2012 chevrolet malibu owners manual

Welcome to the 2012 Chevrolet Malibu Owner’s Manual․ This guide provides essential information for safe and proper vehicle operation, maintenance, and troubleshooting․ Read carefully to ensure optimal performance and longevity of your vehicle․

Key Features of the 2012 Chevrolet Malibu

The 2012 Chevrolet Malibu offers a blend of efficiency, comfort, and technology․ It features a 2․4L Ecotec® 4-cylinder engine with direct injection, delivering excellent fuel economy․ The interior boasts premium cloth seating and a dual-zone automatic climate control system․ Additional highlights include steering wheel-mounted audio and cruise controls, an AM/FM stereo with CD player and USB port, and an optional touchscreen navigation system with Bluetooth® connectivity․ Safety is enhanced with six standard airbags, electronic stability control, and anti-lock brakes․

Safety Precautions and Warnings

Always follow safety guidelines to ensure safe vehicle operation․ Wear seat belts at all times, and ensure all passengers do the same․ Avoid distractions while driving, such as using electronic devices․ Never ignore warning lights or alarms; they indicate potential issues․ Properly maintain the vehicle to prevent mechanical failures․ Keep loose items secure to avoid injury in sudden stops; Follow all traffic laws and drive defensively to minimize risks․ Regular maintenance is crucial for safety and performance․

Keys and Locks

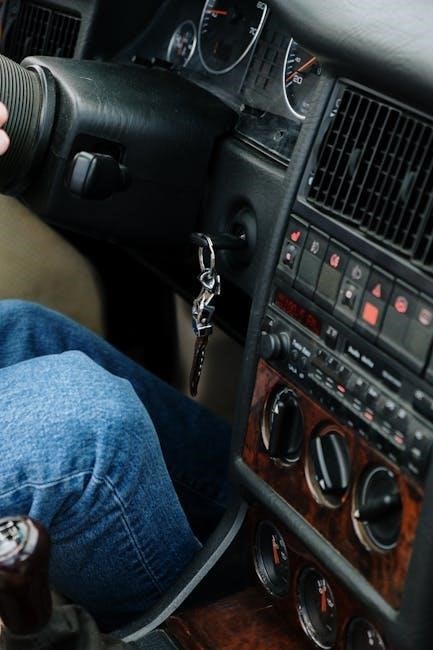
Your vehicle uses a keyless entry system for convenience․ The doors can be locked or unlocked using the remote control or the door lock switches․ Ensure keys are kept secure to prevent unauthorized access․ Always lock the vehicle when unattended for safety․

4․1․ Keyless Entry

The keyless entry system provides convenient access to your vehicle․ The remote control allows you to lock or unlock doors, open the trunk, and activate the panic alarm․ Press the unlock button once to unlock the driver’s door and twice to unlock all doors․ The lock button secures the vehicle with a single press․ The panic button sounds the alarm and flashes the headlights for emergency situations․ Replace the battery if the remote stops functioning․ Always keep a spare key in a safe location․ Regularly test the remote to ensure proper operation․ Ensure the system is used responsibly to maintain vehicle security․ For optimal performance, avoid exposing the remote to extreme temperatures or moisture․ If issues arise, consult the troubleshooting section or contact a certified service center․ Proper use of the keyless entry system enhances your driving experience and protects your vehicle․

4․2․ Door Locks

The 2012 Chevrolet Malibu features manual and power door locks for convenience and security․ Manual locks are operated by a lever on each door, while power locks are controlled via switches on the door panels․ The system includes an automatic door lock feature that engages when the vehicle exceeds a certain speed․ For added safety, doors can be manually locked using the lock button on the door․ Always ensure all doors are securely locked before leaving the vehicle to prevent unauthorized access․ Regularly check the door lock mechanisms for proper function․ If issues arise, refer to the troubleshooting section or contact a certified technician․ Proper maintenance ensures reliable operation and enhances vehicle security․ Always lock doors when the vehicle is unattended to safeguard your belongings and maintain peace of mind while driving․

Doors and Windows

The 2012 Chevrolet Malibu features user-friendly door and window mechanisms designed for ease of operation and safety․ Regular maintenance ensures smooth functionality and optimal performance․ Always check for proper alignment and lubricate hinges periodically to maintain door operation․ For windows, ensure the power window switches are clean and free from obstructions to prevent malfunction․ Proper care extends the lifespan of these components, ensuring reliability and comfort․ Clean door seals regularly to maintain a weather-tight seal and protect the interior from moisture․ Address any issues promptly to avoid costly repairs․ Inspect window glass for chips or cracks and repair them immediately to prevent further damage․ Properly functioning doors and windows contribute to a safe and enjoyable driving experience․ Maintain your vehicle’s doors and windows to uphold its performance and longevity․ Keep the door locks well-lubricated to ensure smooth operation․ Regularly inspect window motors for any signs of wear or failure․ Replace worn-out door handles promptly to maintain security․ Clean window tracks to ensure smooth up-and-down movement․ Avoid using abrasive cleaners that could damage window glass or door panels․ For power windows, test the auto-up and auto-down features periodically to ensure they function correctly․ If a window is difficult to roll up or down, check for obstructions or misalignment; Lubricate window tracks if they become stiff or squeaky․ For manual windows, ensure the crank mechanism is secure and well-maintained․ Keep door and window mechanisms free from dirt and debris to prevent malfunctions․ Regularly check door alignment to ensure proper closing and sealing․ Inspect door locks for wear and tear, and replace any faulty components to maintain vehicle security․ Clean and inspect window switches to ensure they are functioning properly․ Replace any worn-out door seals to prevent air leaks and maintain interior comfort․ Keep the doors and windows in good condition to enhance your driving experience and protect your investment․ Always refer to the owner’s manual for specific maintenance recommendations and guidelines․ By following these tips, you can ensure your doors and windows remain in optimal condition for years to come․ Properly functioning doors and windows are essential for both safety and comfort while driving․ Regular maintenance and inspections help prevent issues before they arise․ Keep your doors and windows in top shape to enjoy a hassle-free driving experience․ Always address any issues promptly to avoid more serious problems down the road․ Clean and maintain door handles to ensure they remain durable and functional․ Inspect window regulators for any signs of wear or damage․ Test door locks regularly to ensure they are working correctly․ Keep your vehicle’s doors and windows in great condition to maintain its overall performance and value․ Regularly check door hinges for any signs of wear and lubricate them as needed․ Ensure window glass is clean and free from obstructions for clear visibility․ Properly functioning doors and windows are crucial for both safety and convenience․ Maintain them well to enjoy a comfortable and secure driving experience․ Always follow the recommended maintenance schedule outlined in your owner’s manual․ By taking care of your doors and windows, you can help extend the life of your vehicle and ensure it continues to perform at its best․ Keep your doors and windows in excellent condition to protect your investment and enhance your driving experience․ Regular maintenance and inspections are key to preventing issues and ensuring reliable operation․ Properly functioning doors and windows contribute to a safe, comfortable, and enjoyable driving experience․ Always prioritize their maintenance to keep your vehicle in top condition․ Clean and maintain your doors and windows regularly to ensure they continue to function smoothly and effectively․ Inspect door and window components periodically to identify and address any potential issues early․ Keep your doors and windows in great shape to maintain the integrity and performance of your vehicle․ Regular care and attention will help prevent problems and extend the lifespan of these components․ Properly functioning doors and windows are essential for both safety and convenience, so keep them well-maintained at all times․ Always refer to your owner’s manual for specific guidance on caring for your vehicle’s doors and windows․ By following these tips, you can ensure your doors and windows remain in optimal condition for years to come․ Proper maintenance and care will help prevent issues and keep your vehicle running smoothly․ Keep your doors and windows in top shape to enjoy a safe, comfortable, and hassle-free driving experience․ Regular inspections and maintenance are key to ensuring the longevity and performance of your vehicle’s doors and windows․ Always address any issues promptly to avoid more serious problems down the road․ Properly functioning doors and windows are crucial for both safety and convenience, so keep them well-maintained at all times․ Regularly check door hinges, window tracks, and locks to ensure they are functioning properly․ Lubricate moving parts as needed to maintain smooth operation․ Clean door and window components regularly to prevent dirt and debris from causing damage․ Inspect window glass for any signs of damage and address them promptly to avoid further issues․ Test door locks periodically to ensure they are working correctly and securely․ Keep your vehicle’s doors and windows in excellent condition to protect your investment and enhance your driving experience․ Regular maintenance and inspections are essential for ensuring the reliable operation of these components․ Properly functioning doors and windows contribute to a safe, comfortable, and enjoyable driving experience․ Always prioritize their maintenance to keep your vehicle in top condition․ Clean and maintain your doors and windows regularly to ensure they continue to function smoothly and effectively․ Inspect door and window components periodically to identify and address any potential issues early․ Keep your doors and windows in great shape to maintain the integrity and performance of your vehicle․ Regular care and attention will help prevent problems and extend the lifespan of these components․ Properly functioning doors and windows are essential for both safety and convenience, so keep them well-maintained at all times․ Always refer to your owner’s manual for specific guidance on caring for your vehicle’s doors and windows․ By following these tips, you can ensure your doors and windows remain in optimal condition for years to come․ Proper maintenance and care will help prevent issues and keep your vehicle running smoothly․ Keep your doors and windows in top shape to enjoy a safe, comfortable, and hassle-free driving experience․ Regular inspections and maintenance are key to ensuring the longevity and performance of your vehicle’s doors and windows․ Always address any issues promptly to avoid more serious problems down the road․ Properly functioning doors and windows are crucial for both safety and convenience, so keep them well-maintained at all times․ Regularly check door hinges, window tracks, and locks to ensure they are functioning properly․ Lubricate moving parts as needed to maintain smooth operation․ Clean door and window components regularly to prevent dirt and debris from causing damage․ Inspect window glass for any signs of damage and address them promptly to avoid further issues․ Test door locks periodically to ensure they are working correctly and securely․ Keep your vehicle’s doors and windows in excellent condition to protect your investment and enhance your driving experience․ Regular maintenance and inspections are essential for ensuring the reliable operation of these components․ Properly functioning doors and windows contribute to a safe, comfortable, and enjoyable driving experience․ Always prioritize their maintenance to keep your vehicle in top condition․ Clean and maintain your doors and windows regularly to ensure they continue to function smoothly and effectively․ Inspect door and window components periodically to identify and address any potential issues early․ Keep your doors and windows in great shape to maintain the integrity and performance of your vehicle․ Regular care and attention will help prevent problems and extend the lifespan of these components․ Properly functioning doors and windows are essential for both safety and convenience, so keep them well-maintained at all times․ Always refer to your owner’s manual for specific guidance on caring for your vehicle’s doors and windows․ By following these tips, you can ensure your doors and windows remain in optimal condition for years to come․ Proper maintenance and care will help prevent issues and keep your vehicle running smoothly․ Keep your doors and windows in top shape to enjoy a safe, comfortable, and hassle-free driving experience․ Regular inspections and maintenance are key to ensuring the longevity and performance of your vehicle’s doors and windows․ Always address any issues promptly to avoid more serious problems down the road․ Properly functioning doors and windows are crucial for both safety and convenience, so keep them well-maintained at all times․ Regularly check door hinges, window tracks, and locks to ensure they are functioning properly․ Lubricate moving parts as needed to maintain smooth operation․ Clean door and window components regularly to prevent dirt and debris from causing damage․ Inspect window glass for any signs of damage and address them promptly to avoid further issues․ Test door locks periodically to ensure they are working correctly and securely․ Keep your vehicle’s doors and windows in excellent condition to protect your investment and enhance your driving experience․ Regular maintenance and inspections are essential for ensuring the reliable operation of these components․ Properly functioning doors and windows contribute to a safe, comfortable, and enjoyable driving experience․ Always prioritize their maintenance to keep your vehicle in top condition․ Clean and maintain your doors and windows regularly to ensure they continue to function smoothly and effectively․ Inspect

5․1․ Opening and Closing

The doors of your 2012 Chevrolet Malibu are designed for smooth and reliable operation․ To open, pull the door handle firmly, ensuring proper alignment with the latch․ Closing requires a secure push to engage the latch fully․ Always check for obstacles before closing doors to avoid damage․ Regularly inspect door hinges for wear and lubricate them if necessary․ Ensure doors are properly aligned to maintain smooth operation and prevent air leaks․ Clean door handles and locks periodically to maintain functionality․ Proper care ensures long-lasting performance and reliability․ Clean door seals to maintain a weather-tight fit and prevent moisture intrusion․ If a door is difficult to close, check alignment and adjust as needed․ Lubricate door hinges annually to maintain smooth operation․ Avoid slamming doors, as this can damage the latch or hinge mechanisms․ Inspect door handles for wear and replace them if necessary․ Ensure doors are closed completely before driving to maintain safety and comfort․ Regular inspections help prevent issues and ensure smooth operation․ Properly functioning doors contribute to a safe and enjoyable driving experience․ Always address any issues promptly to maintain performance․ Clean door handles and locks regularly to prevent dirt buildup and ensure smooth operation․ Inspect door alignment and adjust if necessary to maintain proper closure․ Lubricate hinges as needed to keep doors opening and closing smoothly․ Proper care extends the lifespan of your vehicle’s doors and ensures reliable operation․ Always refer to your owner’s manual for specific maintenance recommendations․ Keep your doors in excellent condition to uphold your vehicle’s performance and longevity․ Regular maintenance ensures smooth operation and prevents costly repairs․ Inspect door components periodically to identify and address any potential issues early․ Properly functioning doors are essential for safety and convenience․ Keep them well-maintained to enjoy a hassle-free driving experience․ Regular care and attention will help prevent problems and extend the lifespan of your doors․ Always prioritize door maintenance to keep your vehicle in top condition․ Clean and inspect door mechanisms regularly to ensure they continue to function smoothly and effectively․ Address any issues promptly to avoid more serious problems down the road․ Properly functioning doors are crucial for both safety and convenience, so keep them well-maintained at all times․ Regularly check door hinges, handles, and locks to ensure they are functioning properly․ Lubricate moving parts as needed to maintain smooth operation․ Clean door components regularly to prevent dirt and debris from causing damage․ Inspect door alignment to ensure proper closing and sealing․ Test door locks periodically to ensure they are working correctly and securely․ Keep your vehicle’s doors in excellent condition to protect your investment and enhance your driving experience․ Regular maintenance and inspections are essential for ensuring the reliable operation of these components; Properly functioning doors contribute to a safe, comfortable, and enjoyable driving experience․ Always prioritize their maintenance to keep your vehicle in top condition․ Clean and maintain your doors regularly to ensure they continue to function smoothly and effectively․ Inspect door components periodically to identify and address any potential issues early․ Keep your doors in great shape to maintain the integrity and performance of your vehicle․ Regular care and attention will help prevent problems and extend the lifespan of these components․ Properly functioning doors are essential for both safety and convenience, so keep them well-maintained at all times․ Always refer to your owner’s manual for specific guidance on caring for your vehicle’s doors․ By following these tips, you can ensure your doors remain in optimal condition for years to come․ Proper maintenance and care will help prevent issues and keep your vehicle running smoothly․ Keep your doors in top shape to enjoy a safe, comfortable, and hassle-free driving experience․ Regular inspections and maintenance are key to ensuring the longevity and performance of your vehicle’s doors․ Always address any issues promptly to avoid more serious problems down the road․ Properly functioning doors are crucial for both safety and convenience, so keep them well-maintained at all times․ Regularly check door hinges, handles, and locks to ensure they are functioning properly․ Lubricate moving parts as needed to maintain smooth operation․ Clean door components regularly to prevent dirt and debris from causing damage․ Inspect door alignment to ensure proper closing and sealing․ Test door locks periodically to ensure they are working correctly and securely․ Keep your vehicle’s doors in excellent condition to protect your investment and enhance your driving experience․ Regular maintenance and inspections are essential for ensuring the reliable operation of these components․ Properly functioning doors contribute to a safe, comfortable, and enjoyable driving experience․ Always prioritize their maintenance to keep your vehicle in top condition․ Clean and maintain your doors regularly to ensure they continue to function smoothly and effectively․ Inspect door components periodically to identify and address any potential issues early․ Keep your doors in great shape to maintain the integrity and performance of your vehicle․ Regular care and attention will help prevent problems and extend the lifespan of these components․ Properly functioning doors are essential for both safety and convenience, so keep them well-maintained at all times․ Always refer to your owner’s manual for specific guidance on caring for your vehicle’s doors․ By following these tips, you can ensure your doors remain in optimal condition for years to come․ Proper maintenance and care will help prevent issues and keep your vehicle running smoothly․ Keep your doors in top shape to enjoy a safe, comfortable, and hassle-free driving experience․ Regular inspections and maintenance are key to ensuring the longevity and performance of your vehicle’s doors․ Always address any issues promptly to avoid more serious problems down the road․ Properly functioning doors are crucial for both safety and convenience, so keep them well-maintained at all times․ Regularly check door hinges, handles, and locks to ensure they are functioning properly․ Lubricate moving parts as needed to maintain smooth operation․ Clean door components regularly to prevent dirt and debris from causing damage․ Inspect door alignment to ensure proper closing and sealing․ Test door locks periodically to ensure they are working correctly and securely․ Keep your vehicle’s doors in excellent condition to protect your investment and enhance your driving experience․ Regular maintenance and inspections are essential for ensuring the reliable operation of these components․ Properly functioning doors contribute to a safe, comfortable, and enjoyable driving experience; Always prioritize their maintenance to keep your vehicle in top condition․ Clean and maintain your doors regularly to ensure they continue to function smoothly and effectively․ Inspect door components periodically to identify and address any potential issues early․ Keep your doors in great shape to maintain the integrity and performance of your vehicle․ Regular care and attention will help prevent problems and extend the lifespan of these components․ Properly functioning doors are essential for both safety and convenience, so keep them well-maintained at all times․ Always refer to your owner’s manual for specific guidance on caring for your vehicle’s doors․ By following these tips, you can ensure your doors remain in optimal condition for years to come․ Proper maintenance and care will help prevent issues and keep your vehicle running smoothly․ Keep your doors in top shape to enjoy a safe, comfortable, and hassle-free driving experience․ Regular inspections and maintenance are key to ensuring the longevity and performance of your vehicle’s doors․ Always address any issues promptly to avoid more serious problems down the road․ Properly functioning doors are crucial for both safety and convenience, so keep them well-maintained at all times․ Regularly check door hinges, handles, and locks to ensure they are functioning properly․ Lubricate moving parts as needed to maintain smooth operation․ Clean door components regularly to prevent dirt and debris from causing damage․ Inspect door alignment to ensure proper closing and sealing․ Test door locks periodically to ensure they are working correctly and securely․ Keep your vehicle’s doors in excellent condition to protect your investment and enhance your driving experience․ Regular maintenance and inspections are essential for ensuring the reliable operation of these components․ Properly functioning doors contribute to a safe, comfortable, and enjoyable driving experience․ Always prioritize their maintenance to keep your vehicle in top condition․ Clean and maintain your doors regularly to ensure they continue to function smoothly and effectively․ Inspect door components periodically to identify and address any potential issues early․ Keep your doors in great shape to maintain the integrity and performance of your vehicle․ Regular care and attention will help prevent problems and extend the lifespan of these components․ Properly functioning doors are essential for both safety and convenience, so keep them well-maintained at all times․ Always refer to your owner’s manual for specific guidance on caring for your vehicle’s doors․ By following these tips,

5․2․ Window Controls

Your 2012 Chevrolet Malibu features power windows for convenience and comfort․ The window controls are located on the door panels, allowing easy operation․ To open or close a window, press or pull the corresponding switch․ The driver’s side control panel includes buttons for all windows, enabling central operation․ For safety, ensure children understand proper window operation․ The automatic feature reverses if an obstruction is detected, preventing injury․ Regularly clean and maintain window switches to ensure smooth functionality․ Properly functioning windows enhance both comfort and safety while driving․ Always monitor children when windows are in use․ Keep window channels clean to prevent jamming and ensure smooth operation․ If a window malfunctions, consult the troubleshooting guide or contact a certified technician․ Regular maintenance ensures reliable performance of your vehicle’s window controls․ Clean the window switches periodically to prevent dirt buildup and maintain responsiveness․ Inspect window seals to ensure a proper fit and prevent air leaks․ Lubricate window tracks if necessary to maintain smooth operation․ Test all windows periodically to ensure they are functioning correctly․ Address any issues promptly to avoid more serious problems․ Properly functioning windows are essential for both comfort and safety, so keep them well-maintained․ Always refer to your owner’s manual for specific guidance on caring for your vehicle’s windows․ Regular care and attention will help prevent problems and extend the lifespan of these components․ By following these tips, you can ensure your windows remain in optimal condition for years to come․ Proper maintenance and care will help prevent issues and keep your vehicle running smoothly․ Keep your windows in top shape to enjoy a safe, comfortable, and hassle-free driving experience․ Regular inspections and maintenance are key to ensuring the longevity and performance of your vehicle’s windows․ Always address any issues promptly to avoid more serious problems down the road․ Properly functioning windows are crucial for both comfort and convenience, so keep them well-maintained at all times․ Regularly check window switches, tracks, and seals to ensure they are functioning properly․ Lubricate moving parts as needed to maintain smooth operation․ Clean window components regularly to prevent dirt and debris from causing damage․ Inspect window alignment to ensure proper sealing and prevent air leaks․ Test window operation periodically to ensure they are working correctly․ Keep your vehicle’s windows in excellent condition to protect your investment and enhance your driving experience․ Regular maintenance and inspections are essential for ensuring the reliable operation of these components․ Properly functioning windows contribute to a safe, comfortable, and enjoyable driving experience․ Always prioritize their maintenance to keep your vehicle in top condition․ Clean and maintain your windows regularly to ensure they continue to function smoothly and effectively․ Inspect window components periodically to identify and address any potential issues early․ Keep your windows in great shape to maintain the integrity and performance of your vehicle․ Regular care and attention will help prevent problems and extend the lifespan of these components․ Properly functioning windows are essential for both comfort and convenience, so keep them well-maintained at all times․ Always refer to your owner’s manual for specific guidance on caring for your vehicle’s windows․ By following these tips, you can ensure your windows remain in optimal condition for years to come․ Proper maintenance and care will help prevent issues and keep your vehicle running smoothly․ Keep your windows in top shape to enjoy a safe, comfortable, and hassle-free driving experience․ Regular inspections and maintenance are key to ensuring the longevity and performance of your vehicle’s windows․ Always address any issues promptly to avoid more serious problems down the road․ Properly functioning windows are crucial for both comfort and convenience, so keep them well-maintained at all times․ Regularly check window switches, tracks, and seals to ensure they are functioning properly․ Lubricate moving parts as needed to maintain smooth operation․ Clean window components regularly to prevent dirt and debris from causing damage․ Inspect window alignment to ensure proper sealing and prevent air leaks․ Test window operation periodically to ensure they are working correctly․ Keep your vehicle’s windows in excellent condition to protect your investment and enhance your driving experience․ Regular maintenance and inspections are essential for ensuring the reliable operation of these components․ Properly functioning windows contribute to a safe, comfortable, and enjoyable driving experience․ Always prioritize their maintenance to keep your vehicle in top condition․ Clean and maintain your windows regularly to ensure they continue to function smoothly and effectively․ Inspect window components periodically to identify and address any potential issues early․ Keep your windows in great shape to maintain the integrity and performance of your vehicle․ Regular care and attention will help prevent problems and extend the lifespan of these components․ Properly functioning windows are essential for both comfort and convenience, so keep them well-maintained at all times․ Always refer to your owner’s manual for specific guidance on caring for your vehicle’s windows․ By following these tips, you can ensure your windows remain in optimal condition for years to come․ Proper maintenance and care will help prevent issues and keep your vehicle running smoothly․ Keep your windows in top shape to enjoy a safe, comfortable, and hassle-free driving experience․ Regular inspections and maintenance are key to ensuring the longevity and performance of your vehicle’s windows․ Always address any issues promptly to avoid more serious problems down the road․ Properly functioning windows are crucial for both comfort and convenience, so keep them well-maintained at all times․ Regularly check window switches, tracks, and seals to ensure they are functioning properly․ Lubricate moving parts as needed to maintain smooth operation․ Clean window components regularly to prevent dirt and debris from causing damage․ Inspect window alignment to ensure proper sealing and prevent air leaks․ Test window operation periodically to ensure they are working correctly․ Keep your vehicle’s windows in excellent condition to protect your investment and enhance your driving experience․ Regular maintenance and inspections are essential for ensuring the reliable operation of these components․ Properly functioning windows contribute to a safe, comfortable, and enjoyable driving experience․ Always prioritize their maintenance to keep your vehicle in top condition․ Clean and maintain your windows regularly to ensure they continue to function smoothly and effectively․ Inspect window components periodically to identify and address any potential issues early․ Keep your windows in great shape to maintain the integrity and performance of your vehicle․ Regular care and attention will help prevent problems and extend the lifespan of these components․ Properly functioning windows are essential for both comfort and convenience, so keep them well-maintained at all times․ Always refer to your owner’s manual for specific guidance on caring for your vehicle’s windows․ By following these tips, you can ensure your windows remain in optimal condition for years to come․ Proper maintenance and care will help prevent issues and keep your vehicle running smoothly․ Keep your windows in top shape to enjoy a safe, comfortable, and hassle-free driving experience․ Regular inspections and maintenance are key to ensuring the longevity and performance of your vehicle’s windows․ Always address any issues promptly to avoid more serious problems down the road․ Properly functioning windows are crucial for both comfort and convenience, so keep them well-maintained at all times․ Regularly check window switches, tracks, and seals to ensure they are functioning properly․ Lubricate moving parts as needed to maintain smooth operation․ Clean window components regularly to prevent dirt and debris from causing damage․ Inspect window alignment to ensure proper sealing and prevent air leaks․ Test window operation periodically to ensure they are working correctly․ Keep your vehicle’s windows in excellent condition to protect your investment and enhance your driving experience․ Regular maintenance and inspections are essential for ensuring the reliable operation of these components․ Properly functioning windows contribute to a safe, comfortable, and enjoyable driving experience․ Always prioritize their maintenance to keep your vehicle in top condition․ Clean and maintain your windows regularly to ensure they continue to function smoothly and effectively․ Inspect window components periodically to identify and address any potential issues early․ Keep your windows in great shape to maintain the integrity and performance of your vehicle․ Regular care and attention will help prevent problems and extend the lifespan of these components․ Properly functioning windows are essential for both comfort and convenience, so keep them well-maintained at all times․ Always refer to your owner’s manual for specific guidance on caring for your vehicle’s windows․ By following these tips, you can ensure your windows remain in optimal condition for years to come․ Proper maintenance and care will help prevent issues and keep your vehicle running smoothly․ Keep your windows in top shape to enjoy a safe, comfortable, and hassle-free driving experience․ Regular inspections and maintenance are key to ensuring the longevity and performance of your vehicle’s windows․ Always address any issues promptly to avoid more serious problems down the road․ Properly functioning windows are crucial for both comfort and convenience, so keep them well-maintained at all times․ Regularly check window switches, tracks, and seals to ensure they are functioning properly․ Lubricate moving parts as needed to maintain smooth operation․ Clean window components regularly to prevent dirt and debris from causing damage․ Inspect window alignment to ensure proper sealing and prevent air leaks․ Test window operation periodically to ensure they are working correctly; Keep your vehicle’s windows in excellent condition to protect your investment and enhance your driving experience․ Regular maintenance and inspections are essential for ensuring the reliable operation of these components․ Properly functioning windows contribute to a safe, comfortable, and enjoyable driving experience․ Always prioritize their maintenance to keep your vehicle in top condition․ Clean and maintain your windows regularly to ensure they continue to function smoothly and effectively․ Inspect window components periodically to identify and address any potential issues early․ Keep your windows in great shape to maintain the integrity and performance of your vehicle․ Regular care and attention will help prevent problems and extend the lifespan of these components․ Properly functioning windows are essential for both comfort and convenience, so keep them well-maintained at all times․ Always refer to your owner’s manual for specific guidance on caring for your vehicle’s windows․ By following these tips, you can ensure your windows remain in optimal condition for years to come․ Proper maintenance and care will help prevent issues and keep your vehicle running smoothly․ Keep your windows in top shape to enjoy a safe, comfortable, and hassle-free driving experience․ Regular inspections and maintenance are key to ensuring the longevity and performance

Troubleshooting Common Issues

Adjusting Seats

Adjust your 2012 Chevrolet Malibu seats for optimal comfort and visibility․ Manual adjustments include lumbar support, tilt, and recline․ Power seats offer additional customization for driver and passenger convenience․

philips 1200 coffee machine manual

The Philips 1200 Coffee Machine is an innovative addition to your kitchen‚ offering ease of use and high-quality coffee. Part of the 1200 series‚ it ensures consistent and delicious brewing with customizable options‚ perfect for coffee enthusiasts seeking convenience and flavor at home.

1.1 Overview of the Philips 1200 Series

The Philips 1200 Series is a line of fully automatic espresso machines designed for home use‚ offering a perfect blend of simplicity and advanced features. Part of the series includes models like the EP1220‚ which are compact‚ user-friendly‚ and built to deliver high-quality coffee with minimal effort. The series is known for its customizable settings‚ allowing users to tailor their coffee experience. With a focus on convenience‚ the 1200 Series is ideal for coffee lovers who want to enjoy professional-grade espresso without the complexity. The machines are supported by comprehensive user manuals and online resources for easy operation and maintenance.

1.2 Key Features and Benefits

The Philips 1200 Coffee Machine stands out for its user-friendly interface and customizable settings‚ allowing users to tailor coffee strength and temperature to their preferences; It features a high-quality brewing system and a compact design‚ making it ideal for home use. The machine also includes a digital display for easy navigation and maintains optimal brewing temperatures for a perfect cup. Its energy-efficient design and automatic shut-off add convenience and safety. With durable construction and easy maintenance‚ the Philips 1200 offers a reliable and enjoyable coffee-making experience‚ catering to both casual drinkers and coffee enthusiasts alike.

Unpacking and Initial Setup

Unpack the Philips 1200 Coffee Machine carefully‚ ensuring all accessories like the coffee grounds container and user manual are included. Position it on a stable‚ flat surface in your kitchen and follow the manual’s setup guide for initial power-on and configuration. This ensures proper functionality and safety during first use.

2.1 Unpacking the Machine and Accessories

Begin by carefully unpacking the Philips 1200 Coffee Machine from its box‚ ensuring no damage occurs during removal. Inside‚ you’ll find the machine‚ a coffee grounds container‚ and a water tank. Additional accessories may include a user manual‚ power cord‚ and descaling kit. Inspect all parts for any visible damage or defects. Place the machine on a stable‚ flat surface‚ keeping the power cord and other components organized. Familiarize yourself with the included user manual‚ which provides detailed instructions for setup and operation. Ensure all items are accounted for before proceeding.

2.2 Positioning the Machine in Your Kitchen

Place the Philips 1200 Coffee Machine on a stable‚ flat surface‚ ensuring it is level for proper operation. Choose a location near a power outlet to avoid cable clutter. Allow sufficient space around the machine for airflow and easy access. Avoid positioning it near water sources or in areas prone to splashing to prevent damage. Ensure the machine is at least 10 cm away from walls or other appliances. For a sleek look‚ align it with your kitchen countertops or place it in a corner. Proper positioning enhances both functionality and aesthetic appeal in your kitchen setup.

2.3 Initial Power-On and Setup Process

After positioning the machine‚ plug in the Philips 1200 Coffee Machine and ensure the power button is accessible. Turn it on and follow the digital display prompts for initial setup. The machine will guide you through language selection and other preferences. Perform a rinse cycle as instructed to prepare the machine for first use. Ensure the water tank is filled and the coffee grounds container is in place. Familiarize yourself with the control panel functions during this process. Proper initial setup ensures optimal performance and longevity of the machine. Refer to the manual for detailed guidance on completing these steps successfully.

Understanding the Control Panel

The Philips 1200 features an intuitive control panel with a digital display and buttons for easy navigation. The buttons allow you to select coffee options‚ adjust settings‚ and access maintenance modes‚ ensuring a seamless user experience.

3.1 Layout and Functionality of Buttons

The Philips 1200 Coffee Machine features a sleek and user-friendly control panel with a logical arrangement of buttons. The power button is centrally located‚ while coffee type and customization buttons are grouped for easy access. Each button corresponds to specific functions‚ such as selecting coffee strength or temperature. The buttons are backlit for visibility and feature intuitive icons to guide operation. LED indicators provide feedback on selected settings or maintenance needs. Additional buttons include options for pre-infusion and aroma control‚ enhancing the brewing experience. The design ensures seamless navigation‚ making it simple for users to explore advanced features. Refer to the manual for detailed guidance.

3.2 Navigating the Digital Display

The Philips 1200 Coffee Machine features a high-resolution digital display designed for intuitive operation. The color-coded interface provides clear visual feedback‚ with options to adjust brightness for optimal visibility. Users can navigate through menus using the control buttons‚ accessing settings like coffee strength‚ temperature‚ and cup size. The display also shows real-time information‚ such as selected brewing options‚ maintenance alerts‚ and error codes. Language customization is available‚ ensuring ease of use for diverse users. Refer to the manual for detailed instructions on utilizing the display’s advanced features and troubleshooting capabilities. This ensures a seamless and personalized coffee-making experience.

Brewing Options and Customization

The Philips 1200 Coffee Machine offers versatile brewing options‚ allowing you to craft espresso‚ cappuccino‚ and latte with ease. Customize strength‚ temperature‚ and cup size to suit your taste preferences.

4.1 Types of Coffee You Can Make

The Philips 1200 Coffee Machine enables you to craft a variety of coffee drinks‚ including espresso‚ cappuccino‚ latte‚ and macchiato. With its intuitive interface‚ you can easily adjust settings to produce the perfect shot of espresso or froth milk for creamy textured beverages. Additionally‚ it supports brewing long coffees‚ making it versatile for different preferences. The machine’s flexibility ensures that whether you prefer a strong espresso or a milky latte‚ it delivers with precision and consistency‚ meeting the needs of both coffee novices and connoisseurs alike.

4.2 Adjusting Coffee Strength and Temperature

The Philips 1200 Coffee Machine offers customizable options to tailor your coffee experience. Adjust the coffee strength by selecting from multiple levels to suit your preference‚ from mild to extra strong. Temperature control is also precise‚ allowing you to set the perfect heat for your brew. This ensures that every cup is brewed to your liking‚ whether you prefer a bold espresso or a smoother‚ more balanced flavor. The machine’s intuitive controls make it easy to experiment and find your ideal settings‚ enhancing the overall brewing experience.

Maintenance and Cleaning

Regular maintenance ensures optimal performance. Daily cleaning involves wiping surfaces and rinsing parts. Descaling prevents mineral buildup. Replace worn parts periodically for machine longevity.

5.1 Daily Cleaning Routine

Regular daily cleaning is essential to maintain the performance and hygiene of your Philips 1200 Coffee Machine. Start by removing and rinsing the coffee grounds container after each use. Clean the brewing unit by running a rinse cycle without coffee. Wipe the machine’s surfaces with a damp cloth to remove any splatters or residue. Check and empty the drip tray frequently to prevent overflow. For thorough hygiene‚ use a soft brush to clean the coffee outlet and crema disk. Refer to the manual for detailed steps on these processes to ensure your machine remains in optimal condition.

5.2 Descaling the Machine

Descaling is crucial to remove mineral buildup and prevent damage to your Philips 1200 Coffee Machine. Use a Philips-approved descaling solution or compatible alternative. Start by ensuring the machine is turned off and cool. Pour the solution into the water tank‚ then run the descaling cycle as per the manual. Repeat rinsing cycles with fresh water to remove any solution residue. Regular descaling ensures optimal performance‚ prevents scaling issues‚ and maintains the machine’s longevity. Always follow the manual’s specific instructions for precise guidance tailored to your Philips 1200 model.

5.3 Replacing Wearable Parts

Replacing wearable parts on your Philips 1200 Coffee Machine is essential for maintaining its performance and longevity. Parts like the brew group‚ seals‚ and water filters may need replacement due to wear and tear. The brew group‚ which holds the coffee grounds and hot water‚ is crucial for making espresso and should be replaced if it becomes worn or clogged. Regular descaling can help prevent mineral buildup‚ but some parts still require periodic replacement. It’s important to use genuine Philips parts to ensure compatibility and proper function. Consult the manual or Philips’ official resources for specific replacement intervals and guidelines on identifying when a part needs replacement. Signs that a part may need replacing include leaks‚ reduced coffee quality‚ or unusual noises. Following the proper procedure for replacement will help keep your machine running smoothly and ensure optimal coffee quality. Always refer to the manual for detailed instructions tailored to your Philips 1200 model.

Troubleshooting Common Issues

Common issues with the Philips 1200 Coffee Machine include error codes‚ unusual noises‚ or low coffee flow. Always refer to the manual or Philips support for solutions.

6.1 Error Codes and Their Meanings

The Philips 1200 Coffee Machine displays error codes to indicate specific issues. For example‚ E1 may signal a low water level‚ while E2 could indicate a blockage in the coffee outlet. Refer to the user manual for a complete list of error codes and their meanings. Understanding these codes helps you quickly identify and resolve problems‚ ensuring your machine runs smoothly. Always consult the manual or visit www.philips.com/coffee-care for detailed troubleshooting guides and solutions to get your machine back in operation.

6.2 Resolving Common Operational Problems

Common issues with the Philips 1200 Coffee Machine can often be resolved with simple troubleshooting. If the machine doesn’t turn on‚ check the power connection. For brew group errors‚ ensure it’s properly aligned and clean. Descaling regularly prevents mineral buildup‚ while rinsing the machine after each use maintains hygiene. If coffee flows slowly‚ clean the brew outlet or check for bean grind blockages. Refer to the user manual or visit www.philips.com/coffee-care for detailed step-by-step solutions. Regular maintenance and proper care ensure optimal performance and extend the machine’s lifespan.

Accessories and Compatible Products

The Philips 1200 Coffee Machine works seamlessly with compatible grinders‚ coffee beans‚ and cleaning solutions. Visit www.philips.com/coffee-care for a full list of recommended accessories.

7.1 Recommended Coffee Beans and Grinders

For optimal performance with the Philips 1200 Coffee Machine‚ use high-quality coffee beans that align with your preferred roast levels and flavor profiles. Philips recommends pairing the machine with compatible grinders to ensure precise grinding. Freshly grinding your beans before brewing enhances aroma and taste. Visit www.philips.com/coffee-care for a list of recommended coffee beans and grinders designed to work seamlessly with your Philips 1200‚ ensuring the best brewing experience.

7.2 Philips-Approved Cleaning Solutions

Regular cleaning is essential for maintaining your Philips 1200 Coffee Machine’s performance. Philips recommends using their approved cleaning solutions‚ such as descaling products and maintenance kits‚ to ensure optimal functionality. These solutions are specifically designed to remove mineral buildup and coffee oil residue without damaging the machine. Visit www.philips.com/coffee-care for a list of approved cleaning products and detailed instructions. Using these solutions helps preserve the machine’s longevity and ensures your coffee continues to taste its best. Always refer to the user manual for guidance on cleaning procedures.

Warranty and Support

The Philips 1200 Coffee Machine comes with a comprehensive warranty program‚ ensuring coverage for parts and labor. For support‚ customers can contact Philips through their official website or dedicated customer service channels‚ where they can find troubleshooting guides and detailed assistance to address any concerns effectively.

8.1 Understanding the Warranty Terms

The Philips 1200 Coffee Machine is covered by a comprehensive warranty that typically lasts for two years from the date of purchase. This warranty includes coverage for both parts and labor‚ ensuring that any manufacturing defects or malfunctions are repaired free of charge. Additionally‚ the warranty remains valid as long as the machine is used in accordance with the guidelines provided in the user manual. For detailed information‚ users can refer to the warranty section in the manual or visit the official Philips website. Proper registration of the product is recommended to expedite warranty claims and support services.

8.2 Contacting Philips Customer Support

For assistance with your Philips 1200 Coffee Machine‚ Philips offers multiple support channels. Visit the official Philips website at www.philips.com/coffee-care for detailed support options. You can submit a query via the online contact form or reach out to their customer service team directly. Additionally‚ live chat is available on the website for immediate help. For urgent inquiries‚ contact the Philips support hotline at the number provided in your user manual. Ensure to have your product serial number ready for faster assistance. Philips aims to provide timely and effective solutions to enhance your user experience.

The Philips 1200 Coffee Machine offers a seamless brewing experience with its intuitive design and customizable features‚ making it a perfect choice for coffee lovers to explore and enjoy.

9.1 Summary of Key Takeaways

The Philips 1200 Coffee Machine is a top-tier‚ fully automatic espresso machine designed for convenience and quality. It offers customizable brewing options‚ a user-friendly digital display‚ and robust maintenance features. Regular cleaning and descaling are essential to maintain performance. With its sleek design and advanced functionality‚ this machine balances ease of use with premium coffee experiences. Refer to the user manual for detailed guidance on setup‚ troubleshooting‚ and care. Visit www.philips.com/coffee-care for additional resources to optimize your machine’s longevity and brewing capabilities.

9.2 Encouragement to Explore More Features

Take your coffee experience to the next level by exploring the Philips 1200 Coffee Machine’s advanced features. Experiment with customizable brewing options‚ adjust strength and temperature to suit your taste‚ and discover the convenience of automatic functions. Refer to the user manual for detailed insights into maximizing your machine’s capabilities. Visit www.philips.com/coffee-care for video tutorials and tips to enhance your coffee-making skills. With regular maintenance and exploration‚ you’ll unlock the full potential of your Philips 1200 and enjoy a superior coffee experience every time.

florida real estate exam questions and answers pdf

The Florida Real Estate Exam Questions and Answers PDF is a comprehensive study resource designed to help candidates prepare for the state licensing exam․ It includes 100 multiple-choice questions, covering key topics like real estate law, principles, and math calculations․ The guide provides detailed answers and explanations to ensure a thorough understanding of the material․ With a focus on the latest updates and common question types, this PDF is an essential tool for aspiring real estate professionals aiming to pass the exam with confidence․

Overview of the Florida Real Estate Exam

The Florida Real Estate Exam is a 100-question, multiple-choice test required for obtaining a real estate license in the state․ It is divided into two sections: 45 questions on real estate principles and practices, and 45 questions on Florida real estate law, with an additional 10 math questions․ Administered by the Florida Real Estate Commission (FREC), the exam must be completed within 3․5 hours, and applicants need a minimum score of 75% to pass․ The exam covers a wide range of topics, from property ownership and contracts to ethical practices and regulatory requirements․ It is designed to ensure candidates possess the knowledge and skills necessary to operate competently in the real estate industry․ Preparation is crucial due to the exam’s challenging nature, with many questions focusing on legal and practical scenarios․

Importance of Using Practice Questions and Answers

Using practice questions and answers is vital for success on the Florida Real Estate Exam․ These resources provide a realistic preview of the exam format, helping candidates familiarize themselves with question types and content․ By working through practice exams, individuals can identify strengths and weaknesses, allowing targeted study․ The questions cover essential topics like real estate law, principles, and math, ensuring comprehensive preparation․ Additionally, practice exams improve time management skills and reduce exam-day anxiety․ Many candidates who use these tools report higher confidence and better performance, making them an indispensable part of a successful study strategy․ Regular practice helps build the knowledge and assurance needed to excel on the actual test․

Structure of the Exam and Question Types

The Florida Real Estate Exam consists of 100 multiple-choice questions, divided into two main sections: 45 questions on real estate principles and practices, 45 on real estate law, and 10 math questions․ Candidates have 3․5 hours to complete the exam, and a minimum score of 75% is required to pass․ The questions are designed to test knowledge of key concepts, legal requirements, and practical applications․ Math questions focus on calculations related to property values, commissions, and financing․ Understanding the exam structure and question types is crucial for effective preparation, as it allows candidates to focus on areas needing improvement and practice under timed conditions for better time management․ Familiarity with the format ensures a smoother test-taking experience;

Exam Format and Content

The Florida Real Estate Exam includes 100 multiple-choice questions, covering principles, practices, law, and math․ Candidates have 3․5 hours to complete it, requiring a 75% score to pass․

Breakdown of the 100-Question Exam

The Florida Real Estate Exam is divided into two main sections: 45 questions on real estate principles and practices, and 45 questions on Florida real estate law․ Additionally, there are 10 math questions focused on real estate calculations․ This structure ensures a comprehensive assessment of both theoretical knowledge and practical application․ Candidates must answer at least 75 questions correctly to pass, with a 3․5-hour time limit․ The breakdown reflects the importance of understanding both legal frameworks and operational practices in the real estate field, preparing candidates for the challenges of the profession․

Key Topics Covered in the Exam

The Florida Real Estate Exam covers essential topics such as real estate law, principles, and practices, with a strong emphasis on state-specific regulations․ Key areas include property valuation, real estate financing, and contract law․ Candidates are also tested on their understanding of ethical practices, licensing requirements, and the role of the Florida Real Estate Commission (FREC)․ Math questions focus on calculations like commission rates, property taxes, and investment returns․ Additionally, the exam addresses topics such as property types, land use, and environmental regulations․ These subjects ensure that candidates possess a well-rounded knowledge of both theoretical and practical aspects of real estate in Florida․

Math Questions and Their Significance

Math questions in the Florida Real Estate Exam are crucial for assessing practical application skills․ They typically involve calculations such as commission rates, property taxes, and investment returns․ These questions ensure candidates understand financial aspects of real estate transactions․ For example, calculating the gross income multiplier or determining the annual debt service is common․ While formulas are not provided, understanding basic arithmetic and algebraic concepts is necessary․ Practice exams often include similar math problems, emphasizing their importance․ Strong math skills are essential for real estate professionals to accurately advise clients and complete transactions effectively․ These questions account for a smaller portion of the exam but are vital for demonstrating competency in real-world scenarios․

Preparing for the Florida Real Estate Exam

Effective preparation involves using study guides, online courses, and practice exams to master real estate principles, laws, and math calculations․ Regular review ensures readiness for the exam․

Recommended Study Materials and Resources

To excel on the Florida Real Estate Exam, utilize the Florida Real Estate Exam Manual for in-depth knowledge on state-specific laws and practices․ Practice exams, such as those provided by Gold Coast Schools, offer 100 questions covering principles, law, and math․ Online platforms like Real Estate Express and Kaplan Real Estate Education provide structured courses and interactive tools․ Flashcards and video tutorials can reinforce key concepts․ Additionally, the Florida Real Estate Law Certification Sample Examination Questions and Real Estate Principles and Practices Study Guide are valuable for targeted preparation․ Regularly reviewing these materials ensures a well-rounded understanding of the exam content․

These resources are designed to simulate the actual exam experience, helping candidates build confidence and familiarity with question formats and content․

Effective Strategies for Passing the Exam

To succeed on the Florida Real Estate Exam, adopt a structured study approach․ Start by creating a detailed study schedule and stick to it, ensuring consistent preparation․ Focus on understanding key concepts rather than memorizing answers․ Prioritize challenging topics, such as real estate math and state-specific laws, and allocate extra time to master them․ Regularly take timed practice exams to simulate test conditions and identify weak areas․ Review explanations for both correct and incorrect answers to deepen your understanding․ Stay calm during the exam by managing your time effectively, and avoid guessing excessively․ By combining thorough preparation with strategic test-taking techniques, you can confidently achieve a passing score․

Consistent practice and a focused mindset are essential for success․

Common Mistakes to Avoid During Preparation

One of the most common mistakes candidates make is procrastinating their study schedule, leading to rushed and ineffective preparation․ Another error is neglecting to review and understand the explanations for incorrect answers, which can leave gaps in knowledge․ Some individuals focus solely on memorizing facts rather than grasping underlying concepts, making it difficult to apply knowledge during the exam․ Additionally, many candidates underestimate the importance of timed practice exams, which are crucial for improving speed and accuracy․ Lastly, ignoring state-specific laws and math problems can significantly impact scores, as these are heavily weighted on the exam․ Avoiding these mistakes ensures a more thorough and successful preparation process․

Florida Real Estate Law and Principles

Florida real estate law and principles govern transactions, ensuring ethical practices․ The Florida Real Estate Commission regulates licensees, and understanding legal concepts like contracts and property rights is essential for success․

Understanding Real Estate Law in Florida

Florida real estate law establishes the rules and regulations governing property transactions․ It covers key areas such as contracts, property rights, and disclosure requirements․ Real estate agents must understand these laws to ensure legal and ethical practices․ The Florida Real Estate Commission (FREC) enforces these regulations, ensuring compliance and protecting consumers․ Knowledge of real estate law is crucial for agents to navigate transactions smoothly, avoid legal disputes, and maintain professional integrity․ Understanding these principles is essential for passing the exam and succeeding in the real estate industry․

Principles and Practices in Real Estate

Principles and practices in real estate form the foundation of professional conduct and effective transaction management․ Key principles include fiduciary duty, ethical behavior, and fair housing laws․ Practices involve property valuation, contract negotiation, and market analysis․ Understanding these elements ensures agents can guide clients effectively and maintain legal compliance․ Real estate professionals must stay updated on industry standards and local regulations․ These principles and practices are tested in the exam, emphasizing their importance in daily operations․ Mastery of these concepts is essential for both passing the exam and building a successful career in Florida’s competitive real estate market․

Role of the Florida Real Estate Commission (FREC)

The Florida Real Estate Commission (FREC) is responsible for regulating and overseeing the real estate industry in Florida․ It ensures that real estate professionals operate ethically and legally․ FREC consists of seven members, including real estate licensees and consumer representatives․ The commission handles licensing, investigates complaints, and enforces real estate laws․ It also sets standards for education and conduct, ensuring agents and brokers meet state requirements․ FREC’s role is crucial for maintaining public trust and protecting consumers․ Understanding FREC’s responsibilities is essential for exam preparation, as questions often cover its functions and regulatory powers in the real estate sector․ This knowledge helps professionals comply with state laws and maintain professional integrity․

Practice Exam Questions and Answers

Practice exams provide real test simulations, helping identify weaknesses and track progress․ They include detailed explanations for correct and incorrect answers, enhancing learning effectiveness․

Sample Questions from Previous Exams

The Florida Real Estate Exam Questions and Answers PDF includes sample questions from previous exams, covering topics like real estate law, principles, and math․ These questions are designed to mirror the actual exam format, helping candidates familiarize themselves with the question types and content․ For example, questions may ask about the role of the Florida Real Estate Commission (FREC) or the legal requirements for real estate transactions․ Each sample question is accompanied by detailed explanations, ensuring users understand the correct answers and reasoning․ This resource is invaluable for identifying weaknesses and improving test-taking strategies․ By practicing with these questions, candidates can build confidence and readiness for the actual exam․

Analysis of Common Question Types

The Florida Real Estate Exam features a variety of question types, including multiple-choice, true/false, and math calculation questions․ Multiple-choice questions test knowledge of real estate concepts, while true/false questions assess understanding of specific legal and ethical principles․ Math questions focus on practical calculations, such as commission splits and property valuations․ The exam also includes scenario-based questions that simulate real-world situations, requiring applicants to apply their knowledge․ Understanding these question types is crucial for effective preparation․ By analyzing common patterns and focusing on weak areas, candidates can improve their performance and increase their chances of passing the exam successfully․

How to Use Practice Exams for Better Preparation

Practice exams are a vital tool for preparing for the Florida Real Estate Exam․ They simulate the actual test environment, helping candidates familiarize themselves with the format, timing, and question types․ By taking practice exams, individuals can identify strengths and weaknesses, allowing targeted study․ It’s advisable to start with untimed exams to focus on understanding concepts, then progress to timed sessions to build stamina․ Reviewing answers thoroughly after each practice exam helps reinforce learning․ Additionally, tracking progress over time provides motivation and a clear measure of improvement․ Regular use of practice exams ensures a well-prepared and confident approach to the actual exam, enhancing the likelihood of success․

Additional Tips for Success

Thoroughly review practice exams, manage time effectively, and stay calm during the test․ Regular breaks and a healthy lifestyle can enhance focus and retention abilities․

Time Management During the Exam

Effective time management is crucial for success on the Florida Real Estate Exam․ With 100 questions and a 3․5-hour time limit, candidates should allocate approximately 2 minutes per question․ Start by quickly skimming through the exam to identify easier questions and tackle them first․ This strategy helps build confidence and saves time for more challenging questions later․ Allocate specific time blocks for math questions, as they often require more attention․ Avoid spending too long on a single question—move on and return to it later if time permits․ Practice exams can help improve pacing and ensure you complete the test within the allotted time․ Staying calm and focused will also enhance your ability to manage time effectively and answer questions accurately․

Staying Calm and Focused

Remaining calm and focused is essential for performing well on the Florida Real Estate Exam․ Stress can impair cognitive function, making it harder to process information․ Techniques like deep breathing and positive visualization can help maintain composure․ Before the exam, ensure you are well-rested and mentally prepared․ During the test, take brief breaks between sections to recharge․ Avoid overthinking questions; instead, rely on your preparation and instincts․ Staying hydrated and energized with light snacks can also support concentration․ Remember, it’s not just about knowledge but also about managing your mindset to approach each question with clarity and confidence․ A calm demeanor will help you stay focused and perform at your best․

Post-Exam Steps and Next Actions

After completing the Florida Real Estate Exam, the next steps are crucial for obtaining your license․ First, review your results to ensure you scored at least 75%, the passing threshold․ If successful, submit your application to the Florida Real Estate Commission (FREC) and pay the required fees; Next, complete the necessary fingerprinting and background check as part of the licensing process․ Once approved, you’ll receive your real estate license, allowing you to practice under a licensed broker․ If you didn’t pass, analyze areas for improvement and register for a re-exam․ Timely follow-up ensures a smooth transition into your real estate career, so stay organized and proactive throughout the process․

stack on gun safe instruction manual

This manual provides essential guidance for safe installation, operation, and maintenance of your Stack-On gun safe, ensuring proper use and security for your firearms and valuables.

1.1 Purpose of the Manual

This manual is designed to guide users through the safe and effective installation, operation, and maintenance of their Stack-On gun safe. It provides detailed instructions for assembling and securing the safe, programming electronic and biometric locks, and troubleshooting common issues. The manual also emphasizes safety precautions to ensure the secure storage of firearms and valuables. By following the guidelines outlined, users can maximize the functionality and longevity of their safe while maintaining optimal security for their belongings.

1.2 Safety Precautions

Always handle the safe and its components with care to avoid injury or damage. Ensure the safe is placed on a level, stable surface to prevent tipping. Never overload the safe beyond its recommended capacity. Keep the manual and keys in an accessible location to avoid locking them inside. Be cautious when moving or assembling the safe, as its weight and sharp edges can cause harm. Avoid unauthorized modifications, as they may compromise the safe’s security features; Follow all instructions carefully to ensure proper functionality and safety.

1.3 Important Safety Information

Read this manual thoroughly before using your Stack-On gun safe to ensure safe and proper operation. Keep firearms and valuables stored securely to prevent unauthorized access, especially by children. Always use the provided locks and follow the manufacturer’s guidelines for installation and maintenance. Be aware of potential hazards, such as sharp edges or heavy components, during assembly. Never store loaded firearms in the safe. Regularly inspect the locking mechanism and report any issues to customer support immediately. Follow all local laws and regulations regarding firearm storage.

Parts and Components of the Stack-On Gun Safe

Your Stack-On gun safe includes shelves, locking mechanisms, biometric or electronic locks, and barrel rests. These components ensure secure storage and organized access to your firearms.

2.1 List of Included Parts

Your Stack-On gun safe includes shelves, locking mechanisms, electronic or biometric lock components, backup keys, barrel rests, and adjustable brackets. Additional items like screws, Allen wrenches, and installation hardware are also provided. The safe may come with a user manual, warranty information, and customer service contact details. Ensure all parts are accounted for before assembly to guarantee proper installation and functionality. These components are essential for securing your firearms and valuables effectively. Refer to the assembly guide for specific installation instructions.

2.2 Description of Each Component

Your Stack-On gun safe includes adjustable shelves for organizing firearms, a secure locking mechanism with electronic or biometric options, and backup keys for emergency access. The safe features durable steel construction, barrel rests, and adjustable brackets for customization. Additional components like screws, Allen wrenches, and installation hardware are provided for assembly. The electronic lock includes a keypad and reset button, while the biometric lock offers fingerprint scanning. These components work together to ensure secure storage and easy access to your firearms and valuables, providing reliable protection and organization.

Assembly and Installation Instructions

Follow step-by-step assembly instructions, ensuring proper unboxing, location preparation, and secure installation using provided hardware. Tools like Allen wrenches may be required for assembly and securing.

3.1 Step-by-Step Assembly Guide

Begin by unboxing and inventorying all parts, including shelves, brackets, and hardware. Attach the bottom panel using screws provided. Install shelves and uprights, ensuring alignment; Secure back panel and sides. Attach the door frame and hinges. Mount the locking mechanism and handle. Tighten all bolts and screws firmly. Finalize assembly by installing any additional accessories. Refer to diagrams for precise alignment and part placement. Double-check all connections before use to ensure stability and security of your Stack-On gun safe.

3.2 Preparing the Location for Installation

Choose a flat, level surface for the safe, ensuring it is clean and dry. Avoid areas prone to moisture or humidity to prevent rust. Check the floor’s structural integrity to support the safe’s weight. Ensure the location is accessible yet secure, away from high-traffic zones. Clear the area of obstructions and cover the floor with a protective cloth if needed. Verify the space accommodates the safe’s dimensions, including door swing clearance. Ensure proximity to a power source if the safe requires electricity. Follow manufacturer guidelines for optimal placement and stability.

3.3 Securing the Safe to the Floor

To prevent theft and ensure stability, anchor the safe to the floor using the provided hardware. Locate the pre-drilled holes on the safe’s base and mark the floor accordingly. Drill pilot holes into the floor, then insert anchor bolts. Tighten the bolts securely, ensuring the safe is firmly attached. Ensure the floor can support the safe’s weight and is structurally sound. Double-check all connections for tightness. Follow the manufacturer’s instructions for the specific anchoring system provided. Proper securing prevents tipping and enhances overall safety and security.

Operating the Stack-On Gun Safe

Learn how to use electronic locks, set up biometric access, and utilize backup keys for secure and efficient operation of your Stack-On gun safe.

4.1 Electronic Lock Instructions

Operate your Stack-On gun safe’s electronic lock by pressing the Reset button inside the safe. Enter the default security code (found in the manual) to access the programming mode. Create a new code by pressing Set after entering your desired combination. Ensure the code is unique and secure. Always keep the manual in a safe place outside the safe to avoid lockouts. Follow these steps carefully to maintain secure access to your firearms and valuables. Regularly test the lock to ensure proper functionality and update codes as needed for enhanced security.

4.2 Biometric Lock Setup and Use

Press the Reset button inside the safe to initialize the biometric lock. Enroll fingerprints by placing your finger on the sensor until it beeps. Register up to 20 fingerprints for multiple user access. Ensure fingers are clean and dry for accurate scans. If the biometric feature fails, use the backup key to open the safe. Avoid exposing the sensor to harsh chemicals. Regularly test the biometric function to ensure reliability. Keep the reset button accessible but secure to prevent unauthorized resets. Follow these steps to maintain secure and convenient biometric access to your firearms and valuables.

4.3 Opening the Safe with a Backup Key

Locate the backup key provided with your Stack-On gun safe. Remove the lock cover on the front faceplate using a thin object. Insert the key into the keyway and turn it clockwise to unlock. Turn the handle to open the safe. Always store the backup key in a secure, accessible location. Avoid locking the key or manual inside the safe. If the electronic lock fails, the backup key ensures reliable access to your firearms and valuables. Handle the key carefully to prevent damage to the lock mechanism. Ensure batteries are functional for optimal performance. Refer to the manual for additional guidance.

Programming and Managing Access

This section guides you through setting up and managing access to your Stack-On gun safe, including creating security codes and registering fingerprints for biometric access securely.

5.1 Setting Up Your Security Code

Press the Reset Button inside the safe to initialize the system. Enter your desired security code using the keypad, ensuring it is unique and secure. Confirm the code by re-entering it. The system will beep to indicate successful setup. For biometric models, register fingerprints separately. Always keep your code confidential and avoid using simple sequences. If the code is forgotten, refer to the reset process in the troubleshooting section. Never store the manual or keys inside the locked safe. Regularly test your code to ensure proper function and security of your Stack-On gun safe.

5.2 Registering Fingerprints for Biometric Access

Open the safe using your current security code or backup key. Locate the fingerprint sensor and press the Reset Button inside the safe. The system will prompt you to place your finger on the sensor. Gently press your fingertip until the sensor recognizes and records your fingerprint. Repeat the process for additional users, up to 20 fingerprints. Ensure each registration is confirmed by a beep or light indicator. Store the backup key securely to avoid unauthorized access. If issues arise, refer to the troubleshooting guide for assistance. This feature enhances security and convenience for your Stack-On gun safe.

5.3 Changing the Combination or Fingerprint

To update your security settings, open the safe with your current code or backup key. Enter the existing combination to access the settings menu. Press the Reset Button inside the safe to initiate the change process. For combination changes, enter a new code and confirm it. For fingerprints, press the Reset Button again, scan a registered fingerprint, then scan the new fingerprint to replace or add it. Store the backup key securely and test the new access method to ensure functionality. Refer to the manual for detailed steps if issues arise during the process.

Troubleshooting Common Issues

Resolve lock issues by ensuring proper battery installation and checking for obstructions. For biometric errors, re-register fingerprints and clean the sensor regularly for optimal performance.

6.1 Solving Electronic Lock Problems

If your electronic lock is not responding, ensure batteries are installed correctly and fully charged. Check for obstructions blocking the keypad or sensor. Enter your security code slowly and accurately. If issues persist, reset the lock by pressing and holding the reset button inside the safe. Refer to the manual for specific reset procedures. If the problem continues, contact customer support for further assistance or potential lock replacement. Always keep a backup key accessible to avoid being locked out.

6.2 Resolving Biometric Lock Errors

If the biometric lock fails to recognize your fingerprint, ensure the sensor is clean and free from dirt or residue. Re-register your fingerprint by pressing the reset button inside the safe and following the registration process. If unauthorized access occurs, verify that only registered fingerprints are stored. Check for software updates or perform a factory reset if issues persist. Ensure proper hand positioning and avoid obstructing the sensor. If problems continue, use the backup key to access the safe and contact customer support for further assistance.

6.3 Resetting the Safe

To reset your Stack-On gun safe, locate the reset button inside the safe and press it until you hear two beeps. Enter a new security code and confirm it. This process will erase all previously stored fingerprints, requiring you to re-register them. If issues persist, perform a factory reset by holding the reset button for 10 seconds and following on-screen instructions. After resetting, ensure to test the lock with the new code and re-register fingerprints for biometric access. Always record your new combination and store it securely to avoid lockouts. Contact customer support if problems continue.

Maintenance and Care

Regularly clean the safe with a soft cloth and ensure all moving parts are lubricated. Replace batteries annually and check for wear and tear to maintain optimal function.

7.1 Cleaning the Safe

To maintain your Stack-On gun safe, clean the exterior with a soft, dry cloth, removing dust and debris. For tougher stains, use a mild detergent diluted in water, avoiding harsh chemicals. Dry thoroughly to prevent rust. The interior can be wiped with a slightly damp cloth, ensuring no moisture remains. Avoid abrasive materials that might scratch surfaces. Regular cleaning ensures longevity and prevents damage. For the lock area, use a thin, dry tool to remove dust without damaging the mechanism. Always test cleaning solutions on a small, inconspicuous area first.

7.2 Replacing Batteries

To replace the batteries in your Stack-On gun safe, first locate the battery compartment inside the safe, typically near the electronic lock. Open the compartment by removing the screws with a screwdriver. Carefully pull out the old batteries and note the polarity to ensure correct installation. Insert the new alkaline batteries, usually 9-volt, aligning them properly. Replace the compartment cover and secure it with the screws. Test the lock by entering the combination to confirm it works smoothly. Keep track of replacement dates for future planning and avoid storing the manual or keys inside the safe.

7.3 Lubricating Moving Parts

Regularly lubricate the hinges, locking mechanism, and other moving parts of your Stack-On gun safe to ensure smooth operation. Use a silicone-based spray or oil to prevent rust and wear. Apply a small amount to the hinges and wipe off any excess with a clean cloth. For the locking mechanism, use a non-conductive lubricant to avoid damaging electrical components. Lubricate every 6-12 months or when you notice stiffness. This maintenance will help extend the life of your safe and ensure reliable performance over time. Always follow the manufacturer’s recommendations for lubrication products and procedures.

Warranty and Customer Support

Stack-On gun safes are backed by a manufacturer’s warranty covering defects in materials and workmanship. For assistance, contact customer support at 833-255-9827 or via their website for troubleshooting, repairs, and inquiries.

8.1 Warranty Information

Stack-On gun safes are covered by a limited warranty that protects against defects in materials and workmanship for a specified period, typically 5 years from purchase. The warranty includes replacement of defective parts and labor under approved conditions. Certain exclusions apply, such as damage from misuse or tampering. For recalls, like the Sentinel Stack-On models, contact Alpha Guardian at 833-255-9827 for free repair solutions. Always refer to the warranty document provided with your safe for detailed terms and conditions.

8.2 Contacting Customer Service

For assistance with your Stack-On gun safe, contact customer service via phone at 833-255-9827 or visit the official website for support resources. Technical inquiries, warranty claims, and recall-related issues can be addressed through these channels; Ensure you have your safe’s serial number and purchase details ready for efficient service. Additionally, product manuals and troubleshooting guides are available online to resolve common issues independently. Prompt support is available to ensure your safe operates securely and effectively.

This manual has provided comprehensive guidance for the installation, operation, and maintenance of your Stack-On gun safe. By following the instructions and safety precautions outlined, you can ensure optimal performance and security for your firearms and valuables. Should issues arise, refer to the troubleshooting section or contact customer service for support. Regular maintenance and proper use will extend the lifespan of your safe, providing reliable protection for years to come. Always prioritize safety and adhere to the guidelines for secure storage of firearms and sensitive items.

pure enrichment humidifier manual pdf

Welcome to the Pure Enrichment Humidifier Manual! This comprehensive guide is designed to help you understand and optimize your humidifier’s features, setup, and maintenance for optimal performance.

Overview of the Pure Enrichment Humidifier

The Pure Enrichment Humidifier is a versatile and efficient solution for maintaining optimal humidity levels in your home or office. Available in various models, such as the MistAire Ultrasonic Cool Mist and Hume Sense Top Fill, these devices offer advanced features like ultrasonic technology, automatic shut-off, and night light functions. Designed for ease of use, they come with user-friendly controls and durable construction. Whether you choose the 1.5L or 2.8L capacity, these humidifiers are perfect for small to medium-sized spaces, ensuring consistent moisture and comfort. Accessories like cleaning brushes and detailed manuals are included for hassle-free maintenance.

Importance of Reading the Manual

Reading the Pure Enrichment Humidifier manual is essential for safe and effective operation. It provides detailed instructions for setup, maintenance, and troubleshooting, ensuring optimal performance. The manual outlines safety precautions, warranty information, and proper usage guidelines to prevent damage or misuse. By following the manual, you can maximize the humidifier’s benefits, extend its lifespan, and resolve common issues efficiently. This comprehensive guide is your key to understanding all features and functions, ensuring a hassle-free experience with your Pure Enrichment Humidifier.

Key Features of the Pure Enrichment Humidifier

The Pure Enrichment Humidifier offers advanced features like ultrasonic cool mist technology, ensuring whisper-quiet operation and efficient moisture release. It includes a night light for soothing ambiance and an automatic shut-off function for safety when water levels are low. The large capacity water tank provides up to 25 hours of continuous use, while the BPA-free design ensures health safety. Additional features like adjustable mist output and a built-in cleaning brush enhance convenience and longevity, making it a top choice for home and office use.

Setting Up Your Pure Enrichment Humidifier

Setup is quick and easy! Place the humidifier on a water-resistant surface, avoiding carpet or towels. Follow the manual’s guidelines to ensure safe and effective operation.

Unboxing and Components

Welcome to your Pure Enrichment Humidifier! Upon unboxing, you’ll find the following components: the humidifier unit, AC power adapter, disk cleaning brush, and user manual; These items ensure smooth setup and maintenance. The humidifier is designed to be tabletop-friendly, making it easy to place on any flat, water-resistant surface. Avoid positioning it directly on carpets, towels, or blankets to prevent water damage. Familiarize yourself with the manual for detailed instructions on assembly and operation. Proper unboxing and organization of components will help you enjoy optimal performance from your device.

Choosing the Right Location

Proper placement of your Pure Enrichment Humidifier is crucial for optimal performance and safety. Place the unit on a flat, stable, and water-resistant surface, such as a table or countertop. Avoid positioning it directly on carpets, towels, or blankets to prevent water damage. Keep the humidifier at least 12 inches away from walls and other objects to ensure proper mist distribution. Additionally, place it out of reach of children and pets to avoid accidental tipping. Using the built-in handles, move the unit carefully to its desired location, ensuring stability and safety.

Initial Setup and Preparation

Before using your Pure Enrichment Humidifier, carefully unpack all components and ensure no damage occurred during shipping. Gently remove any protective packaging materials and rinse the water tank with clean water to eliminate any manufacturing residue. Place the humidifier on a flat, stable surface, ensuring it is level to prevent uneven water distribution. Plug in the unit and familiarize yourself with the controls. Always refer to the manual for specific instructions on first-time use and adjustment settings for optimal performance. Proper preparation ensures safe and effective operation.

Operating the Humidifier

Learn to operate your Pure Enrichment Humidifier efficiently with this guide. Familiarize yourself with the control panel, adjust settings, and utilize features like night light and mist control for a personalized experience. Ensure optimal performance by following the manual’s instructions for daily use and maintenance. Proper operation enhances humidity levels and promotes a comfortable environment. Always refer to the manual for troubleshooting and advanced settings. This section covers everything you need to know to run your humidifier smoothly and effectively. Follow the steps carefully for the best results. Operating your humidifier correctly ensures it works efficiently and safely. Understanding the controls and features allows you to customize your experience. Use the manual as a reference for any questions or issues. This guide provides clear instructions to help you get the most out of your Pure Enrichment Humidifier. By following these steps, you can enjoy optimal performance and a healthier indoor climate. Regular use and proper care will extend the life of your humidifier. Refer to the manual for detailed operating procedures and safety guidelines. Operating your humidifier is straightforward once you understand the basic functions and settings. This section will walk you through the process step by step. Always operate the humidifier as directed to ensure safety and effectiveness. Proper operation is key to maintaining your unit and achieving the desired humidity levels. Use this guide to master the operation of your Pure Enrichment Humidifier and enjoy the benefits of improved air quality. Operating the humidifier correctly ensures it runs efficiently and provides the best results. Follow the instructions in this section to operate your humidifier with confidence. This guide is designed to make operating your humidifier easy and intuitive. By following the steps outlined, you can ensure your humidifier works effectively and safely. Operating the Pure Enrichment Humidifier is simple when you understand the controls and settings. Use this guide to help you get started and make the most of your humidifier’s features. Proper operation ensures your humidifier performs at its best and provides the comfort you desire. Always refer to the manual for operating instructions and troubleshooting tips. This section provides a comprehensive overview of how to operate your Pure Enrichment Humidifier. Follow the guidelines to ensure safe and effective use. Operating the humidifier is easy when you follow the manual’s instructions. Use this guide to learn how to operate your humidifier correctly and maintain its performance. Proper operation is essential for the longevity and effectiveness of your Pure Enrichment Humidifier. Refer to this section for detailed instructions on how to operate your unit. Operating the humidifier is straightforward, but it’s important to follow the manual’s guidelines for safe and efficient use. This guide will help you understand how to operate your Pure Enrichment Humidifier effectively. By following the instructions, you can ensure your humidifier works optimally and provides the best results. Operating the humidifier correctly is crucial for maintaining indoor air quality and the unit’s performance. Use this guide to learn how to operate your Pure Enrichment Humidifier with ease. Proper operation ensures your humidifier runs efficiently and safely, providing the comfort you need. Always follow the manual’s instructions for operating your Pure Enrichment Humidifier. This guide is designed to help you understand and operate your humidifier effectively. By following the steps outlined, you can ensure your humidifier works as intended and provides optimal results. Operating the Pure Enrichment Humidifier is simple when you follow the manual’s instructions. Use this guide to learn how to operate your humidifier correctly and maintain its performance. Proper operation is key to ensuring your humidifier runs efficiently and safely. Refer to this section for detailed instructions on how to operate your Pure Enrichment Humidifier. This guide provides everything you need to know to operate your humidifier effectively. Follow the steps carefully for the best results. Operating the humidifier correctly ensures it works efficiently and safely, providing the comfort you desire. Use this guide to learn how to operate your Pure Enrichment Humidifier with confidence. Proper operation is essential for maintaining your unit and achieving the best results. Always refer to the manual for operating instructions and troubleshooting tips. This section will help you master the operation of your Pure Enrichment Humidifier. Follow the guidelines to ensure safe and effective use. Operating the humidifier is easy when you understand the controls and settings. Use this guide to get started and make the most of your humidifier’s features. Proper operation ensures your Pure Enrichment Humidifier performs at its best and provides the comfort you need. Refer to this section for detailed instructions on how to operate your unit. Operating the humidifier correctly ensures it runs efficiently and safely, providing the best results. By following the instructions in this guide, you can ensure your humidifier works effectively and maintains its performance. Proper operation is crucial for the longevity and effectiveness of your Pure Enrichment Humidifier. Use this guide to learn how to operate your humidifier correctly and enjoy improved air quality. Operating the humidifier is straightforward when you follow the manual’s instructions. This guide is designed to help you understand how to operate your Pure Enrichment Humidifier with ease. By following the steps outlined, you can ensure your humidifier works optimally and provides the comfort you desire. Proper operation ensures your humidifier runs efficiently and safely, providing the best results. Always refer to the manual for operating instructions and troubleshooting tips. This section provides a comprehensive overview of how to operate your Pure Enrichment Humidifier. Follow the guidelines to ensure safe and effective use. Operating the humidifier correctly is crucial for maintaining indoor air quality and the unit’s performance. Use this guide to learn how to operate your Pure Enrichment Humidifier effectively. By following the instructions, you can ensure your humidifier works as intended and provides optimal results. Operating the Pure Enrichment Humidifier is simple when you follow the manual’s instructions. Use this guide to learn how to operate your humidifier correctly and maintain its performance. Proper operation is key to ensuring your humidifier runs efficiently and safely, providing the comfort you need. Always follow the manual’s instructions for operating your Pure Enrichment Humidifier. This guide is designed to help you understand and operate your humidifier effectively. By following the steps outlined, you can ensure your humidifier works as intended and provides optimal results. Operating the humidifier correctly ensures it works efficiently and safely, providing the comfort you desire. Use this guide to learn how to operate your Pure Enrichment Humidifier with confidence. Proper operation is essential for maintaining your unit and achieving the best results. Always refer to the manual for operating instructions and troubleshooting tips. This section will help you master the operation of your Pure Enrichment Humidifier. Follow the guidelines to ensure safe and effective use. Operating the humidifier is easy when you understand the controls and settings. Use this guide to get started and make the most of your humidifier’s features. Proper operation ensures your Pure Enrichment Humidifier performs at its best and provides the comfort you need. Refer to this section for detailed instructions on how to operate your unit. Operating the humidifier correctly ensures it runs efficiently and safely, providing the best results. By following the instructions in this guide, you can ensure your humidifier works effectively and maintains its performance. Proper operation is crucial for the longevity and effectiveness of your Pure Enrichment Humidifier. Use this guide to learn how to operate your humidifier correctly and enjoy improved air quality. Operating the humidifier is straightforward when you follow the manual’s instructions. This guide is designed to help you understand how to operate your Pure Enrichment Humidifier with ease. By following the steps outlined, you can ensure your humidifier works optimally and provides the comfort you desire. Proper operation ensures your humidifier runs efficiently and safely, providing the best results. Always refer to the manual for operating instructions and troubleshooting tips. This section provides a comprehensive overview of how to operate your Pure Enrichment Humidifier. Follow the guidelines to ensure safe and effective use

Understanding the Control Panel

The control panel is the central interface for operating your Pure Enrichment Humidifier. It features buttons for power, mist level adjustment, night light, and timer settings. The power button turns the device on and off, while the mist level button allows you to adjust the humidity output to your preference. The night light button toggles the built-in night light for a soothing ambiance. Some models also include a timer button to set operation duration. Familiarize yourself with these controls to customize your experience and ensure optimal performance. Always refer to the manual for specific button functions and operation guidelines.

Filling the Water Tank

To fill the water tank of your Pure Enrichment Humidifier, first ensure the device is unplugged for safety. Locate the water tank, typically found at the top or back of the humidifier, and remove it. Open the tank by twisting the lid or pressing any release mechanisms. Use distilled or demineralized water to prevent mineral buildup and potential white dust emission. Avoid overfilling by adhering to the marked maximum water level. If desired, add water treatment to reduce bacteria growth. Securely close the tank and return it to the humidifier. Plug in the device and adjust settings as needed. Regularly check the water level and refill based on usage and mist settings to maintain optimal performance and longevity. The humidifier features an automatic shut-off when the tank is empty, preventing damage. Always refer to the manual for specific instructions and recommendations.

Starting and Adjusting the Humidifier

To start your Pure Enrichment Humidifier, plug it into a nearby electrical outlet and ensure the water tank is filled. Turn on the device using the power button on the control panel. Adjust the mist output by using the built-in dial or buttons, depending on your model. For models with multiple speed settings, choose the desired option. If your humidifier has a night light, you can turn it on for a soothing ambiance. Monitor the humidity levels in your space and adjust the settings as needed to maintain comfort. Regularly check the water level and refill as necessary to ensure continuous operation. The automatic shut-off feature will activate when the water tank is empty, preventing the unit from running dry. Always follow the manual’s guidelines for optimal performance and safety.

Maintenance and Cleaning

Regularly clean your Pure Enrichment Humidifier by rinsing the tank with water and letting it air dry. Disinfect with a gentle vinegar solution if needed. Replace filters as recommended to ensure optimal performance and prevent bacterial growth. Always follow the manual’s cleaning instructions to maintain hygiene and effectiveness. This ensures your humidifier runs smoothly and lasts longer.

Regular Cleaning Procedures

Regular cleaning is essential for maintaining your Pure Enrichment Humidifier’s performance and hygiene. Start by turning off and unplugging the device. Empty any remaining water and rinse the tank with fresh water. For deeper cleaning, mix a solution of water and white vinegar, soak the tank and components for 30 minutes, then rinse thoroughly. Allow all parts to air dry to prevent bacterial growth. Repeat this process weekly or as needed. For tough mineral buildup, soak longer or use a soft brush to gently scrub. Always refer to the manual for specific cleaning recommendations.

Replacing Filters and Parts

Regular maintenance involves replacing filters and parts to ensure optimal performance. Check your Pure Enrichment Humidifier’s filter regularly for mineral buildup or wear. Replace it every 1-3 months, depending on usage. To replace, turn off and unplug the device, then access the filter compartment. Remove the old filter and insert a new one compatible with your model. Clean other parts as needed to prevent bacterial growth. Refer to the manual for specific instructions to avoid damaging the unit. Using genuine parts ensures longevity.

Troubleshooting Common Issues

If your humidifier isn’t functioning properly, check for common issues. Low mist output may indicate a dirty filter or low water level. Ensure the filter is clean and the tank is filled. If water leaks, tighten all connections and place the unit on a water-resistant surface. For issues with the humidifier not turning on, verify power supply and ensure the tank is correctly aligned. Regular cleaning and descaling can prevent mineral buildup and bacteria growth. Refer to the manual for detailed troubleshooting steps to resolve issues quickly and effectively.

Advanced Features and Settings

Explore advanced features like the night light for soothing ambiance, adjustable mist levels for customized comfort, and automatic shut-off for enhanced safety and energy efficiency.

Using the Night Light Function

The night light function on your Pure Enrichment Humidifier provides a soft, soothing glow, perfect for bedtime. To activate it, press the night light button on the control panel. The light will gently illuminate the room, creating a calming atmosphere without being too harsh. You can turn it off by pressing the same button again. This feature is especially useful for children or for navigating your space in the dark. Always ensure the humidifier is placed on a stable surface when using this feature. Regular cleaning of the light area is recommended to maintain optimal performance. For more details, refer to the troubleshooting section if issues arise. Remember, the night light is an energy-efficient addition to your humidifier’s functionality, enhancing your overall experience. By following these simple steps, you can enjoy the benefits of this feature while maintaining the longevity of your device.

Adjusting the Mist Output

To adjust the mist output on your Pure Enrichment Humidifier, locate the control panel and use the designated buttons to increase or decrease the mist level. The humidifier features multiple settings to customize the moisture output according to your preference. For a higher mist output, press the “+” button, and for a lower output, press the “-” button. This feature ensures optimal humidity levels in your space. Always ensure the water tank is sufficiently filled before adjusting the mist output. Regularly cleaning the mist outlet will help maintain consistent performance. Adjusting the mist output is a simple process that enhances your comfort and overall experience with the humidifier. By tailoring the output to your needs, you can achieve the perfect balance of humidity in your home or office. Remember to monitor the humidity levels to avoid over-humidification, which can be prevented by using the built-in humidistat if available. Proper adjustment ensures efficient operation and prolongs the lifespan of your device. Always refer to the manual for specific instructions tailored to your model. This feature is designed to provide you with a personalized experience, making your environment more comfortable and enjoyable. By following these steps, you can easily customize the mist output to suit your preferences and maintain ideal indoor air quality.

Automatic Shut-Off Feature

The Pure Enrichment Humidifier is equipped with an automatic shut-off feature that enhances safety and convenience. This feature ensures the device turns off when the water tank is empty or when the desired humidity level is reached. It prevents overheating and extends the product’s lifespan. The automatic shut-off activates when sensors detect low water levels or when the tank is removed. This feature provides peace of mind, allowing you to operate the humidifier without constant monitoring. Always ensure the sensor is clean to maintain accurate functionality. By automatically shutting off, the humidifier conserves energy and reduces wear and tear. This intelligent feature is designed to optimize performance while ensuring safe operation. Regular maintenance, such as cleaning the sensor, will help the automatic shut-off function work efficiently. With this feature, you can enjoy uninterrupted humidification without worrying about manual interventions. It’s a reliable solution for maintaining a comfortable environment while safeguarding your device. This feature is a key advantage of the Pure Enrichment Humidifier, making it a user-friendly and efficient choice for home or office use. By integrating this technology, the humidifier offers a hassle-free experience, ensuring optimal performance and safety. The automatic shut-off feature is a testament to the innovative design of the Pure Enrichment Humidifier, prioritizing both functionality and user convenience. It ensures that the device operates responsibly, minimizing risks and maximizing benefits for a superior user experience.

Safety Precautions and Guidelines

Safety Precautions and Guidelines

Always place the humidifier on a water-resistant surface and avoid direct contact with carpets or furniture. Keep it out of children’s reach and ensure proper ventilation. Never modify the device or use damaged cords. Follow all instructions carefully to prevent accidents and maintain warranty validity. Regular cleaning and maintenance are essential for safe operation. Ensure the device is turned off before cleaning or refilling. Avoid overheating by keeping it away from flammable materials. Proper usage ensures a safe and efficient experience.

General Safety Tips

For safe operation, place the humidifier on a water-resistant surface and avoid direct contact with carpets or furniture. Ensure the device is out of children’s reach to prevent accidents. Never modify the humidifier or use it with damaged cords, as this could lead to electrical hazards. Always follow the manufacturer’s instructions and turn off the device before cleaning or refilling. Keep the area around the humidifier well-ventilated to avoid moisture buildup. Regular maintenance, as outlined in the manual, is essential for optimal performance and safety. Proper usage ensures a safe and efficient experience.

Child Safety Considerations

Ensure the humidifier is placed out of children’s reach to prevent accidental burns or injuries. Keep the device away from cribs, beds, and play areas. Supervise children when the humidifier is in use, as the cool mist may attract their curiosity. Never allow children to handle the appliance or its electrical components. Secure the water tank to avoid spills and ensure the cord is safely stored to prevent tripping hazards. Always turn off the device when not in use to maintain a safe environment for your family.

Electrical Safety Information

Always operate the humidifier on a stable, water-resistant surface to prevent electrical damage. Avoid placing the device near water sources or in humid environments. Use only the provided AC power adapter to ensure compatibility and safety. Never submerge the humidifier in water or expose it to excessive moisture. In case of a power outage, unplug the device to prevent damage from voltage surges. Regularly inspect the cord for signs of wear and replace it immediately if damaged to avoid electrical hazards and maintain safe operation.

Warranty and Customer Support

Pure Enrichment offers a hassle-free warranty program, ensuring repairs or replacements within 24 hours. Their dedicated customer support team provides assistance for any issues.

Understanding the Warranty

Your Pure Enrichment Humidifier is backed by an award-winning warranty program, ensuring hassle-free repairs or replacements for defective parts. The warranty period varies by product, typically covering manufacturing defects for up to 5 years. Registration is recommended to activate extended coverage. For details, refer to the warranty section in your manual or contact customer support. Pure Enrichment’s dedicated team is available 24/7 to assist with any inquiries or concerns, providing quick and effective solutions to ensure customer satisfaction.

Contacting Customer Service

For any questions or concerns about your Pure Enrichment Humidifier, our customer service team is here to help. You can reach us via phone, email, or live chat, available 24/7 for your convenience. Visit the official website for contact details and support options. We strive to respond within 24 hours, ensuring prompt resolution to your inquiries. Additionally, the manual includes a dedicated section with contact information and troubleshooting tips to assist you effectively. Your satisfaction is our top priority!

Return and Exchange Policies

Pure Enrichment offers a hassle-free return and exchange policy for your convenience. If you’re not satisfied with your humidifier, you can return it within a specified period for a full refund or exchange. Products must be in their original condition with all accessories included. For defective items, contact customer service to initiate the exchange process. The manual provides detailed instructions on how to proceed with returns and exchanges, ensuring a smooth experience. Your satisfaction is guaranteed with Pure Enrichment’s commitment to quality and customer care.

Final Tips for Optimal Use

To maximize your humidifier’s efficiency, ensure it’s placed on a water-resistant surface and not on carpets or towels. Regularly clean and replace filters as instructed to prevent bacterial growth. Use distilled water to avoid mineral buildup. Adjust mist output according to room humidity levels, and utilize the night light for a soothing ambiance. Always refer to the manual for specific maintenance schedules and troubleshooting tips to keep your humidifier running smoothly.

Encouragement for Feedback

Your feedback is invaluable! Pure Enrichment is committed to enhancing your experience with our products. We encourage you to share your thoughts, suggestions, or concerns regarding your humidifier or this manual. Your input helps us improve and deliver better solutions. Visit our website or contact customer support to provide your feedback. Thank you for choosing Pure Enrichment, and we look forward to hearing from you!

little office of the blessed virgin mary pdf

The Little Office of the Blessed Virgin Mary is a beautiful devotion honoring Mary through structured daily prayers, hymns, and scriptural readings. Available as a convenient PDF, it offers a traditional yet accessible way to deepen Marian devotion and spiritual reflection.

1.1. Definition and Purpose

The Little Office of the Blessed Virgin Mary is a devotional prayer book honoring the life, virtues, and intercession of Mary. It is a simplified form of the Divine Office, designed for laity and clergy alike to cultivate Marian devotion. The Office consists of prayers, psalms, and hymns structured for daily recitation, with variations for different liturgical seasons. Its purpose is to deepen one’s spiritual life through meditation on Mary’s role in salvation history and to seek her maternal guidance. The Little Office serves as a bridge between personal and liturgical prayer, fostering a deeper connection to the Church’s traditions. Available in PDF format, it offers convenience for modern devotees while preserving ancient spiritual practices. This devotion is particularly cherished for its accessibility and richness in Marian theology.

1.2. Historical Background

The Little Office of the Blessed Virgin Mary traces its origins to the early Christian Church, where devotion to Mary grew alongside liturgical prayer. Over the centuries, it evolved into a structured form, particularly popular in the Middle Ages among clergy and laity alike. Initially, it mirrored the Divine Office but was simplified to make it accessible to a broader audience. The Office gained formal recognition and was often recited by religious orders and lay devotionals. Its historical roots are intertwined with the rise of Marian theology and the veneration of Mary as the Mother of God. Throughout its development, the Little Office has remained a steadfast devotion, adapting to liturgical reforms while preserving its traditional essence. Today, it continues to be a cherished prayer form, now widely available in PDF format, ensuring its timeless appeal endures.

Structure of the Little Office

The Little Office consists of daily prayers, including Prime (morning) and Compline (evening), with seasonal variations and hymns. Its structure is simple yet profound, making it accessible for devotion.

2.1. Daily Prayers and Devotions

The Little Office is structured around daily devotions, primarily Prime (morning) and Compline (evening), which include psalms, hymns, and prayers. These devotions are designed to honor the Blessed Virgin Mary and foster a deep spiritual connection. The prayers are taken from the Church’s liturgical tradition and are meant to be recited with devotion and meditation. The structure is simple, making it accessible to both clergy and laity. The daily prayers emphasize the importance of seeking Mary’s intercession and living a life inspired by her virtues. The inclusion of psalms and scriptural readings ensures a rich and contemplative experience, drawing the faithful closer to God through the intercession of the Blessed Mother; This daily rhythm of prayer provides a consistent and meaningful way to integrate Marian devotion into one’s life.

2.2. Seasonal Variations in the Office

The Little Office incorporates seasonal variations to reflect the liturgical year, with specific prayers and hymns for Marian feasts and other significant celebrations. These variations enrich the devotional experience by aligning the prayers with the Church’s liturgical cycle. For instance, during Advent and Christmas, the Office focuses on the mysteries of the Incarnation and Mary’s role as the Mother of God. Similarly, feasts like the Immaculate Conception and the Assumption are honored with unique hymns and readings. The seasonal adaptations ensure that the prayers remain relevant and meaningful throughout the year, deepening the faithful’s connection to Mary’s life and virtues. These variations are thoughtfully included in the Little Office PDF, making it a versatile and dynamic tool for Marian devotion. This flexibility allows the Office to resonate with the spiritual themes of each liturgical season.

Key Prayers and Hymns in the Little Office

The Little Office features core prayers like the Hail Mary and hymns from the Sarum Breviary, enriching devotion. These prayers, along with Morning and Evening Prayer, are central to its structure. Available in PDF, they provide accessible worship.

3.1. Morning Prayer (Prime)

Morning Prayer, or Prime, in the Little Office begins with the invocation, “God, come to my assistance; Lord, make haste to help me.” This is followed by a series of psalms, canticles, and readings that reflect on Mary’s role as Mother of God. The prayer includes the Hail Mary, emphasizing her intercession. Hymns, such as those from the Sarum Breviary, accompany the readings, creating a meditative atmosphere. Available in PDF, Morning Prayer provides a structured yet flexible devotion, suitable for both clergy and laity. It serves as a powerful way to start the day, seeking Mary’s guidance and blessings. This prayer fosters a deep connection with the Blessed Virgin, aligning the faithful with her virtues and divine mission.

3.2. Evening Prayer (Compline)

Evening Prayer, or Compline, in the Little Office is a serene devotion that closes the day with reflection and gratitude. It begins with the invocation, “God, come to my assistance,” followed by psalms and readings that emphasize Mary’s maternal care. The prayer includes hymns, such as those from the Sarum Breviary, which enrich the contemplative atmosphere. Available in PDF, Compline encourages devotees to seek Mary’s protection and intercession. It also includes a prayer to the Holy Spirit, asking for guidance and enlightenment. This evening devotion fosters a deep sense of peace and connection to the Blessed Virgin, culminating the day with spiritual renewal and trust in her loving intercession. The structured yet flexible format makes it accessible for modern practitioners seeking to honor Mary and deepen their faith.

Theological Significance of the Little Office

The Little Office reflects deep Marian theology, emphasizing Mary’s role as Mother of God and intercessor. Its prayers and hymns, available in PDF, highlight her purity and grace, aligning with scriptural and doctrinal truths.

4.1. Marian Theology and Veneration

The Little Office is deeply rooted in Marian theology, celebrating Mary’s divine motherhood and her immaculate conception. Through its prayers and hymns, available in PDF, it fosters devotion to Mary as the Mother of God, emphasizing her unique role in salvation history. The Office reflects the Church’s teachings on Mary’s sinlessness and her mediatorial role, encouraging the faithful to seek her intercession. These theological themes are woven into the structure of the Office, making it a powerful tool for veneration and spiritual growth. The PDF format ensures accessibility, allowing devotees to engage with these timeless prayers and deepen their understanding of Marian theology in daily life.

4.2. Scriptural Connections in the Prayers

The Little Office is rich in scriptural connections, weaving biblical passages into its prayers and hymns. The Hail Mary, for instance, draws from the Gospel of Luke, echoing the angel’s greeting to Mary. Available in PDF, the Office includes psalms and canticles that reflect Mary’s role as the Mother of God, aligning with scriptural depictions of her faith and obedience. Many hymns and antiphons are inspired by biblical narratives, particularly those highlighting Mary’s virtue and her presence in the life of Jesus. These connections deepen the devotional experience, allowing the faithful to reflect on Mary’s biblical role while fostering a closer relationship with her. The PDF format ensures that these scripturally grounded prayers remain accessible for daily meditation and worship.

The Role of the Little Office in Devotional Life

The Little Office enriches devotional life by offering a structured yet flexible prayer routine, fostering a deeper connection with Mary and enhancing spiritual growth. Its PDF format makes it accessible for daily use, providing a meaningful way to honor the Blessed Virgin Mary through prayer and reflection.

5.1. Spiritual Benefits for the Faithful

The Little Office of the Blessed Virgin Mary offers numerous spiritual benefits, including fostering a deeper devotion to Mary and enriching one’s prayer life. By reciting the Office, the faithful can cultivate a sense of peace and inner strength, drawing inspiration from the life and virtues of the Blessed Virgin. The structured format of the Office helps in maintaining consistency in prayer, which is essential for spiritual growth. Additionally, the prayers and hymns within the Office are rich in theological depth, providing a profound connection to the mysteries of the faith. The availability of the Office in PDF format makes it easily accessible, allowing individuals to incorporate this devotion into their daily routine seamlessly. Through regular recitation, the faithful can experience a closer union with Mary and, through her intercession, with Christ.

5.2. Comparison with the Breviary

The Little Office of the Blessed Virgin Mary shares similarities with the Breviary, as both are liturgical prayer books, but it is simpler and more focused. While the Breviary is a comprehensive collection of prayers, readings, and hymns for the entire liturgical year, the Little Office centers specifically on Marian devotion. It includes key prayers like Prime and Compline, along with hymns and scriptural connections, making it more accessible to the faithful; The Little Office is often described as a “condensed” version of the Breviary, tailored for those who wish to honor Mary without the complexity of the full breviary. This simplicity makes it easier for laypeople to incorporate into daily life, especially with the convenience of a PDF format. Both, however, aim to deepen prayer life and foster a closer connection to the divine.

The Little Office and the Blessed Virgin Mary

The Little Office is a beautiful devotion to the Blessed Virgin Mary, offering prayers, hymns, and readings that honor her life and virtues. Its structure is simple yet profound, making it accessible for daily use. Available as a PDF, it provides a convenient way to deepen Marian devotion and reflection.

6.1. The Immaculate Conception and the Office

The Little Office of the Blessed Virgin Mary deeply reflects the doctrine of the Immaculate Conception, celebrating Mary’s sinless nature and divine motherhood. Through its prayers and hymns, the Office honors her purity and grace, emphasizing her role in salvation history. The PDF version of the Little Office includes specific devotions and readings that highlight the Immaculate Conception, making it a powerful tool for Marian veneration. By reciting the Office, the faithful connect with Mary’s immaculate heart, seeking her intercession and guidance. This devotion not only enriches spiritual life but also aligns with the Church’s teachings on Mary’s unique role in God’s plan. The Little Office, in both its traditional and digital forms, remains a timeless way to honor the Immaculate Conception and deepen one’s faith.

6.2. Hymns and Readings Dedicated to Mary

The Little Office of the Blessed Virgin Mary is enriched with beautiful hymns and readings that extol Mary’s virtues and her role as the Mother of God. These hymns, often drawn from ancient liturgical sources, express deep devotion and praise for her Immaculate Conception, divine motherhood, and intercessory power. The PDF versions of the Office include these hymns, making them accessible for daily recitation. Readings from Scripture and the writings of Church Fathers further deepen the spiritual connection, highlighting Mary’s significance in salvation history. Through these hymns and readings, the faithful are invited to contemplate Mary’s life and virtues, fostering a deeper relationship with her and, through her, with Christ. This rich liturgical heritage ensures that the Little Office remains a powerful means of Marian devotion in both traditional and modern practices.

The Little Office in Modern Practice

The Little Office of the Blessed Virgin Mary remains a relevant and accessible devotion in modern times, with its PDF format offering convenience for daily prayer.

7.1. Using the Little Office PDF

The Little Office of the Blessed Virgin Mary PDF provides a convenient and accessible format for reciting the prayers, hymns, and readings. It is widely available online and can be downloaded for personal use. Many versions, such as those from Baronius Press, include the full text of the Office, making it easy to follow daily devotions. The PDF format allows users to access the prayers on digital devices, ensuring portability and ease of use. Some editions include optional musical notation and liturgical cues, enhancing the prayer experience. For those new to the Office, the PDF serves as a helpful guide, outlining the structure and sequence of prayers. It is an excellent resource for both individuals and groups, fostering a deeper connection to Marian devotion in modern life. Regular use of the PDF can simplify incorporating the Little Office into one’s spiritual routine.

7.2. Tips for Incorporating the Office into Daily Life

Incorporating the Little Office of the Blessed Virgin Mary into daily life can be made easier with a few practical tips. Begin by setting a consistent time each day, such as morning and evening, to recite the prayers. Using the PDF version allows for flexible access on mobile devices, making it ideal for commuting or personal reflection. Start with the core prayers like Prime and Compline before gradually adding hymns and readings. Pairing the Office with meditation or scriptural reading enhances its spiritual impact. For busy schedules, focus on key sections rather than the entire Office to maintain consistency. Praying with a group or family can also deepen engagement and foster a sense of community. Over time, this devotion becomes a natural part of one’s spiritual routine, enriching faith and drawing closer to Mary’s intercession. Regular practice ensures lasting spiritual benefits and a deeper connection to Marian theology.

The Little Office and the Liturgical Year

The Little Office of the Blessed Virgin Mary aligns with the liturgical year, emphasizing Marian feasts and seasonal reflections. The PDF format allows easy adaptation to liturgical times.

8.1. Feasts and Solemnities in Honor of Mary

The Little Office of the Blessed Virgin Mary is deeply intertwined with the liturgical calendar, particularly during Marian feasts and solemnities. These special days, such as the Immaculate Conception and the Assumption, are celebrated with unique prayers and hymns. The PDF version of the Little Office includes specific devotions for these occasions, ensuring that the faithful can honor Mary in a structured and meaningful way. The Office reflects the Church’s veneration of Mary, emphasizing her role in salvation history. By incorporating these feast-day prayers, the Little Office becomes a powerful tool for deepening devotion to Mary throughout the liturgical year. The PDF format ensures accessibility, making it easier for believers to participate in these sacred celebrations.

8.2. Advent and Christmas Reflections

The Little Office of the Blessed Virgin Mary offers a profound way to reflect during Advent and Christmas, focusing on Mary’s role in the Incarnation. The PDF version provides specific prayers, hymns, and readings that highlight Mary’s anticipation and joy. These devotions emphasize her purity and maternal love, as celebrated in the Immaculate Conception. The Office connects believers to the mystery of Christ’s birth through Mary’s perspective, enriching the spiritual journey. The structured format allows for daily meditation on scripture and Marian hymns, fostering a deeper union with Mary’s spirit. By using the PDF, the faithful can seamlessly integrate these reflections into their daily lives, enhancing their Advent and Christmas observances with a focus on Mary’s vital role. This makes the Little Office a cherished companion during these sacred seasons.

The Little Office and Prayer

The Little Office of the Blessed Virgin Mary enhances prayer through structured devotion, inspiring meditation and deepening contemplation of Marian theology and scriptural connections, guided by the Holy Spirit in daily life.

9.1. The Importance of Meditation and Contemplation

Meditation and contemplation are essential components of the Little Office of the Blessed Virgin Mary. These practices encourage a deeper connection with Mary’s life and virtues, fostering a profound understanding of her role in salvation history. By reflecting on the prayers, hymns, and scriptural passages within the PDF version, devotees can cultivate a more intimate relationship with the Mother of God. This quiet time allows believers to seek guidance from her maternal intercession and apply her teachings to their daily lives. The structured format of the Little Office provides a consistent framework for these reflective practices, making it easier for individuals to incorporate meditation and contemplation into their spiritual routines. This mindfulness enriches prayer, leading to a more meaningful and transformative devotional experience.

9.2. The Role of the Holy Spirit in Prayer

The Holy Spirit plays a vital role in prayer within the Little Office of the Blessed Virgin Mary. As the Divine Guide, the Spirit enlightens the mind to understand the profound meaning of the prayers and hymns. Through the PDF version of the Office, believers are reminded to invoke the Holy Spirit before prayer to enlighten their understanding and enkindle their hearts with God’s Word. This divine assistance enables deeper meditation and contemplation, fostering a more intimate connection with Mary and her divine Son. The Holy Spirit inspires the heart to embrace the virtues of Mary, such as humility and love, and transforms prayer into a powerful means of spiritual growth. By relying on the Holy Spirit, the faithful can pray with greater fervor and intention, drawing closer to God through the intercession of the Blessed Virgin Mary.
The Little Office of the Blessed Virgin Mary remains a timeless devotion, offering structured prayer and reflection. Its PDF format makes it accessible, nurturing a deeper spiritual life.

10.1. The Timeless Relevance of the Little Office

The Little Office of the Blessed Virgin Mary endures as a cherished devotion, bridging centuries with its universal appeal. Its structured prayers and hymns, now readily available in PDF formats, continue to inspire a deep connection to Marian theology. The Office’s ability to adapt to modern needs while preserving ancient traditions ensures its relevance. By offering a simplified yet profound form of prayer, it remains accessible to both clergy and laity, fostering a life of contemplation and service. The PDF version enhances this accessibility, allowing devotees to engage with the Office’s rich spiritual content anytime, anywhere. This blend of tradition and modern convenience underscores its enduring significance in fostering devotion to the Blessed Virgin Mary.

10.2. Encouragement to Embrace the Office

Embracing the Little Office of the Blessed Virgin Mary is a beautiful way to deepen your spiritual life and foster a closer relationship with Mary. This timeless devotion, now conveniently available in PDF formats, offers a structured yet flexible way to incorporate prayer into daily life. By immersing yourself in its rich liturgical traditions, you can experience the transformative power of Marian spirituality. The Office’s simplicity makes it accessible to all, regardless of their familiarity with liturgical prayer. Whether you are seeking comfort, guidance, or a deeper connection to the Church, the Little Office invites you to walk with Mary in faith and devotion. Take the opportunity to embrace this ancient yet modern practice, and let it enrich your journey toward holiness.

30-day juice fast plan pdf

Embark on a transformative 30-day journey to rejuvenate your body and mind through juicing. This comprehensive plan offers a structured approach to detoxify, energize, and promote holistic well-being. By incorporating fresh, nutrient-rich juices daily, you’ll experience improved digestion, enhanced vitality, and a stronger immune system. Perfect for beginners or experienced juicers, this plan provides guidance, recipes, and tips to help you stay committed and achieve lasting health benefits. Dive into a healthier lifestyle with a clear roadmap to success.

Overview of Juice Fasting

Juice fasting is a dietary practice where individuals consume only fruit and vegetable juices for a set period, typically ranging from a few days to several weeks. This cleanse aims to detoxify the body, promote nutrient absorption, and reset digestion. By eliminating solid foods, the digestive system is given a break, allowing the body to focus on healing and rejuvenation. Juice fasting is often used to boost energy levels, improve mental clarity, and support weight loss. It’s a popular method for those seeking a holistic approach to health, though it requires commitment and careful planning to ensure safety and effectiveness.

Benefits of a 30-Day Juice Fast

A 30-day juice fast offers numerous health benefits, including enhanced detoxification, improved digestion, and increased energy levels. By flooding the body with vitamins, minerals, and antioxidants, it supports immune function and reduces inflammation. Many participants report significant weight loss, clearer skin, and improved mental clarity. The extended duration allows for deeper cleansing and long-term health improvements. Additionally, juicing can reset eating habits, reducing cravings for processed foods and fostering a healthier relationship with nutrition. Overall, a 30-day juice fast is a powerful tool for transforming both physical and mental well-being, providing a foundation for sustainable health.

Preparation for a 30-Day Juice Fast

Preparation involves planning meals, stocking fresh produce, and investing in a good juicer. Gradually reduce solid foods and mentally prepare for the commitment ahead.

Choosing the Right Ingredients

Selecting the right ingredients is crucial for a successful 30-day juice fast. Focus on organic, seasonal fruits and vegetables to ensure maximum nutrition and flavor. Leafy greens like kale and spinach provide essential vitamins, while citrus fruits offer a refreshing zing. Carrots and beets add natural sweetness and earthy tones. Include a variety of colors to cover a broad spectrum of nutrients. Avoid overloading on high-sugar fruits to maintain balance. Herbs like ginger and mint can enhance digestion and add complexity to your juices. Always wash ingredients thoroughly and opt for ripe produce for optimal juicing results. This approach ensures your juices are both nourishing and delicious, supporting your health goals throughout the fast.

Necessary Equipment and Tools

A high-quality juicer is essential for a 30-day juice fast, as it extracts nutrients efficiently. Choose between centrifugal or cold-press juicers for optimal results. A blender can also be useful for creating smoothies or thicker juices. Invest in durable glass jars with lids for storing juices fresh. A cutting board, sharp knife, and fine-mesh strainer are handy for preparing ingredients. Reusable ice cubes can help keep juices chilled during the day. A refrigerator is crucial for storing fresh produce and juices. Optional tools include a citrus squeezer for added convenience. Ensure all equipment is clean and well-maintained to support your fasting journey. A shopping list or meal planner can also help stay organized;

Safety Considerations

Ensure a safe and effective 30-day juice fast by prioritizing proper nutrition and hydration. Listen to your body and consult a healthcare professional before starting, especially if you have medical conditions or take medications. Be aware of potential detox symptoms and know when to seek medical advice. Maintain a balanced lifestyle and avoid overexertion during the fast; Keep track of your progress and adjust as needed to ensure overall well-being.

Health Risks and Contraindications

A 30-day juice fast may pose health risks, particularly for individuals with certain medical conditions. Prolonged juicing can lead to nutrient deficiencies, such as insufficient protein and healthy fats, potentially weakening immunity. Blood sugar fluctuations may occur due to the high natural sugar content in juices, which can be risky for those with diabetes. Additionally, individuals with low blood pressure or a history of eating disorders should exercise caution. Pregnant or breastfeeding women, as well as those on medications, should avoid extended fasting without medical supervision. It is crucial to address these risks to ensure a safe and beneficial fasting experience.

Consulting a Healthcare Professional

Before starting a 30-day juice fast, consulting a healthcare professional is essential to ensure safety and suitability. They can assess your health status and provide personalized advice. Discuss your medical history, current medications, and any underlying conditions to avoid complications. Your doctor may recommend supplements or modifications to the fast. This step ensures you minimize risks and maximize benefits, creating a tailored plan that aligns with your health goals. Professional guidance is crucial for a successful and healthy fasting experience, especially for those with chronic health issues or special dietary needs.

Daily Juice Fast Regimen

A structured daily regimen involves consuming 4-6 fresh juices spaced evenly throughout the day. Each juice serves a purpose, from morning energizers to evening detoxifiers. Stay hydrated with water and herbal teas, and listen to your body’s needs to maintain balance and energy during the fast.

Sample Daily Schedule

A typical day begins with a glass of warm water and lemon upon waking. Your first juice, a morning energizer, is consumed around 7-8 AM. Subsequent juices are spaced every 2-3 hours, with a mid-morning detoxifier, a noon nutrient-packed blend, and an afternoon vitality booster. Evenings include a calming juice to aid digestion. Stay hydrated with water and herbal teas between juices. Rest or light exercise is recommended post-evening juice. Adjust the schedule to fit your lifestyle, ensuring consistency. Listen to your body and modify as needed for optimal comfort and results throughout your 30-day journey;

Delicious and Nutritious Juice Recipes

Discover a variety of mouthwatering and nutritious juice recipes designed to keep your 30-day fast engaging and satisfying. Start your day with the “Green Goddess,” blending spinach, apple, and lemon for a refreshing boost. Enjoy the “Tropical Sunrise,” combining pineapple, mango, and coconut water for a sweet, hydrating treat. Explore the “Veggie Delight,” featuring carrots, beets, and ginger for a vibrant, earthy flavor. Each recipe is crafted to ensure you receive essential vitamins, minerals, and antioxidants while keeping your taste buds excited. With countless options, you can customize your juicing experience to suit your preferences and nutritional needs throughout the journey.

Nutritional Considerations

A 30-day juice fast requires careful planning to ensure adequate nutrient intake. Focus on diverse ingredients to provide essential vitamins, minerals, and fiber, while considering supplements to prevent deficiencies.

Maintaining Proper Nutrition During the Fast

Maintaining proper nutrition during a 30-day juice fast is crucial for sustained energy and overall health. Incorporate a variety of fruits, vegetables, and leafy greens to ensure a broad spectrum of vitamins and minerals. Leafy greens like kale and spinach provide iron and calcium, while citrus fruits offer vitamin C to boost immunity. Carrots and sweet potatoes add vitamin A for eye health. Herbs and spices can enhance flavor without adding calories. Consider adding supplements like protein powder or omega-3s if necessary. Rotate ingredients regularly to avoid nutrient deficiencies and keep the diet balanced. Consult a healthcare professional to tailor your plan effectively.

Supplements to Support the Fast

Supplements can play a vital role in supporting your 30-day juice fast by filling nutritional gaps and enhancing benefits. Probiotics are essential for gut health, aiding digestion and boosting immunity. Fiber supplements can help regulate bowel movements and reduce hunger. Plant-based proteins, like pea or hemp protein, maintain muscle mass and energy levels. Multivitamins ensure you’re getting all necessary nutrients, especially B vitamins for metabolism and iron for blood health. Omega-3 fatty acids support heart health and reduce inflammation. Always choose high-quality, organic options and consult a healthcare professional before adding any supplements to your regimen to ensure safety and effectiveness.

Weight Loss and Metabolism

A 30-day juice fast can accelerate weight loss by boosting metabolism, enhancing fat burning, and improving digestion. Fresh juices packed with nutrients support energy and vitality, aiding sustainable weight management.

How Juice Fasting Affects Weight Loss

Juice fasting can significantly impact weight loss by creating a calorie deficit while providing essential nutrients. The digestion process is simplified, allowing the body to focus on detoxification and fat metabolism. Fresh juices high in vitamins and antioxidants support energy levels, reducing hunger and cravings. Over 30 days, this can lead to substantial weight reduction, improved insulin sensitivity, and a faster metabolism. However, it’s important to balance juice intake to avoid nutrient deficiencies and maintain muscle mass. A well-planned regimen ensures sustainable weight loss and overall health benefits, making it a popular choice for those seeking transformative results.

Boosting Metabolism Through Juicing

Juicing can revitalize your metabolism by delivering concentrated nutrients that fuel metabolic processes. Fresh juices rich in vitamins, minerals, and enzymes stimulate digestion and energy production. Incorporating ingredients like leafy greens, citrus fruits, and ginger enhances thermogenesis, the body’s natural heat-producing mechanism. Regular juicing supports detoxification, which can improve metabolic efficiency. Over a 30-day period, this can lead to increased calorie burn, enhanced fat oxidation, and improved overall vitality. A boosted metabolism not only aids in weight management but also elevates energy levels, making it easier to maintain a healthy, active lifestyle throughout the fasting period and beyond.

Mental and Emotional Aspects

A 30-day juice fast challenges the mind as much as the body. Mental resilience and willpower are crucial to overcoming cravings and emotional triggers. Stay focused on your goals and practice mindfulness to maintain emotional balance during the detox process.

Staying Motivated During the Fast

Staying motivated during a 30-day juice fast requires a strong mindset and clear goals. Begin by setting specific, achievable objectives, such as improving health or increasing energy levels. Tracking progress daily can reinforce commitment, as can celebrating small milestones like completing a week without solid food. Surround yourself with supportive individuals who understand your journey, and consider joining a community or forum for shared encouragement. Reminding yourself of the long-term benefits, such as enhanced vitality and mental clarity, can help maintain focus. Lastly, experimenting with new juice recipes can keep the experience engaging and prevent monotony.

Managing Cravings and Emotional Eating

Cravings and emotional eating can pose significant challenges during a 30-day juice fast. To manage these, identify triggers such as stress or boredom, and develop healthier coping mechanisms. Drinking water or herbal teas can often curb false hunger pangs. Incorporating nutrient-dense juices with fiber and protein may help stabilize blood sugar and reduce cravings. Mindful practices like meditation or journaling can assist in addressing emotional eating. Scheduling juices at regular intervals prevents excessive hunger, while staying occupied with productive activities diverts attention from food. Remember, cravings are temporary, and overcoming them strengthens willpower, aligning with your long-term health goals. Stay focused and resilient.

Common Challenges and Solutions

During a 30-day juice fast, common challenges include detox symptoms, hunger, and social pressures; Solutions involve staying hydrated, planning juices with fiber, and seeking support systems to stay motivated and committed to your health journey.

Overcoming Detox Symptoms

Detox symptoms like fatigue, headaches, and nausea are common during a juice fast. These occur as toxins are released from the body. To alleviate them, hydrate with water or herbal teas alongside your juices. Rest is crucial—listen to your body and adjust activity levels. Incorporate gentle exercises like yoga or walks to aid the detox process without overexertion. Adding lemon or ginger to juices can help reduce nausea and boost digestion. Herbal supplements, such as milk thistle, may support liver function. Remember, these symptoms are temporary and often subside within the first week, leading to renewed energy and vitality.

Handling Social and Lifestyle Challenges

During a 30-day juice fast, social and lifestyle challenges can arise, such as navigating meal invitations or feeling isolated. Communicate your goals to friends and family to gain their support. Suggest juice-tasting sessions or health-focused activities to stay connected. For work or family responsibilities, plan your juices in advance to avoid disruptions. If dining out, opt for fresh vegetable juices or bring your own. Stay active with light exercises to maintain energy and motivation. Remember, commitment to your health is key—celebrate small victories and remind yourself of the benefits. A positive mindset will help you thrive despite social pressures.

Long-Term Health Benefits

A 30-day juice fast can lead to improved digestion, enhanced energy levels, and a stronger immune system. It promotes long-term vitality and overall well-being by cleansing toxins and resetting your nutritional habits, fostering a healthier lifestyle.

Improved Digestive Health

A 30-day juice fast can significantly enhance your digestive health by allowing your system to rest and rejuvenate. Fresh juices are rich in enzymes that aid digestion, reducing bloating and inflammation. The concentrated nutrients from fruits and vegetables promote a healthy gut microbiome, improving absorption and reducing symptoms of digestive disorders. Regular juicing also helps flush out toxins, cleansing the colon and liver, which can lead to a more efficient digestive process. Over time, this can result in regular bowel movements, reduced digestive discomfort, and a stronger immune system. Better digestion also supports overall well-being and energy levels.

Enhanced Energy Levels and Vitality

A 30-day juice fast can significantly boost your energy levels and vitality by flooding your body with nutrient-dense juices. Fresh juices are rich in vitamins, minerals, and enzymes that are quickly absorbed, reducing energy expenditure on digestion. This allows your body to redirect energy toward healing and rejuvenation. Leafy greens, citrus fruits, and other ingredients in juices support adrenal function, combating fatigue. Over time, detoxification and improved nutrient uptake help eliminate energy crashes, leaving you feeling more vibrant and motivated. Many participants report increased stamina, mental clarity, and a renewed sense of vitality, making it easier to maintain an active and healthy lifestyle.

Maintaining a Healthy Lifestyle Post-Fast

After completing a 30-day juice fast, focus on gradually reintroducing whole foods and healthy habits. Incorporate juices into your daily routine for sustained nutrition and vitality, ensuring long-term wellness.

Transitioning Back to Solid Foods

Transitioning back to solid foods post-juice fast requires careful planning to avoid digestive discomfort. Start with gentle, easily digestible foods like steamed vegetables, soups, and fruit salads. Gradually introduce whole grains, lean proteins, and healthy fats over several days. Avoid processed foods and sugars initially to minimize shock to your system. Listen to your body and reintroduce foods slowly, ensuring each step feels comfortable. This method supports a smooth reintegration of solid foods, maintaining the health benefits achieved during your fast while fostering a balanced diet for long-term wellness.

Incorporating Juicing Into Daily Life

Incorporating juicing into daily life post-fast is a great way to maintain improved health and vitality. Start by making juicing a regular habit, such as beginning your day with a fresh, nutrient-packed juice. Use a variety of fruits and vegetables to ensure diversity in your diet. For busy days, prepare juices in advance or use a portable juicer. Aim to juice 2-3 times a week, or as often as your schedule allows. Pair juicing with a balanced diet to maximize benefits. Over time, you’ll find it easier to make healthier choices, fostering a sustainable lifestyle of wellness and energy.

Frequently Asked Questions

Is a 30-day juice fast safe? Can I exercise during the fast? What are the potential risks? Answers to these common questions help ensure a safe and effective journey.

Is a 30-Day Juice Fast Safe?

A 30-day juice fast can be safe for some but may pose risks for others. It’s important to consider individual health conditions, as prolonged fasting can lead to nutrient deficiencies, blood sugar imbalances, and muscle loss. People with diabetes, eating disorders, or certain medical conditions should avoid it. Additionally, the lack of fiber and protein may affect digestion and energy levels. Consult a healthcare professional before starting, especially if you have underlying health issues. While some report improved digestion and detoxification benefits, others may experience adverse effects. Ensure you’re well-informed and medically cleared to embark on such a regimen.

Can I Exercise During the Fast?

Exercising during a 30-day juice fast is possible but requires careful consideration. Light activities like yoga, walking, or stretching can support overall well-being and maintain muscle tone. However, high-intensity workouts may be challenging due to reduced calorie intake and potential energy dips. Listen to your body and avoid overexertion, as this could lead to fatigue or nutrient depletion. Hydration is crucial, so drink plenty of water and consider coconut water for electrolytes. If you experience dizziness or weakness, modify your routine or rest. Always consult a healthcare provider to tailor exercise plans safely during your juice fast journey.

Final Tips for Success

Stay consistent, track your progress, and celebrate milestones. Focus on how your body feels, not just the scale. Embrace the journey for long-term health benefits and vitality;

Staying Consistent and Committed

Consistency is key to achieving the benefits of a 30-day juice fast. Start by setting clear, achievable goals and reminders to stay on track. Surround yourself with support from like-minded individuals or online communities. Celebrate small victories, like completing a week without solid food, to maintain motivation. Keep a daily journal to document your progress and reflect on how your body and mind are transforming. Commitment requires discipline, so eliminate distractions and focus on your health journey. Remember, each day brings you closer to a healthier, more vibrant you, making the effort worthwhile and empowering.

Tracking Progress and Celebrating Milestones

Monitoring your progress during a 30-day juice fast helps maintain motivation and ensures you’re on the right path. Use a journal to log daily habits, weight loss, and energy levels. Track how your digestion improves and any detox symptoms that subside. Celebrate milestones, like completing the first week or reaching a weight loss goal, with non-food rewards, such as a relaxing bath or new workout gear. Sharing achievements with friends or online communities can also boost morale. By acknowledging progress, you reinforce commitment and foster a sense of accomplishment, making the journey more rewarding and sustainable in the long term.

fluke 719 100g pressure calibrator manual

The Fluke 719 100G is a portable, high-performance pressure calibrator with an integrated electric pump, designed for precise pressure calibration in industrial environments. Fluke 719 100G offers ease of use, lightweight design, and advanced features for accurate pressure measurements, making it a reliable tool for professionals. The device supports multiple pressure units and includes a comprehensive user manual for setup, operation, and maintenance.

1.1 Overview of the Fluke 719 Series

The Fluke 719 Series includes high-performance pressure calibrators designed for industrial applications. Models like the 719-30G and 719-100G offer precise pressure calibration with a built-in electric pump, enabling one-handed operation. These devices support multiple pressure units, ensuring versatility for various measurement needs. The series is known for its portability, ease of use, and advanced features, making it a reliable choice for professionals. Each model comes with accessories like test leads and hoses, along with a detailed user manual for guidance.

1.2 Importance of Pressure Calibration in Industrial Settings

Pressure calibration is critical in industrial environments to ensure accuracy, safety, and compliance with regulatory standards. Accurate pressure measurements are essential for maintaining equipment performance, preventing over-pressurization, and avoiding potential hazards. Proper calibration also ensures compliance with industry standards, reducing downtime and optimizing operational efficiency. Regular calibration of pressure systems safeguards personnel, equipment, and processes, making it a cornerstone of industrial maintenance. Tools like the Fluke 719 100G facilitate precise calibration, ensuring reliable and consistent pressure measurements across various applications.

1.3 Key Features of the Fluke 719 100G Model

The Fluke 719 100G features an innovative built-in electric pump for one-handed operation, enabling quick and precise pressure calibration. It offers a wide pressure range of -12 to 120 PSI with high accuracy and resolution. The device supports multiple pressure units and includes programmable pump limit settings to prevent over-pressurization. Equipped with mA measurement and simulation capabilities, it simplifies the calibration of pressure-to-current transmitters. Its lightweight design, intuitive interface, and compatibility with various test leads and hoses make it a versatile tool for industrial applications.

Product Specifications

The Fluke 719 100G offers precise pressure calibration with a range of -12 to 120 PSI and high accuracy. It includes a built-in electric pump, multiple pressure units, and advanced technical features for reliable performance in industrial settings.

2.1 Technical Data and Performance Metrics

The Fluke 719 100G delivers exceptional performance with a pressure range of -12 to 120 PSI and 0.01 PSI resolution. It ensures high accuracy, making it ideal for industrial applications. The built-in electric pump allows for one-handed operation, enhancing efficiency. The calibrator supports multiple pressure units, including psi and bar, and features programmable pump limits to prevent over-pressurization. Its lightweight design and robust construction ensure durability and portability, making it a reliable tool for field calibration tasks.

2.2 Pressure Range and Accuracy

The Fluke 719 100G offers a pressure range of -12 to 120 PSI with a resolution of 0.01 PSI, ensuring precise measurements. Its accuracy is ±0.05% of full scale, making it highly reliable for industrial calibration tasks. The calibrator supports various pressure units, including psi, bar, and others, allowing flexibility in different applications. The integrated electric pump enables efficient pressure generation, while programmable limits prevent over-pressurization, ensuring safe and accurate operation across diverse industrial environments.

2.3 Compatibility with Various Pressure Units

The Fluke 719 100G supports a wide range of pressure units, including psi, bar, kg/cm², and others, enhancing its versatility for global industrial applications. This compatibility allows users to switch between units seamlessly, ensuring accurate measurements in diverse environments. The device’s flexible configuration and user-friendly interface make it easy to adapt to different pressure standards, while its advanced sensor technology maintains precision across all units. This feature-rich design ensures the Fluke 719 100G meets the demands of various industries requiring precise pressure calibration.

Understanding the Fluke 719 100G Manual

The Fluke 719 100G manual is a comprehensive guide providing detailed instructions for setup, operation, and maintenance. It includes safety precautions, symbols, and troubleshooting tips to ensure optimal device performance and user safety.

3.1 Structure and Content of the Manual

The Fluke 719 100G manual is structured to guide users through installation, operation, and maintenance. It begins with safety information and precautions, followed by a detailed overview of the device’s features and functions. The manual includes technical specifications, operating procedures, and troubleshooting sections. Appendices provide additional resources, ensuring users can maximize the calibrator’s capabilities while maintaining safety and compliance. The content is organized logically, making it easy to navigate and reference specific topics as needed.

3.2 Safety Information and Precautions

The manual emphasizes critical safety measures to ensure safe operation of the Fluke 719 100G. Users are warned not to use the calibrator in CAT II, III, or IV environments. Proper grounding and insulation of equipment are essential to prevent electrical hazards. The device should not be exposed to extreme temperatures or moisture. Handling high-pressure components requires caution to avoid injury. Adherence to the manual’s guidelines is crucial to maintain safety, prevent equipment damage, and ensure compliance with industry standards. Always refer to the manual for specific precautions before operation.

3.3 Symbols and Conventions Used in the Manual

The manual uses specific symbols and conventions to convey critical information. A warning sign (triangle with exclamation mark) indicates potential hazards to the user or equipment. A caution symbol (circle with exclamation mark) highlights actions that could damage the calibrator or connected devices. Important notes are marked with an exclamation mark in a circle for emphasis. Electrical symbols, such as voltage and current indicators, guide users through connections. Pressure measurement symbols clarify units and calibration steps. Referencing these symbols ensures safe and accurate operation of the Fluke 719 100G.

Setting Up the Fluke 719 100G

Unpack and inspect the calibrator for damage. Connect the device, power it on, and configure initial settings. Perform calibration as outlined in the manual for accurate operation.

4.1 Unpacking and Initial Inspection

When unpacking the Fluke 719 100G, carefully inspect the device and accessories for any damage or tampering. Ensure all components, including test leads, hoses, and connectors, are included. Refer to the packing list in the manual to verify completeness. Examine the pressure ports and electrical connections for cleanliness and integrity. If any damage is found, contact Fluke customer support immediately. Proper inspection ensures reliable operation and prevents potential issues during calibration.

4;2 Connecting the Device and Powering On

To connect the Fluke 719 100G, ensure all accessories like test leads and hoses are securely attached. Insert the battery or connect the AC power adapter, ensuring it meets the device’s specifications. Turn the device on using the power button. The display will light up, and the device will perform a self-test. Once the start-up sequence completes, navigate through the menu to select the desired mode. Always use approved power sources to avoid damage. Proper connection ensures accurate operation and safety during calibration tasks.

4.3 Configuring Initial Settings and Calibrating the Device

Power on the Fluke 719 100G and navigate to the menu to configure initial settings. Select the desired pressure unit (e.g., PSI, bar) and adjust other parameters as needed. Perform a self-calibration by following on-screen prompts to ensure accuracy. Use the built-in electric pump to set reference pressures, or connect external modules for expanded functionality. Save settings and verify calibration by comparing measurements with known standards. Proper configuration ensures reliable performance during field operations and maintains measurement integrity. Always refer to the manual for detailed calibration procedures.

Operating the Fluke 719 100G

Operate the Fluke 719 100G by navigating its intuitive interface, using the electric pump for pressure generation, and performing mA signal simulations. Measure pressure accurately and efficiently.

5.1 Navigating the User Interface

The Fluke 719 100G features an intuitive user interface with a backlit display, making it easy to navigate through various modes and settings. Users can select measurement modes, configure pressure units, and access calibration functions. The interface provides clear menus for pump control, pressure measurement, and mA signal simulation. Programmable pump limits prevent over-pressurization, while real-time pressure tracking ensures accurate measurements. The interface also allows quick access to diagnostic tools and setup options, ensuring efficient operation. The manual provides detailed instructions to master these features.

5.2 Performing Basic Pressure Measurements

To perform basic pressure measurements with the Fluke 719 100G, connect the appropriate pressure module and ensure the device is set to the correct pressure unit. Use the built-in electric pump to generate pressure or connect to an external source. Select the measurement mode and allow the reading to stabilize, indicated by the stability indicator. The device displays precise pressure values with high accuracy. For best results, refer to the manual for calibration and setup procedures to ensure accurate measurements. The interface provides real-time data for immediate analysis and troubleshooting.

5.3 Using the Built-In Electric Pump

The Fluke 719 100G features an innovative built-in electric pump, enabling one-handed operation for pressure calibration. To use the pump, press and hold the “P” button to activate it. The pump automatically generates and regulates pressure, allowing precise control during calibration. For safety, programmable pump limits prevent over-pressurization. The pump is suitable for calibrating a wide range of pressure devices efficiently. Ensure the pump is properly maintained and cleaned as outlined in the manual to maintain optimal performance. Regular checks ensure reliable operation and extend the pump’s lifespan.

Advanced Calibration Techniques

The Fluke 719 100G supports advanced calibration methods, including pressure-to-current transmitter calibration, mA signal simulation, and pressure switch calibration. These techniques ensure precise measurements and device accuracy;

6.1 Calibrating Pressure-to-Current (P/I) Transmitters

The Fluke 719 100G enables precise calibration of pressure-to-current (P/I) transmitters by simulating mA signals and measuring pressure outputs. Connect the transmitter to the calibrator, configure the desired current range, and use the electric pump to apply pressure. The device displays real-time pressure and current values, allowing for accurate adjustments. Once calibrated, store the results for documentation. This process ensures optimal performance and accuracy of the transmitter in industrial applications, leveraging the calibrator’s advanced features for reliable results.

6.2 Simulating and Measuring mA Signals

The Fluke 719 100G allows users to simulate and measure mA signals accurately, ensuring proper loop calibration. Connect the transmitter, select the mA range, and use the SOURCE function to apply the desired current. The device measures and displays the output, enabling precise adjustments. For enhanced accuracy, the calibrator supports HART communication, allowing configuration of specific transmitter parameters. This feature is essential for verifying and calibrating pressure transmitters in industrial control systems, ensuring reliable performance and compliance with operational standards.

6.3 Calibrating Pressure Switches and Sensors

The Fluke 719 100G simplifies the calibration of pressure switches and sensors by providing precise control over pressure settings. Connect the device to the switch or sensor, set the desired pressure using the calibrator’s controls, and verify activation points. The built-in electric pump allows for one-handed operation, making it easy to simulate real-world conditions. Use the HOLD function to maintain pressure during testing. This ensures accurate calibration of switching points and sensor responses, guaranteeing reliable performance in industrial applications.

Maintenance and Troubleshooting

Regular cleaning and inspection ensure optimal performance. Check for leaks and worn seals. Update firmware for the latest features. Address common issues using error codes for quick resolution.

7.1 Routine Maintenance and Cleaning

Regular maintenance ensures optimal performance and longevity. Clean the exterior with a soft cloth and inspect the pressure port for debris. Avoid harsh chemicals, as they may damage components. Check the pump for wear and tear, replacing seals or O-rings as needed. Refer to the user manual for detailed instructions. Calibrate the device periodically to maintain accuracy. Use Fluke-approved modules for calibration. Drain hydraulic fluid if used to prevent contamination. Update firmware for the latest features. Always follow safety guidelines to avoid damage or injury.

7.2 Common Issues and Error Codes

Common issues with the Fluke 719 100G include error codes such as “E001” for communication errors, “E002” for sensor malfunctions, and “E003” for pump failures. Users may encounter inaccurate readings due to incorrect module installation or outdated firmware. Ensure all connections are secure and modules are compatible. Refer to the error code list in the manual for troubleshooting steps. Restarting the device often resolves temporary glitches. For persistent issues, contact Fluke support or update the firmware to the latest version for optimal performance.

7.3 Repair and Replacement of Components

For the Fluke 719 100G, repairs require authorized personnel to ensure safety and accuracy. Replace damaged sensors, pumps, or valves using genuine Fluke parts. Disconnect power before starting any repair. Follow the manual’s torque specifications for fittings and connections. If unfamiliar with procedures, contact Fluke customer support or an authorized service center. Regular maintenance, like cleaning the pump and checking for leaks, prevents component failure. Always refer to the manual for detailed repair guidelines to maintain calibration accuracy and device longevity.

Accessories and Optional Equipment

The Fluke 719 100G supports various accessories, including TL75 test leads, AC72 Alligator clips, and push-fit connectors. Optional software updates enhance functionality and ensure accuracy.

8.1 Compatible Pressure Modules and Sensors

The Fluke 719 100G supports a range of pressure modules and sensors, ensuring compatibility with various industrial applications. These modules are designed for precision and durability, offering accurate pressure measurements across different ranges. The device is compatible with TL75 test leads, AC72 Alligator clips, and push-fit connectors, providing versatility in connectivity. Additionally, the calibrator works seamlessly with optional pressure sensors, allowing users to adapt to specific measurement requirements. The modular design ensures easy integration of accessories, enhancing the device’s functionality for diverse calibration tasks. A comprehensive user manual, included on the provided CD-ROM, details the installation and use of these components, ensuring optimal performance and accuracy in pressure calibration.

8.2 Test Leads, Hoses, and Connectors

The Fluke 719 100G is equipped with a range of durable test leads, hoses, and connectors designed for reliable pressure calibration. The included TL75 test leads and AC72 Alligator clips ensure secure connections, while the translucent test hose provides visibility and flexibility. Stainless steel push-fit connectors offer durability and resistance to wear. These accessories are constructed from high-quality materials to maintain accuracy and withstand industrial environments. The calibrator’s compatible design allows for easy connection of these components, ensuring precise measurements and efficient operation. Detailed specifications for these items are outlined in the user manual.

8.3 Software and Firmware Updates

The Fluke 719 100G supports software and firmware updates to enhance functionality and performance. Users can download the latest updates from Fluke’s official website or through the CD-ROM provided. Updating ensures compatibility with new features, improved accuracy, and enhanced device security. The process is straightforward, with step-by-step instructions available in the user manual. Regular updates are recommended to maintain optimal operation and access to the latest calibration tools. Fluke’s commitment to innovation ensures the 719 100G remains a cutting-edge pressure calibrator, meeting evolving industry standards. Always verify updates from authorized sources to avoid unauthorized modifications.

Compliance and Certifications

The Fluke 719 100G complies with industry standards and regulations, ensuring safety and environmental responsibility. It meets CE marking requirements and adheres to RoHS compliance, guaranteeing reliable performance and eco-friendliness.

9.1 Industry Standards and Regulations

The Fluke 719 100G adheres to stringent industry standards, ensuring compliance with global regulations. It meets CE marking requirements, indicating conformity to EU directives for safety, health, and environmental protection. The device also complies with RoHS (Restriction of Hazardous Substances) standards, ensuring eco-friendly design and operation. Furthermore, it aligns with ISO/IEC 17025 for calibration laboratories, maintaining high accuracy and reliability. Compliance with these standards ensures the Fluke 719 100G is suitable for use in various industrial settings worldwide, providing users with confidence in its performance and adherence to safety protocols.

9.2 Certifications and Approvals

The Fluke 719 100G is certified to meet global standards, ensuring reliability and safety. It holds CE certification, compliance with RoHS, and adherence to ISO/IEC 17025 for calibration accuracy. The device also meets IEC 61010-1 safety standards for electrical equipment, ensuring user protection. Additionally, it is approved for use in hazardous locations, aligning with international safety ratings. These certifications underscore the product’s commitment to quality, safety, and environmental responsibility, making it a trusted choice for industrial applications worldwide.

9.3 Environmental and Safety Compliance

The Fluke 719 100G adheres to strict environmental and safety standards. It is CE-marked, ensuring compliance with EU health, safety, and environmental regulations. The device is RoHS-compliant, free from hazardous substances like lead and mercury. It meets IEC 61010-1 safety standards for electrical equipment, ensuring safe operation. Designed for use in hazardous locations, it aligns with global safety ratings. The 719 100G is also energy-efficient and built with eco-friendly materials, reflecting Fluke’s commitment to environmental sustainability while maintaining high performance and user safety.

User Resources and Support

Fluke offers comprehensive support for the 719 100G, including a detailed user manual, online FAQs, and dedicated customer service. Visit Fluke’s official website for resources and assistance.

10.1 Accessing the Full User Manual

The complete user manual for the Fluke 719 100G is available on the CD-ROM included with the device. It can also be downloaded from Fluke’s official website. The manual provides detailed instructions for setup, operation, and troubleshooting, ensuring users can maximize the calibrator’s functionality. Additionally, the manual is available in multiple languages, catering to a global audience. It includes safety precautions, technical specifications, and step-by-step guides for optimal performance. Users are encouraged to review the manual thoroughly before operating the device.

10.2 Online Support and FAQs

Fluke offers comprehensive online support and FAQs for the 719 100G, accessible through their official website. Users can find troubleshooting guides, technical documentation, and answers to common questions. The FAQs cover topics like calibration, error codes, and device maintenance. Additionally, Fluke provides a dedicated customer support portal for submitting inquiries or requesting assistance. Online resources are available 24/7, ensuring quick access to information and resolving issues efficiently. This ensures users can optimize their use of the Fluke 719 100G with minimal downtime.

10.3 Contacting Fluke Customer Service

For direct assistance with the Fluke 719 100G, users can contact Fluke Customer Service via phone or email. The toll-free number, 1.877.766.5412, is available for immediate support. Additionally, regional offices provide localized assistance. Fluke’s website offers a contact form for inquiries, ensuring prompt responses. Representatives are trained to address calibration, technical issues, and repair requests. Email support is also available for less urgent matters. Fluke’s customer service team operates during standard business hours, providing reliable support for optimal device performance and troubleshooting.

Warranty and Service Options

The Fluke 719 100G is backed by a standard warranty, with optional extended service plans available. These options ensure optimal performance and longevity, contact Fluke for details.

11.1 Standard Warranty Coverage

The Fluke 719 100G is covered by a standard warranty that ensures protection against manufacturing defects. This warranty typically lasts for one year from the date of purchase and includes repair or replacement of faulty components. Additionally, the warranty covers calibration accuracy, ensuring the device performs within specified tolerances. For specific details, users should refer to the official Fluke website or contact customer support. Extended service plans are also available for continued protection and maintenance beyond the standard warranty period, providing peace of mind for long-term use.

11.2 Extended Warranty and Service Plans

Fluke offers extended warranty and service plans for the 719 100G, providing additional protection and support beyond the standard warranty. These plans ensure continued accuracy and performance, with options for extended periods of coverage. Users can opt for enhanced service packages that include priority repairs, annual calibration, and access to expert technical support. Extended plans are ideal for organizations seeking long-term reliability and minimal downtime. For details, visit the Fluke website or contact their customer service team to explore tailored solutions that meet specific needs and budgets.

11.3 Calibration and Repair Services

Fluke offers comprehensive calibration and repair services for the 719 100G, ensuring optimal performance and accuracy. Certified technicians use specialized tools and genuine parts to restore devices to factory specifications. Calibration services include pressure measurement verification and adjustment, while repairs address hardware issues to maintain reliability. Users can schedule these services through Fluke’s website or authorized distributors. Regular calibration and timely repairs are crucial for maintaining measurement accuracy and extending the device’s lifespan. Fluke’s expertise ensures compliance with industry standards, providing peace of mind for professionals relying on precise pressure calibration.

The Fluke 719 100G is a versatile, high-precision pressure calibrator designed for industrial applications, offering ease of use, portability, and advanced features for accurate measurements and calibration.

12.1 Summary of Key Features and Benefits

The Fluke 719 100G offers a built-in electric pump for one-handed operation, ensuring efficient pressure calibration. It supports multiple pressure units and provides high accuracy measurements. The device is lightweight and portable, making it ideal for field use. With programmable pump limits, it prevents over-pressurization, enhancing safety. The comprehensive manual guides users through setup, operation, and maintenance, ensuring optimal performance. These features make the Fluke 719 100G a reliable tool for industrial pressure calibration needs.

12.2 Best Practices for Using the Fluke 719 100G

Always read the manual thoroughly before operating the Fluke 719 100G. Ensure proper setup and calibration for accurate measurements. Use genuine Fluke accessories to maintain performance. Regularly inspect and clean the device to prevent contamination. Follow safety guidelines to avoid over-pressurization. Utilize the programmable pump limits for safe operation. Store the calibrator in a protective case when not in use. Perform routine maintenance as outlined in the manual to ensure longevity. By adhering to these practices, users can maximize the device’s accuracy and reliability in industrial settings.

12.3 Final Thoughts on the Fluke 719 100G Manual

The Fluke 719 100G manual is a comprehensive guide that covers all aspects of the calibrator, from setup to advanced operations. It provides clear instructions, safety precautions, and troubleshooting tips, ensuring users can maximize the device’s potential. Available in multiple languages and digital formats, the manual is accessible and user-friendly. By following the manual’s guidelines, users can perform accurate calibrations, maintain the device, and troubleshoot common issues effectively. It is an essential resource for anyone working with the Fluke 719 100G.

hart 40v 18 inch mower manual

The Hart 40V 18 Inch Mower is a powerful, battery-powered lawn mower designed for efficient cutting. It features a 40V 6.0Ah lithium-ion battery, providing up to 1/4 acre cutting capacity. With an 18-inch cutting deck and adjustable height settings, it’s ideal for small to medium-sized lawns. The mower includes a side-discharge chute and mulch plug for versatile grass management. Its lightweight design and ergonomic handle ensure ease of use, making it a convenient choice for homeowners seeking reliable cordless mowing.

1.1 Overview of the Hart 40V 18 Inch Mower

The Hart 40V 18 Inch Mower is a cordless, battery-powered lawn mower designed for efficient cutting. It features a sturdy 18-inch steel cutting deck and a powerful 40V 6.0Ah lithium-ion battery, offering up to 1/4 acre of cutting capacity on a single charge. The mower includes a side-discharge chute for grass clippings and a mulch plug for optional mulching functionality. Its lightweight design and ergonomic handle make it easy to maneuver, perfect for small to medium-sized lawns.

1.2 Key Features of the Mower

The Hart 40V 18 Inch Mower boasts a robust 18-inch cutting deck and a high-performance 40V 6.0Ah lithium-ion battery, enabling up to 1/4 acre of cutting on a single charge. It features adjustable cutting heights, a side-discharge chute for grass clippings, and a mulch plug for efficient mulching. The mower is lightweight, easy to maneuver, and includes an ergonomic handle for comfort. These features make it an ideal choice for small to medium-sized lawns, offering both convenience and versatility.

Components Included in the Package

The package includes the 40V 18-inch mower, 6.0Ah lithium-ion battery, 40V charger, side-discharge chute, start key, mulch plug, and operator’s manual for ensuring comprehensive functionality.

2.1 40V 18 Inch Side Discharge Mower

The Hart 40V 18-inch side-discharge mower is the core component, offering a powerful yet quiet cutting experience. Its 18-inch steel deck ensures efficient grass cutting, while the side-discharge feature allows for even grass clippings distribution. Designed for durability, it supports mulching and bagging options, making it versatile for various lawn care needs. The mower is lightweight, ergonomic, and built to handle small to medium-sized yards effectively.

2.2 6.0Ah Lithium-Ion Battery

The 6.0Ah lithium-ion battery powers the Hart 40V mower, offering reliable performance for up to 1/4 acre on a single charge. It is compatible with all HART 40V tools, ensuring versatility. The battery charges quickly and is designed for long-lasting durability. Its lightweight design enhances portability, while advanced technology prevents overheating and ensures eco-friendly operation. This battery is a key component, providing the energy needed for efficient mowing and maintaining your lawn effortlessly. It is essential for optimal mower performance and convenience.

2.3 40V Charger

The 40V charger is included in the package and is specifically designed to charge the 6.0Ah lithium-ion battery efficiently. It ensures quick and safe charging, with built-in safety features to prevent overheating and overcharging. The charger is compatible with all HART 40V batteries, making it versatile for use with other tools in the HART 40V range. Its compact design and easy-to-use interface make it convenient for homeowners to keep their mower ready for operation. The charger is essential for maintaining the performance and longevity of the battery, ensuring reliable power for your mowing needs.

2.4 Side-Discharge Chute

The side-discharge chute is a key component included with the Hart 40V 18 Inch Mower, allowing for efficient grass clippings distribution. It is easy to attach and detach, providing a convenient option for users who prefer not to bag or mulch. The chute ensures clippings are evenly dispersed, promoting healthy lawn growth. Its durable design withstands regular use, and installation is straightforward, as outlined in the operator’s manual. This feature enhances mowing efficiency and lawn maintenance.

2.5 Start Key

The start key is a crucial component for operating the Hart 40V 18 Inch Mower. It is included in the package and must be inserted into the mower’s ignition system to power it on. The key ensures secure and safe starting, preventing unauthorized use. Simply insert the key, press the start button, and the mower will begin operation. Always store the key safely when not in use to maintain security and prevent accidental activation.

2.6 Mulch Plug

The mulch plug is an essential accessory for the Hart 40V 18 Inch Mower, enabling efficient mulching functionality. It is included in the package and designed to fit seamlessly into the mower deck. By inserting the mulch plug, grass clippings are finely chopped and redistributed back into the lawn, acting as a natural fertilizer. This feature promotes a healthier lawn and reduces the need for bagging. The plug is easy to install and remove, offering versatility in mowing options.

2.7 Operator’s Manual

The Operator’s Manual for the Hart 40V 18 Inch Mower is included in the package and available for free PDF download. It provides detailed instructions for assembly, operation, and maintenance. The manual covers safety guidelines, troubleshooting common issues, and proper usage of features like mulching and side-discharge. It also includes diagrams and step-by-step guides to ensure users can maximize the mower’s performance and longevity. Referencing the manual is essential for optimal and safe operation.

Assembly and Setup

Assembly involves unpacking, inspecting, and attaching the handle. Install the side-discharge chute and insert the mulch plug as needed. Charge the battery before first use.

3.1 Unpacking and Inspection

Start by carefully unpacking the mower from the box. Inspect all components, including the mower deck, handle, battery, charger, and accessories, for any damage or defects. Ensure all parts listed in the manual are included. Check for any signs of shipping damage, such as dents or bent parts. This step ensures everything is in order before proceeding with assembly and use.

3.2 Attaching the Handle

Begin by removing all packaging materials from the handle and mower. Align the handle brackets with the mower’s frame, ensuring proper fitment. Secure the handle using the provided bolts or screws, tightening firmly to ensure stability. Refer to the manual for specific alignment and tightening instructions. Double-check that the handle is level and firmly attached before proceeding. This step ensures safe and comfortable operation of the mower.

3.3 Installing the Side-Discharge Chute

Locate the side-discharge chute from the packaging and align it with the designated mounting points on the mower deck. Ensure the chute is securely fastened using the provided screws or clips. Tighten firmly to prevent movement during operation. Adjust the chute’s angle to direct grass clippings away from your mowing path. Refer to the manual for specific alignment instructions to ensure proper installation and functionality. After installation, test the chute to confirm it’s working correctly.

3.4 Inserting the Mulch Plug

To use the mulching feature, first remove the side-discharge chute. Locate the mulch plug and align it with the mower’s discharge opening. Gently push the plug into place until it fits securely. Ensure it is tightly seated to prevent grass clippings from escaping. Once installed, the mower will chop grass into fine particles for nutrient-rich mulch. Refer to the manual for specific guidance on proper installation and usage of the mulch plug for optimal performance.

3.5 Charging the Battery

Charging the 40V 6.0Ah lithium-ion battery is essential for operation. First, locate the charging port on the battery; Plug the 40V charger into a nearby electrical outlet. Attach the charging cable to the battery pack, ensuring a secure connection. Allow the battery to charge for the recommended time, typically 2 to 4 hours, until the indicator light shows a full charge. Avoid overcharging to prolong battery life. Once charged, unplug and insert the battery into the mower for use.

Safety Guidelines

Ensure safe operation by wearing protective gear, clearing the mowing area of obstacles, and properly handling electrical components. Always follow the manufacturer’s instructions for safe usage.

4.1 Pre-Operation Checks

Before using the Hart 40V 18 Inch Mower, ensure the handle is securely in position and the blade is free from damage. Check the battery charge level and wear protective gear. Inspect the mowing area for obstacles and ensure the side-discharge chute or mulch plug is properly installed. Verify all safety features are functioning correctly and review the operator’s manual for specific guidelines to ensure safe and effective operation.

4.2 Safety Precautions While Mowing

Always wear protective gear, including gloves and eye protection. Keep children and pets at a safe distance; Avoid mowing in wet conditions or near water. Never wear loose clothing that could get caught in the blade. Maintain a firm grip on the handle and walk at a steady pace. Be cautious on slopes and uneven terrain. Do not reach under the mower while it is in operation, and ensure the blade stops completely before leaving the mower unattended.

4.3 Proper Handling of Electrical Components

Always avoid exposing electrical components to water or moisture. Store the battery, charger, and other electrical parts in a dry, cool place; Use only the provided charger to avoid damage. Regularly inspect cords and connectors for wear or damage. Never tamper with electrical components, and ensure they are securely connected before use. Store the battery separately from metal objects to prevent accidental short circuits. Follow the manual for proper handling and maintenance of electrical parts.

4.4 Storing the Mower Safely

Store the mower in a dry, cool place away from direct sunlight and flammable materials. Clean the deck thoroughly before storage to prevent grass buildup. Disconnect the battery and store it separately in a protective case. Avoid storing the mower in extreme temperatures or humid environments. Ensure all moving parts are secure to prevent accidental movement. Follow the manual’s guidelines for proper winter storage to maintain performance and longevity of the mower and its components.

Operating the Mower

Start the mower with the key, adjust cutting height as needed, and use the side-discharge or mulch features for efficient grass management. Ensure safe handling and maintain control while mowing to achieve even results.

5.1 Starting the Mower

To start the Hart 40V 18 Inch Mower, insert the start key and ensure the safety handle is properly engaged. Press the start button, and the mower will begin operation. Always ensure the area is clear of debris and obstacles before starting. The mower features a push-button start for convenience and ease of use, eliminating the need for pull cords. Proper starting ensures smooth and efficient mowing performance.

5.2 Adjusting the Cutting Height

The Hart 40V 18 Inch Mower allows for easy height adjustment to accommodate different grass lengths. Use the height adjustment lever to choose from multiple settings, ensuring an even cut. Refer to the operator’s manual for specific instructions on adjusting the cutting height. Proper adjustment ensures optimal mowing performance and maintains the health of your lawn. Always adjust the height before starting the mower for best results.

5.3 Using the Side-Discharge Feature

The Hart 40V 18 Inch Mower’s side-discharge feature allows for efficient grass clippings management. To use it, attach the side-discharge chute securely to the mower deck. This feature is ideal for taller or thicker grass, as it disperses clippings evenly. Ensure the chute is properly aligned and adjusted to prevent clogging. For best results, mow in a steady, forward motion and maintain the recommended cutting height to avoid overwhelming the discharge system.

5.4 Mulching Functionality

The Hart 40V 18 Inch Mower offers a mulching feature for nutrient-rich grass clippings. Insert the mulch plug into the mower deck to activate this mode. The clippings are finely chopped and redistributed onto the lawn, promoting healthy growth. For best results, mow at the recommended height and ensure grass is dry to avoid clogging. This eco-friendly option reduces the need for bagging and fertilizers, enhancing lawn health naturally.

5.5 Manoeuvring the Mower

The Hart 40V 18 Inch Mower is designed for easy manoeuvring, thanks to its lightweight and ergonomic handle. The compact design allows for smooth turning and navigation around obstacles. The mower’s balanced construction ensures stability, making it effortless to push and control. This feature is particularly beneficial for smaller lawns with tight spaces or uneven terrain, providing a seamless mowing experience with minimal effort required from the operator.

Maintenance and Care

Regular maintenance ensures optimal performance and longevity. Clean the mower deck, sharpen the blade, and check the battery. Lubricate moving parts for smooth operation and durability.

6.1 Cleaning the Mower Deck

Cleaning the mower deck regularly is essential for maintaining performance. Turn off and unplug the mower, then remove the battery for safety. Use a stiff brush or cloth to wipe away grass clippings and debris. Avoid using a pressure washer, as it may damage electrical components. Regular cleaning prevents rust and ensures proper airflow, helping the mower cut efficiently. Always wear gloves and protective eyewear during this process.

6.2 Sharpening the Blade

Sharpening the blade ensures clean cuts and efficient mowing. Disconnect the battery and wear gloves for safety. Remove the blade and inspect for damage. Use a file or grinder to sharpen the cutting edge, maintaining the original angle. Check for balance by placing the blade on a straightedge. A dull blade increases mowing time and grass stress. Sharpen annually or when performance declines. Proper sharpening extends blade life and improves mower performance.

6.3 Checking and Replacing the Battery

Regularly check the 6.0Ah lithium-ion battery for wear or damage. Store it in a cool, dry place to maintain performance. Charge fully before extended storage. If the battery no longer holds a charge or runtime decreases, replace it with a compatible 40V Hart battery. Always disconnect the battery before performing maintenance. Follow safety guidelines to avoid electrical hazards. Replace the battery every 3-5 years or as needed to ensure optimal mower performance and reliability.

6.4 Lubricating Moving Parts

Lubricate the mower’s moving parts, such as wheels and hinges, regularly to ensure smooth operation. Use a silicone-based spray lubricant to protect against rust and wear. Apply a small amount to pivot points and moving components. Avoid over-lubricating to prevent attracting dirt. Lubricate after cleaning or long storage to maintain performance. Always refer to the operator’s manual for specific lubrication recommendations to keep the mower running efficiently and extend its lifespan.

Troubleshooting Common Issues

This section addresses typical problems like the mower not starting, uneven cutting, or mulching issues. It provides solutions for identifying and resolving common operational difficulties effectively.

7.1 Mower Not Starting

If the mower fails to start, check the handle position and ensure it’s fully engaged. Verify the battery charge level and confirm the start key is properly inserted. Ensure the battery is fully charged and correctly installed. If issues persist, consult the operator’s manual or contact customer support for further assistance. Always refer to the troubleshooting guide for detailed instructions to resolve startup problems effectively.

7.2 Uneven Cutting Performance

Uneven cutting may occur due to a dull blade, incorrect cutting height, or debris obstructing the mower deck. Check the blade for sharpness and clean the deck regularly. Ensure the mowing height is adjusted evenly across all four wheels. If the issue persists, inspect for bent blades or uneven tire pressure. Refer to the operator’s manual for blade sharpening and deck maintenance guidelines to achieve consistent cutting results.

7.3 Mulching Issues

Mulching issues may arise if the mulch plug is not properly installed or if the mower deck is clogged with debris. Ensure the mulch plug is securely fitted and the deck is clean. A dull blade can also prevent effective mulching. Check for blocked chute openings and trim grass at recommended heights to avoid overload. Regularly sharpen the blade and clear the deck to maintain optimal mulching performance.

7.4 Difficulty in Pushing the Mower

Difficulty in pushing the mower may result from improper handle positioning, debris buildup, or uneven tire pressure. Ensure the handle is securely locked in place and adjust it to a comfortable height. Regularly clean the mower deck to prevent grass clippings from obstructing movement. Check tire pressure and ensure the mower is on a level surface. If issues persist, lubricate the wheels or consult the operator’s manual for further guidance.

7.5 Problems with Bagging

Bagging issues may occur due to improper chute installation, clogged grass clippings, or incorrect bag alignment. Ensure the side-discharge chute is removed and the mulch plug is installed for bagging. Check for blockages in the chute or bag. Secure the bag tightly to prevent gaps and ensure proper airflow. If problems persist, clean the mower deck and ensure all connections are secure before retrying the bagging function.

Accessories and Replacement Parts

The Hart 40V 18 Inch Mower supports various accessories like additional 40V batteries, mulch plugs, and replacement blades, ensuring optimal performance and longevity of the mower.

8.1 Compatible 40V Batteries

The Hart 40V 18 Inch Mower is powered by a 6.0Ah lithium-ion battery, offering reliable performance. It is compatible with all Hart 40V batteries, ensuring flexibility for users with multiple Hart tools. The battery provides sufficient power for cutting up to 1/4 acre on a single charge. For optimal performance, it is recommended to use genuine Hart 40V batteries to maintain efficiency and safety. This compatibility enhances the mower’s versatility and convenience for homeowners.

8.2 Additional Mulch Plugs

The Hart 40V 18 Inch Mower comes with a mulch plug for efficient grass mulching. Additional mulch plugs are available for replacement or spare use, ensuring uninterrupted mowing. These plugs are designed to fit seamlessly with the mower’s deck, maintaining optimal performance. For convenience, they can be purchased separately or as part of accessory kits. Regularly cleaning and storing the mulch plug helps preserve its functionality and extends the mower’s lifespan. Always use genuine Hart parts for compatibility and reliability.

8.3 Replacement Blades

Replacement blades for the Hart 40V 18 Inch Mower are essential for maintaining optimal cutting performance. Over time, blades can dull, affecting the mower’s efficiency. Genuine Hart replacement blades are designed to ensure precise cutting and compatibility with your mower. Regularly inspect and replace blades to keep your lawn looking neat. Always refer to the operator’s manual for proper installation instructions to ensure safety and effectiveness. Using genuine parts guarantees reliability and maintains your mower’s performance.

8.4 Side-Discharge Chute Alternatives

The Hart 40V 18 Inch Mower comes with a side-discharge chute, but alternatives are available for customization or replacement. These chutes are designed to enhance grass dispersion and durability. Users can explore compatible options from Hart or third-party manufacturers, ensuring proper fitment and functionality. Always refer to the operator’s manual for compatibility guidelines to maintain optimal performance and safety. Genuine Hart parts are recommended for reliability and longevity of your mower.

Warranty and Support

HART offers a comprehensive warranty for the 40V 18 Inch Mower, covering defects in materials and workmanship. Customer support is accessible through their official website, providing assistance with troubleshooting, repairs, and replacement parts. Users can also download the operator’s manual and access online resources for optimal product usage and maintenance.

9.1 Warranty Coverage

The Hart 40V 18 Inch Mower is backed by a comprehensive warranty covering defects in materials and workmanship. The warranty period is [specific years], ensuring protection for a significant duration. It includes repair or replacement of faulty components at HART’s discretion. The warranty is non-transferable and requires proper product registration. Customers can access detailed warranty terms in the operator’s manual or through HART’s official website.

9.2 Contacting Customer Support

For assistance with the Hart 40V 18 Inch Mower, customers can contact HART’s customer support team via phone, email, or live chat. The support team is available to address inquiries, troubleshooting, and warranty-related issues. Visit the official HART website for the most up-to-date contact information and support resources. Ensure to have your product model number and serial number ready for efficient service. HART’s dedicated support ensures prompt resolution of customer concerns.

9.3 Online Resources and Manuals

The HART 40V 18 Inch Mower’s Operator’s Manual is available for free PDF download on the HART website. It provides detailed instructions for assembly, operation, and maintenance. Users can access additional resources, including troubleshooting guides and replacement part diagrams, by entering their product model number on the HART support page. The manual includes a table of contents and features sections to help users navigate easily and find the information they need quickly.

arctic king air conditioner manual

Welcome to the Arctic King Air Conditioner Manual, your comprehensive guide to understanding and optimizing your unit’s performance. This manual ensures safe, efficient operation and highlights key features for maintaining a comfortable environment. Always prioritize safety precautions and proper handling of flammable refrigerants like R-32 to prevent hazards and mechanical damage.

1.1 Importance of Reading the Manual

Reading the Arctic King Air Conditioner Manual is crucial for ensuring safe, efficient, and proper operation of your unit. It provides essential safety guidelines, installation instructions, and tips for energy-efficient usage. Understanding the manual helps you avoid potential hazards, such as ignition risks from flammable refrigerants like R-32, and prevents mechanical damage. It also guides you through troubleshooting common issues and maximizing the unit’s performance. Referencing the manual ensures compliance with warranty terms and helps maintain optimal functionality for years to come.

1.2 Overview of Arctic King Air Conditioners

Arctic King offers a range of air conditioners designed to provide efficient cooling solutions for various spaces. Their products include portable, window, and wall-mounted models, each featuring advanced technology for optimal performance. With a focus on energy efficiency and user convenience, Arctic King air conditioners come equipped with remote controllers, adjustable settings, and features like sleep mode. The brand is committed to delivering reliable, high-quality units that cater to both residential and commercial needs, ensuring a comfortable environment while minimizing energy consumption.

Downloading the Arctic King Air Conditioner Manual

The Arctic King Air Conditioner Manual can be easily downloaded from sources like ManualsLib or All-Guides Database, offering over 127 manuals for various models in PDF format.

2.1 Sources for Downloading the Manual

The Arctic King Air Conditioner Manual can be downloaded from reliable sources like ManualsLib and the All-Guides Database. ManualsLib offers over 127 manuals, while the All-Guides Database provides 52 manuals for various Arctic King models. Specific models, such as the Arctic King AKTW12CR4-2, have detailed installation and operation manuals available. Additionally, the Arctic King WPPD10CW0N Portable Air Conditioner Manual and other models can be accessed in PDF format from these platforms. Users can visit these websites or search for their specific model to download the manual easily.

2.2 Steps to Download the Manual

To download the Arctic King Air Conditioner Manual, visit websites like ManualsLib or the All-Guides Database. Search for your specific model using the search bar. Click on the desired document, then select the download option. Ensure your model number matches the manual for accuracy. Some manuals, like the Arctic King AKTW12CR4-2, are available in PDF format for easy access. Save or print the manual for future reference and proper unit maintenance.

Safety Precautions

Always keep the Arctic King Air Conditioner away from open flames or devices that may spark, as flammable refrigerants like R-32 are used. Prevent mechanical damage and ensure safe operation by following guidelines carefully. Proper handling and storage are essential to avoid hazards and maintain efficiency.

3;1 General Safety Guidelines

Always ensure the Arctic King Air Conditioner is installed and operated in a well-ventilated area, away from open flames or sparks. Avoid placing the unit near flammable materials. Properly follow all installation and maintenance instructions to prevent mechanical damage. Keep the area around the conditioner clear of obstructions to ensure airflow. Use only authentic Arctic King parts for replacements to maintain safety and efficiency. Regularly inspect the unit for signs of wear or damage. Adhere to all safety guidelines to prevent accidents and ensure optimal performance.

3.2 Handling Flammable Refrigerants

When handling flammable refrigerants like R-32 in your Arctic King Air Conditioner, ensure no open flames or sparking devices are nearby to prevent ignition risks. Store the refrigerant in a well-ventilated, cool, and dry place, away from direct sunlight. Always wear protective gloves and eyewear to avoid skin or eye contact. Follow proper handling procedures to prevent accidental leaks. In case of exposure, ventilate the area immediately and avoid inhalation. Improper handling can lead to serious safety hazards and damage to the unit.

Installation Instructions

Ensure the unit is installed on a level, stable surface, away from direct sunlight. Follow the manufacturer’s guidelines for window and wall installations. Check the location for proper drainage and ventilation to ensure efficient operation. Refer to the specific model’s manual, such as the Arctic King AKTW12CR4-2 or WWK05CR01N-B, for detailed installation steps and safety precautions.

4.1 Pre-Installation Checks

Before installing your Arctic King air conditioner, ensure the installation site is level, stable, and well-ventilated. Check for proper drainage to prevent water accumulation. Verify that the area is free from flammable materials and sparks, as models like the Arctic King AKTW12CR4-2 use flammable refrigerants such as R-32. Ensure the unit is placed away from direct sunlight and heat sources for optimal performance. Review the model-specific requirements, such as those for the Arctic King WWK05CR01N-B, to confirm compatibility with your space and electrical setup.

4.2 Step-by-Step Installation Guide

Begin by carefully unboxing and inspecting the unit for damage. For window models like the Arctic King WWK05CR01N-B, prepare the installation site by ensuring the window frame is level and secure. Assemble any required brackets or side panels, following the manufacturer’s instructions. Insert the unit into the window opening, ensuring it is firmly seated and evenly aligned. Secure the unit with screws and seal gaps with foam or weatherstripping to prevent air leaks. Finally, plug in the unit and test its operation to ensure proper function before full use.

Operating the Arctic King Air Conditioner

Learn to operate your Arctic King Air Conditioner efficiently using the remote controller to adjust temperature, fan speed, and modes. Start the unit, set your desired settings, and utilize features like timers and energy-saving options for optimal performance. Refer to the manual for detailed instructions on advanced functions and troubleshooting common issues.

5.1 Understanding the Remote Controller

The remote controller is essential for operating your Arctic King Air Conditioner. It features buttons for turning the unit on/off, adjusting temperature, selecting modes (Cool, Heat, Fan, Dry), and setting fan speed. The remote also includes a timer function and a display screen for easy navigation. Proper battery installation ensures smooth operation. Refer to the manual for instructions on pairing the remote with your unit and troubleshooting connectivity issues. Always store the remote in a dry place to maintain functionality and responsiveness.

5.2 Adjusting Temperature and Settings

Adjusting the temperature and settings on your Arctic King Air Conditioner is straightforward using the remote controller. Press the Up or Down arrows to set your desired temperature. Select modes like Cool, Heat, Fan, or Dry based on your needs. Use the Timer button to schedule operation, and choose Fan Speed for airflow control. The remote also features a Sleep Mode for energy-saving operation. Always ensure the settings align with the room size and external temperature for optimal performance and energy efficiency. Refer to the manual for detailed guidance on advanced settings.

Maintenance and Care

Regularly clean the air filter and check refrigerant levels to ensure optimal performance. Schedule professional servicing annually to maintain efficiency and prevent potential issues. Proper care extends longevity.

6.1 Regular Maintenance Tips

Regular maintenance is essential for ensuring your Arctic King air conditioner operates efficiently. Clean or replace the air filter monthly to improve airflow and reduce energy consumption. Check and refill refrigerant levels as needed, and inspect the condenser coils for dust or debris. Store the unit properly during the off-season to prevent damage. Regularly drain condensate water to avoid leaks and mold growth; These practices help maintain performance, reduce energy bills, and extend the unit’s lifespan.

6.2 Troubleshooting Common Issues

Troubleshooting your Arctic King air conditioner can resolve common issues efficiently. If the unit isn’t cooling, check if the filter is clean or if the thermostat is set correctly. For unusual noises, inspect fan blades for obstructions. If the remote isn’t working, replace batteries or ensure proper signal reception. Water leaks may indicate a clogged drain, while inconsistent cooling could signal low refrigerant levels. Addressing these issues promptly ensures optimal performance and prevents further complications. Always refer to the manual for detailed solutions or contact customer support if problems persist.

Arctic King Portable Air Conditioner Manual

The Arctic King Portable Air Conditioner Manual provides detailed instructions for efficient operation of portable models like the WPPD10CW0N. It covers installation, adjustable temperature control, and maintenance tips for optimal performance in small spaces, ensuring reliability and convenience.

7.1 Features of Portable Models

Arctic King portable air conditioners, such as the WPPD10CW0N, offer sleek, compact designs for easy mobility. These models feature adjustable temperature controls, ensuring precise cooling in small spaces. They are energy-efficient and include convenience features like timers and remote controls. Designed for portability, they come with built-in wheels and compact dimensions, making them ideal for rooms where traditional units won’t fit. Their lightweight construction and user-friendly interfaces provide reliable cooling without compromising on performance or convenience.

7.2 Specific Instructions for Portable Units

For Arctic King portable models like the WPPD10CW0N, ensure proper ventilation by installing the exhaust hose near a window. Regularly drain collected water to maintain efficiency. Place the unit on a level surface and avoid exposure to direct sunlight. Use the remote control to adjust settings conveniently. Set the timer for energy-saving operation; Always follow safety guidelines, such as keeping flammable materials away due to the use of R-32 refrigerant. Refer to the manual for detailed operating and maintenance steps to optimize performance and longevity.

Arctic King Window/Wall Air Conditioner Manual

This section focuses on the installation and operation of Arctic King window and wall-mounted air conditioners. Ensure proper sealing and alignment during installation for optimal performance and energy efficiency.

8.1 Installation Specifics for Window Units

For Arctic King window air conditioners, ensure proper sealing and alignment during installation. Use the provided support bracket to secure the unit firmly in the window frame. Level the conditioner to prevent water accumulation and ensure efficient drainage. Follow the manual’s guidelines for electrical connections and insulation to minimize air leaks. Always maintain a safe distance from flammable materials and avoid sparks near the unit. Proper installation ensures optimal cooling performance and longevity of the Arctic King window air conditioner.

8.2 Operation Tips for Wall-Mounted Models

For Arctic King wall-mounted air conditioners, use the remote controller to adjust settings efficiently. Ensure the unit is installed on a sturdy wall to support its weight. Regularly clean the air filter to maintain airflow and energy efficiency. Use the timer function to schedule cooling sessions, reducing unnecessary energy consumption. Activate the sleep mode for quieter operation during nighttime. Always follow the manual’s safety guidelines and operation instructions to ensure optimal performance and longevity of your Arctic King wall-mounted air conditioner.

Additional Features and Settings

Arctic King air conditioners offer advanced features like energy-saving modes, programmable timers, and sleep functions. These settings optimize efficiency and comfort, ensuring tailored cooling experiences for users.

9.1 Energy Efficiency Modes

Arctic King air conditioners feature energy efficiency modes designed to minimize power consumption while maintaining optimal cooling. These modes adjust fan speed and compressor operation to reduce energy use. By utilizing advanced sensors, the unit optimizes performance, lowering your electricity bills. Energy-saving settings are easily accessible via the remote controller, allowing users to toggle between modes for balanced comfort and efficiency. This eco-friendly approach ensures long-term savings without compromising on cooling performance or comfort levels in your space.

9.2 Timer and Sleep Mode Functions

The Arctic King air conditioner features a convenient timer function, allowing users to set specific operation times. This enhances energy efficiency by ensuring the unit runs only when needed. Additionally, the sleep mode adjusts settings for quieter operation and consistent comfort during rest. These functions are easily controlled via the remote controller, offering a seamless way to customize your cooling experience while saving energy and promoting uninterrupted sleep. This user-friendly design ensures optimal performance tailored to your daily routine and preferences.

Warranty and Customer Support

Your Arctic King air conditioner comes with a detailed warranty period, ensuring coverage for parts and labor. For inquiries or assistance, contact customer support at 1 866 7 47 4332.

10.1 Understanding the Warranty Period

The Arctic King air conditioner warranty provides coverage for parts and labor, ensuring protection against defects in materials and workmanship. Typically, the warranty period lasts 12 months from the date of purchase, covering functional parts. To validate the warranty, ensure you register your product and retain the purchase receipt. Refer to the manual or contact customer support for specific terms and conditions. Proper installation and maintenance are essential to uphold warranty validity.

10.2 Contacting Customer Service

For assistance with your Arctic King air conditioner, contact customer service at 1-866-7-47-4332 (Monday–Friday, 9 AM–5 PM EST). You can also reach out via email for inquiries or support. When contacting, have your unit’s model number, serial number, and purchase date ready. This ensures faster resolution of issues. Visit the official Arctic King website for additional contact options and support resources. Prompt assistance is available to address any concerns or questions about your air conditioner.

Energy Efficiency and Savings

Arctic King air conditioners feature Energy Star ratings, ensuring high efficiency and reduced energy consumption. Follow the manual’s tips for optimizing settings to lower utility bills and promote eco-friendly cooling.

11.1 Energy Star Ratings

Arctic King air conditioners with Energy Star ratings ensure high efficiency and reduced energy consumption. These units meet strict energy efficiency guidelines set by the U.S. Environmental Protection Agency. By choosing an Energy Star-certified model, you can lower your utility bills while promoting eco-friendly cooling. The manual provides tips on optimizing settings to maximize energy savings without compromising performance. This commitment to efficiency reflects Arctic King’s dedication to sustainable and cost-effective cooling solutions for homes and businesses alike.

11.2 Tips for Energy-Efficient Usage

To maximize energy efficiency, set your Arctic King air conditioner to the recommended temperature range of 70-75°F. Use the remote controller to maintain consistent cooling levels, avoiding frequent adjustments. Enable the energy-saving mode or timer function to limit operation when the room is unoccupied. Running the fan on medium or low speed can reduce energy consumption. Regularly clean or replace the air filter to ensure optimal airflow and performance. Adjusting settings seasonally and using the eco-mode can further enhance efficiency, helping you save on energy costs while staying comfortable.