Aquatic therapy offers a supportive environment for alleviating lower back pain by reducing joint stress and improving mobility․ Water’s buoyancy provides natural resistance, strengthening muscles while minimizing discomfort, making it an effective option for managing chronic pain and enhancing recovery․

Understanding Lower Back Pain
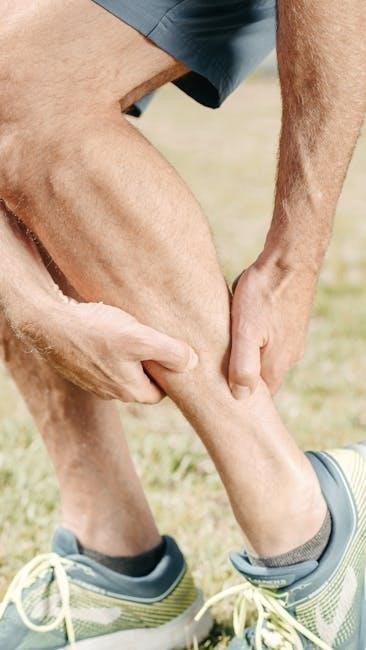
Lower back pain is a common condition affecting millions worldwide, often resulting from muscle strain, poor posture, or underlying medical conditions․ It can manifest as a dull ache or sharp, debilitating pain, impacting daily activities and quality of life․
The lower back, or lumbar region, supports much of the body’s weight and movement, making it prone to injury․ Causes include overuse, lack of exercise, or conditions like herniated discs or arthritis․ Even psychological factors, such as stress, can exacerbate symptoms․
Symptoms may include stiffness, limited mobility, or pain radiating to the legs if nerves are involved․ Chronic lower back pain can develop if acute issues are not addressed, leading to long-term discomfort and disability․
Addressing lower back pain requires understanding its root causes, whether mechanical, postural, or related to lifestyle․ This knowledge is crucial for effective management and prevention of future episodes․ It is one of the most common reasons for seeking medical advice, highlighting its widespread impact on health and well-being․
Benefits of Pool Exercises for Lower Back Pain
Pool exercises provide a low-impact, gentle way to strengthen muscles, improve flexibility, and reduce lower back pain․ The water’s buoyancy reduces stress on joints, while resistance enhances muscle tone, promoting healing and mobility without exacerbating discomfort․
How Pool Exercises Alleviate Lower Back Pain
Pool exercises alleviate lower back pain by leveraging water’s unique properties, such as buoyancy and resistance․ The water’s buoyancy reduces gravitational pressure on the spine, allowing for gentle, pain-free movements․ This creates a safe environment for stretching and strengthening without exacerbating discomfort․
The resistance provided by water helps engage core and back muscles, improving stability and reducing strain on the lower back․ Additionally, the hydrostatic pressure of water can aid in reducing inflammation and promoting blood flow, which supports healing and relaxation․
Pool exercises also enable controlled movements, minimizing the risk of overexertion․ Techniques like spinal traction, achieved through vertical postures in the water, can help relieve compressed discs and improve spinal alignment․ Furthermore, the viscosity of water provides a mild resistance that strengthens muscles gradually, enhancing overall lower back stability and reducing pain over time․
By combining these elements, pool exercises create a therapeutic environment that addresses both the physical and discomfort aspects of lower back pain, making them an effective and sustainable treatment option․
Preventing Injury and Exacerbating Conditions
To prevent injury, avoid harmful movements like bending the spine backward․ Focus on controlled exercises that maintain a neutral spine․ Avoiding such motions reduces strain and prevents worsening of lower back pain during aquatic therapy․
Safe Exercises for Lower Back Pain
Engaging in safe pool exercises is crucial for managing lower back pain․ Gentle movements like the back wall glide and pelvic rolls are effective as they strengthen core muscles without straining the spine․ These exercises promote stability and flexibility, reducing discomfort․ Additionally, walking lunges in the pool provide a low-impact cardiovascular workout that enhances strength without putting excessive pressure on the joints․ It’s essential to maintain proper form and avoid any movements that cause numbness or tingling․ Consulting with a healthcare professional before starting any aquatic therapy program ensures that exercises are tailored to individual needs, preventing further injury and promoting recovery․ By focusing on controlled, low-impact movements, individuals can safely alleviate lower back pain while improving overall physical function and quality of life․
Stretching Exercises in the Pool
Stretching exercises in the pool improve flexibility and reduce lower back stiffness․ Gentle movements like the back wall glide and hip adductor stretches target specific muscles, enhancing range of motion while minimizing strain․ Water’s buoyancy supports the body, allowing for safe and effective stretching without discomfort․ Always maintain a neutral spine during exercises to avoid exacerbating pain․ These stretches can be modified to suit individual needs, making aquatic therapy accessible for various fitness levels․ Regular pool stretching helps alleviate tension and promotes relaxation, contributing to overall lower back well-being․
Example: Back Wall Glide
The back wall glide is a simple yet effective pool exercise for lower back pain․ Start by standing in the shallow end with your feet shoulder-width apart․ Place your hands on the edge of the pool at hip height for support․ Slowly slide your back down along the wall, keeping your spine neutral, while bending your knees slightly․ This movement gently stretches the lower back muscles and improves flexibility․ Hold the stretch for 10-15 seconds and repeat 5-10 times․ The water’s buoyancy reduces pressure on the spine, making this exercise ideal for those with chronic pain․ It’s important to maintain controlled movements and avoid any twisting or jerking․ If numbness or tingling occurs, discontinue the exercise and consult a healthcare professional․ Regular practice of the back wall glide can help alleviate stiffness and enhance overall spinal mobility․ This exercise is often recommended as part of a comprehensive aquatic therapy program for managing lower back pain effectively․
Strengthening Exercises in the Pool
Strengthening exercises in the pool target the muscles supporting the lower back, improving stability and reducing pain․ Water’s resistance enhances muscle engagement without stressing the spine, making it ideal for rebuilding strength in a low-impact environment․
Example: Pelvic Rolls
Pelvic rolls are a foundational exercise in aquatic therapy, focusing on gentle, controlled movements to strengthen the core and lower back muscles․ Standing in the pool with feet shoulder-width apart, engage the abdominals and slowly tilt the pelvis backward, maintaining a neutral spine․ Hold for a few seconds, then release․ This movement improves pelvic mobility and strengthens the abdominal muscles, which are crucial for spinal stability․ By performing pelvic rolls in water, individuals can enhance their posture and reduce lower back strain without putting excessive pressure on the joints․ Regular practice of this exercise can lead to better muscle activation and reduced pain over time․ It is essential to focus on proper form to maximize benefits and avoid discomfort․
Cardiovascular Exercises in the Pool
Pool-based cardiovascular exercises, such as walking lunges or water aerobics, combine low-impact movement with resistance, enhancing heart rate and endurance․ These exercises strengthen the entire body while minimizing strain on the lower back, promoting overall fitness and pain relief․
Example: Walking Lunges
Walking lunges in the pool are an excellent cardiovascular exercise that also strengthens the lower body․ Start by standing in the shallow end with water at waist level․ Step forward with one leg, bending both knees to a 90-degree angle․ Ensure the back knee nearly touches the pool floor while maintaining balance․ Push back to the starting position and alternate legs․ The water’s resistance enhances muscle engagement without putting excessive strain on the spine․ This exercise improves flexibility and strength in the hips and legs, which are crucial for supporting the lower back․ Additionally, the low-impact nature of the movement reduces the risk of aggravating back pain, making it ideal for those with chronic lower back issues․ Regular practice can lead to better posture, reduced muscle tension, and enhanced overall mobility, contributing to long-term back health and pain management․

Safety Tips and Precautions
When performing pool exercises, avoid movements that involve bending backward or twisting excessively, as these can strain the lower back․ Use proper technique, start slowly, and gradually increase intensity․ Always consult a healthcare professional before beginning any new exercise program, especially if experiencing severe pain or underlying conditions․
Avoiding Harmful Movements
When engaging in pool exercises for lower back pain, it is crucial to avoid movements that may exacerbate the condition․ Bending backward or twisting excessively can strain the lower back and worsen pain․ High-impact movements, such as jumping or rapid jerks, should also be avoided to prevent further injury․
Additionally, movements that involve overextension of the spine or repetitive bending can be harmful․ It is essential to maintain a neutral spine position during exercises to avoid putting unnecessary strain on the lower back․ Avoid any exercises that cause numbness, tingling, or increased pain, as these may indicate improper form or overexertion․
Consulting with a healthcare professional or physical therapist can help identify safe and effective movements tailored to your specific condition․ By avoiding harmful movements and focusing on controlled, low-impact exercises, you can safely benefit from aquatic therapy for lower back pain․
Aquatic therapy is a highly effective and gentle approach for managing lower back pain․ The buoyancy of water reduces stress on the spine, allowing for safe and controlled movements that strengthen muscles, improve flexibility, and enhance mobility․ Pool exercises, such as stretching, strengthening, and cardiovascular activities, have been shown to significantly reduce pain and improve quality of life for individuals with lower back pain․
By avoiding harmful movements and following guided exercises, participants can maximize the benefits of aquatic therapy while minimizing the risk of injury․ The supportive environment of water makes it an ideal option for those who may find land-based exercises too challenging or painful․ Overall, aquatic therapy is a valuable tool for alleviating lower back pain and promoting long-term spinal health․
Consulting with a healthcare professional or physical therapist can help tailor a aquatic exercise program to individual needs, ensuring safety and effectiveness․ Embracing aquatic therapy can lead to meaningful relief and improved well-being for those suffering from lower back pain․

References and Further Reading
For a deeper understanding of aquatic therapy’s role in managing lower back pain, several studies and resources are available․ Research published in Clinical Rehabilitation highlights the effectiveness of aquatic exercises in reducing pain and improving physical function for individuals with chronic low back pain․
A systematic review by Sjögren et al․ provides comprehensive insights into the benefits of aquatic therapy for lower back pain, emphasizing its unique combination of support and resistance․ Additionally, the Aquatic Therapy Association offers detailed guidelines and exercise protocols for pool-based treatments․
- Aquatic Exercise Therapy for Chronic Low Back Pain: A Systematic Review (Clinical Rehabilitation)․
- Therapeutic Aquatic Exercise for Low Back Pain: A Study on Disability and Quality of Life․
- The Benefits of Aquatic Physical Therapy for Lower Back Pain (aquaticpt․org)․
Further reading materials, such as “Pool Exercises for Lower Back Pain: A Comprehensive Guide,” provide practical exercises and safety tips for implementing aquatic therapy effectively․ These resources are invaluable for both patients and healthcare professionals seeking evidence-based approaches to managing lower back pain․