Welcome to the ultimate face guide, your journey to achieving healthy, radiant skin. Discover expert-backed routines, from morning cleansing to nighttime repair, tailored for all skin types and concerns.
1.1 Understanding the Importance of a Skincare Routine
A consistent skincare routine is the cornerstone of achieving healthy, radiant skin. It helps maintain skin balance, prevent issues like acne and dryness, and enhance the effectiveness of products. Dermatologists emphasize that even a simple regimen of cleansing, moisturizing, and sun protection can lead to improved skin health over time. By addressing specific concerns and protecting against environmental stressors, a well-structured routine fosters long-term skin clarity and confidence. Whether you’re dealing with sensitive skin or hyperpigmentation, a tailored approach ensures your skin gets the care it needs to thrive.
1.2 Setting Goals for Your Skin Health
Setting clear, realistic goals for your skin health is essential for achieving lasting results. Whether your objective is to reduce acne, improve hydration, or address hyperpigmentation, defining your targets helps guide your routine. Start by identifying your skin type and concerns, then research products and practices tailored to your needs. Consulting with dermatologists or skincare experts can provide personalized insights. Establishing a consistent regimen and allowing time for your skin to respond is key. By setting achievable milestones, you can track progress and adjust your approach as needed. Remember, healthy skin is a long-term journey, and patience combined with the right strategies will lead to a radiant, confident you.

Morning Skincare Routine
A consistent morning skincare routine sets the tone for healthy, radiant skin. It typically includes cleansing, toning, moisturizing, and sunscreen to prepare and protect your skin for the day.
2.1 Cleansing: The First Step to Fresh Skin
Cleansing is the cornerstone of any effective morning skincare routine. It removes dirt, oil, and impurities accumulated overnight, ensuring a fresh start. Use lukewarm water and a gentle cleanser suited to your skin type—gel for oily skin, cream for dry, or foam for combination. Massage onto damp skin in circular motions, rinse thoroughly, and pat dry. Proper cleansing balances skin pH, prevents clogged pores, and prepares skin for subsequent products. Avoid over-washing, as it can strip natural moisture. A clean canvas allows serums, moisturizers, and sunscreen to work optimally, promoting a radiant and healthy complexion throughout the day.
2.2 Toning: Balancing Your Skin’s pH
Toning is a crucial step that follows cleansing, helping to balance your skin’s pH and prepare it for further products. It removes any remaining impurities and tightens pores, creating a smooth canvas for serums and moisturizers. Choose a toner suited to your skin type—witch hazel for oily skin, rosewater for dry, or aloe vera for sensitive. Gently sweep it across your face with a cotton pad, avoiding the delicate eye area. Toning restores skin equilibrium, enhances product absorption, and leaves a refreshed, clean feel. Regular use can reduce the appearance of pores and maintain skin clarity, ensuring a radiant and balanced complexion throughout the day.
2.3 Moisturizing: Locking in Hydration
Moisturizing is essential for maintaining healthy, hydrated skin. It locks in previous steps, ensuring cleansed and toned skin retains moisture. Choose a moisturizer suited to your skin type—lightweight for oily, rich for dry, and hypoallergenic for sensitive. Apply evenly, gently massaging into the face and neck. Consistent use strengthens the skin barrier, preventing water loss and enhancing elasticity. Proper hydration plumps the skin, reducing fine lines and promoting a radiant glow. Even oily skin benefits from moisturizing to regulate oil production. Overlooking this step can lead to dryness and irritation, while regular moisturizing supports long-term skin health and vitality, keeping your complexion soft, supple, and resilient throughout the day.
2.4 Sunscreen: The Ultimate Protective Step
Sunscreen is the final and most crucial step in your morning skincare routine. It protects your skin from harmful UV rays, which can cause sunburn, premature aging, and even skin cancer. Choose a broad-spectrum sunscreen with at least SPF 30 for daily use. Apply it liberally to all exposed areas, including the face, neck, and ears, 15-30 minutes before sun exposure. Reapply every two hours or immediately after swimming or sweating. Skipping sunscreen can lead to irreversible sun damage and skin discoloration. Consistent use ensures long-term skin health, preventing photoaging and maintaining a youthful complexion. Make it a habit to safeguard your skin every day, regardless of weather conditions.
Evening Skincare Routine
The evening routine focuses on repairing and rejuvenating your skin after a day of environmental stressors. It involves cleansing, treating, and hydrating to restore skin health overnight.
3.1 Makeup Removal: The Double Cleanse Method
The double cleanse method is a cornerstone of an effective evening routine, ensuring thorough makeup removal. Start with an oil-based cleanser to dissolve makeup, sunscreen, and impurities. Massage it onto dry skin, then rinse with warm water. Follow with a water-based cleanser to purify pores and remove any remaining residue. This two-step process prevents clogged pores and breakouts, while maintaining the skin’s natural barrier. Proper makeup removal prepares your skin for subsequent treatments, allowing serums and moisturizers to absorb efficiently. Consistency is key to achieving a clear, balanced complexion. Avoid harsh scrubbing, as it can irritate the skin. Instead, focus on gentle, upward strokes for optimal results.

3.2 Exfoliation: Removing Dead Skin Cells
Exfoliation is a vital step in maintaining skin health by removing dead cells and promoting cell turnover. It helps improve texture, reduces dullness, and enhances absorption of subsequent products. There are two main types of exfoliants: physical (like scrubs or brushes) and chemical (such as alpha-hydroxy acids). Over-exfoliating can lead to irritation, so it’s important to find a balance. Start with a gentle exfoliant one to three times a week and adjust based on your skin’s response. Always moisturize after exfoliating to soothe and hydrate the skin. Be cautious with sensitive areas and avoid exfoliating over active breakouts or irritated skin to prevent further damage. Consistent yet gentle exfoliation can reveal brighter, smoother skin over time.
3.3 Serums and Treatments: Targeting Skin Concerns
Serums and treatments are concentrated formulas designed to address specific skin concerns such as aging, acne, or hyperpigmentation. They contain active ingredients like vitamins, antioxidants, and acids that penetrate deeply to deliver visible results. Whether you’re targeting fine lines, dark spots, or breakouts, serums offer tailored solutions. Apply a few drops on clean skin before moisturizing, allowing time for absorption. Consistency is key, as these products often take weeks to show improvements. Always choose serums aligned with your skin type and concerns to maximize efficacy. Pairing with other treatments, such as eye creams or spot treatments, can enhance outcomes for a more radiant complexion.
3.4 Night Cream: Repairing While You Sleep
Night creams are rich, nourishing formulas designed to repair and rejuvenate your skin while you sleep. Unlike daytime moisturizers, night creams focus on restoration, often containing ingredients like retinol, hyaluronic acid, or peptides to address concerns such as wrinkles, dryness, or dullness. Apply a generous layer after serums, allowing it to absorb fully before bed. Night creams help replenish moisture, boost collagen production, and promote cell turnover, leaving your skin refreshed and radiant in the morning. Consistency is key for visible results, as these creams work overtime to address damage accumulated during the day. Choose a night cream tailored to your skin type and concerns for optimal benefits.

Makeup Application Guide
A comprehensive guide to enhancing your natural beauty, from base to finish. Learn how to apply makeup flawlessly, blending techniques, and achieving a polished, professional look effortlessly.
4.1 Primer: Preparing Your Skin for Makeup
Primer is the foundation of a flawless makeup look, creating a smooth canvas for your products. It evens out skin texture, minimizes pores, and ensures long-lasting coverage. Choose a primer suited to your skin type—hydrating, mattifying, or illuminating. Apply a thin, even layer after moisturizer but before foundation. Gently spread it across your face, focusing on areas like the T-zone for oil control or cheeks for hydration. This step enhances makeup adhesion and brings out the true color of your products. Without primer, makeup may cake or fade unevenly. It’s a simple yet essential step for a polished, professional finish.
4.2 Foundation: Achieving an Even Base
Foundation is the cornerstone of a polished makeup look, providing an even base tone and coverage. Choose a shade that matches your skin tone for a natural appearance. Apply it with a brush, sponge, or fingers, blending from the center of your face outward. For sheer coverage, use a light hand; for fuller coverage, build layers. Ensure seamless blending around the hairline, jawline, and edges. Foundation evens out discoloration and creates a uniform canvas for other products. Proper application enhances your natural beauty, offering a smooth, flawless finish. Set it with powder for longevity, especially in oily areas like the T-zone. A well-applied foundation boosts confidence and sets the stage for the rest of your makeup.
4.3 Concealer: Covering Blemishes and Dark Spots
Concealer is a versatile product designed to cover imperfections like blemishes, dark spots, and under-eye circles. Opt for a shade that matches your skin tone or is one shade lighter for under-eye areas. Apply it sparingly with a small brush or beauty blender, patting gently to blend. For dark spots or acne, use a stick concealer for precise coverage. Under the eyes, a liquid formula works best for a smooth, natural finish. Avoid over-applying to prevent cakeiness. Concealer helps create an even base, erasing flaws while maintaining a natural look. Set with powder to ensure long-lasting coverage and a flawless finish; It’s a must-have for addressing specific skin concerns and enhancing your makeup look. Proper application makes all the difference in achieving a polished appearance.
4.4 Contouring and Highlighting: Defining Your Features
Contouring and highlighting are makeup techniques that enhance facial structure by creating depth and dimension. Contouring involves applying a darker shade to areas like the hollows of the cheeks, temples, and jawline to create shadows, while highlighting brightens areas such as the tops of the cheekbones, cupid’s bow, brow bone, and inner corners of the eyes. Use a contour powder or bronzer one shade deeper than your skin tone and a highlighter with a subtle shimmer. Blend thoroughly with a brush or makeup sponge for a seamless look. These techniques can slim or soften features, giving your face a more defined appearance. Start with light layers and build as needed for a natural, sculpted finish. Proper application enhances your natural beauty and creates a polished look.

Advanced Facial Treatments
Advanced treatments like facials, chemical peels, and microneedling enhance skin health, addressing concerns such as aging, hyperpigmentation, and texture. They offer deeper rejuvenation and long-term benefits.

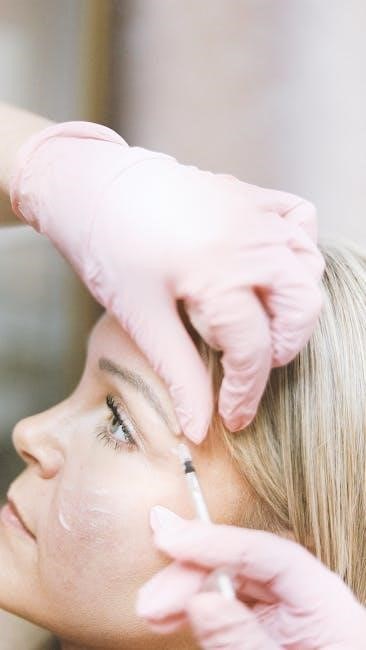
5.1 Facials: Professional Skin Rejuvenation

A facial is a comprehensive treatment designed to rejuvenate and restore skin health. Performed by professionals, it typically includes cleansing, exfoliating, and applying masks tailored to your skin type. This process helps remove impurities, unclog pores, and improve skin texture. Facials often incorporate massage techniques to boost blood circulation and relax facial muscles. Customized serums and moisturizers are applied to address specific concerns like acne, aging, or hydration. Regular facials can enhance skin clarity, reduce the appearance of fine lines, and leave your complexion radiant. They are an excellent way to maintain healthy, glowing skin and can be adapted to suit various skin goals, making them a valuable addition to your skincare regimen.
5.2 Facial Rollers and Massage Tools: Enhancing Skin Health
Facial rollers and massage tools have gained popularity for their ability to enhance skin health. These tools, often made of materials like jade, rose quartz, or stainless steel, are designed to stimulate blood flow and promote lymphatic drainage. Regular use can reduce puffiness, improve skin elasticity, and create a more radiant complexion. Massage tools also help with product absorption, allowing serums and creams to penetrate deeper into the skin. Techniques like rolling or gliding can be performed at home, making these tools a convenient addition to your skincare routine. They offer a natural, non-invasive way to maintain healthy, glowing skin and can be used alongside other treatments for enhanced results.
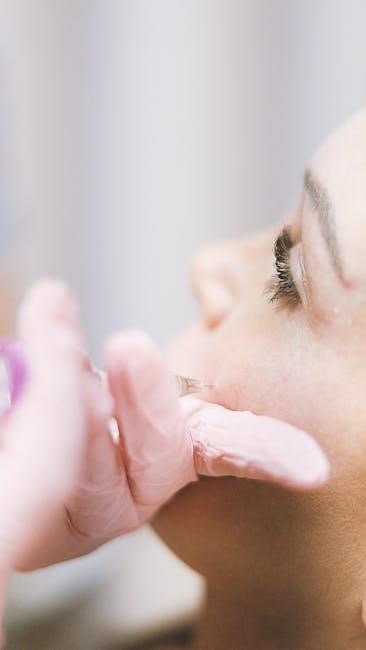
5.3 Chemical Peels: Resurfacing Your Skin
Chemical peels are a popular cosmetic treatment designed to resurface the skin by removing damaged layers. They involve applying a specialized solution to the skin, which causes the top layers to peel off, revealing smoother, more even-toned skin. This procedure is effective for addressing wrinkles, scars, and uneven pigmentation. There are various types of peels, ranging from superficial to deep, depending on the desired outcome. Ingredients like alpha-hydroxy acids (AHAs) and beta-hydroxy acids (BHAs) are commonly used for their exfoliating properties. Chemical peels can improve skin texture, reduce signs of aging, and enhance overall radiance. Proper post-peel care is essential to minimize risks and ensure optimal results. Regular treatments can maintain healthy, youthful-looking skin.

Natural Remedies for Skin Health
Natural remedies offer effective, gentle solutions for skin health. Ingredients like honey, aloe vera, and green tea provide hydration, soothe irritation, and promote a radiant complexion naturally.
6.1 Rose Water: A Timeless Skincare Staple
Rose water is a versatile and natural skincare ingredient with numerous benefits. It acts as a gentle toner, balancing the skin’s pH and reducing puffiness. Rich in antioxidants, it helps combat premature aging and soothes irritated skin. Rose water also has antibacterial properties, making it effective against acne and redness. Its calming scent can reduce stress, promoting overall well-being. Many skincare enthusiasts swear by its ability to hydrate and refresh the complexion. With its gentle nature, it suits all skin types, including sensitive skin. Incorporating rose water into your routine can enhance skin clarity and leave you with a radiant, healthy glow.
6.2 DIY Face Masks: Nutrient-Rich Treatments
DIY face masks are a popular way to nourish and rejuvenate your skin using natural ingredients. They allow you to customize treatments based on your skin type and concerns. For example, a honey and avocado mask hydrates dry skin, while a turmeric and yogurt mask tackles inflammation and hyperpigmentation. Oatmeal and green tea are excellent for soothing sensitive skin, reducing redness, and calming irritation. Sugar or coffee grounds can be used as exfoliants to remove dead skin cells and improve texture. DIY masks are cost-effective and free from harsh chemicals, making them a great addition to your skincare routine. Experiment with different combinations to find what works best for you and enjoy the benefits of glowing, healthy skin.
Budget-Friendly Skincare Tips
Discover affordable ways to maintain healthy skin without breaking the bank. Invest in multi-purpose products, buy in bulk, and shop during sales. Simplify your routine to save money while still achieving great results.
7.1 Affordable Product Recommendations
Explore budget-friendly skincare products that deliver exceptional results. Consider cleansers like Cetaphil Gentle Skin Cleanser or Neutrogena Hydrating Facial Cleanser. For moisturizing, Olay Regenerist Micro-Sculpting Cream and CeraVe Moisturizing Cream are cost-effective options. Sunscreen essentials include EltaMD UV Clear Broad-Spectrum SPF 46 or La Roche-Posay Anthelios Melt-In Sunscreen Milk. Exfoliants like The Ordinary Glycolic Acid 7% Toning Solution or St. Ives Fresh Skin Apricot Scrub are affordable and effective. Look for multi-use products, such as a tinted moisturizer with SPF or a hydrating toner that doubles as a primer. Shop during sales or use coupons to maximize savings without compromising on quality.
7.2 Simplifying Your Routine Without Compromise
Streamline your skincare routine by focusing on essential products that multitask. Use a cleanser with exfoliating properties to combine two steps. Opt for a moisturizer that also provides sun protection, eliminating the need for a separate sunscreen. Choose serums that target multiple concerns, such as anti-aging and hydration. Prioritize products with high concentrations of active ingredients to ensure effectiveness without extra steps. Consider timing—apply certain products in the morning and others at night to maintain efficiency. Finally, select affordable, multi-use products to save money without sacrificing results. By simplifying, you can maintain a effective skincare regimen that is both efficient and budget-friendly.