Exercise bands are versatile, portable tools offering effective resistance for strength training. Popular among all fitness levels, they enhance workouts with minimal equipment, ideal for full-body exercises anywhere.
1.1 What Are Resistance Bands?
Resistance bands are lightweight, flexible straps or tubes made of durable materials like rubber or latex. They provide varying levels of resistance when stretched, offering an effective way to strengthen muscles. Portable and easy to use, they are ideal for workouts at home, in the gym, or while traveling. Resistance bands come in different resistance levels, from light to heavy, catering to all fitness levels. They are versatile tools for targeting specific muscle groups, making them a popular choice for full-body workouts without the need for bulky equipment.
1.2 Popularity and Versatility
Resistance bands have gained significant popularity due to their versatility and convenience. Widely used by fitness enthusiasts and professionals alike, they offer an accessible way to strength train without bulky equipment. Their portability makes them ideal for home workouts, travel, or outdoor sessions. Suitable for all fitness levels, resistance bands cater to beginners and advanced users, providing adjustable resistance to match individual goals. They are also commonly used in physical therapy and rehabilitation, making them a versatile tool for improving strength, flexibility, and overall fitness in various settings.
Benefits of Using Resistance Bands
Resistance bands are lightweight, affordable, and versatile, offering a variety of exercises for full-body workouts. They are space-saving, portable, and suitable for all fitness levels, enhancing strength and flexibility effectively.
2.1 Portability and Convenience
Resistance bands are lightweight and easy to carry, making them ideal for workouts at home, in the gym, or while traveling. Their compact size allows for storage in small spaces, ensuring they’re always accessible. With bands, you can perform a variety of exercises anywhere, eliminating the need for bulky equipment. This portability makes it easier to maintain a consistent workout routine, whether you’re on the go or prefer the convenience of home training. Their ease of use and space-saving design make them a practical choice for fitness enthusiasts of all levels.
2.2 Cost-Effectiveness
Resistance bands are an economical choice for strength training. They offer a cost-effective alternative to pricey gym memberships or bulky equipment, providing versatile workouts at a fraction of the cost. Durable and reusable, bands are a practical investment for home exercises. Their affordability makes them accessible to all fitness levels, ensuring effective training without financial strain. Additionally, they can be easily shared or used by multiple individuals, further enhancing their value.
2.3 Versatility in Exercises
Resistance bands offer unparalleled versatility in workouts. They can be used for a wide range of exercises targeting different muscle groups, from upper body to lower body and core. Whether it’s bicep curls, chest presses, squats, or rows, bands adapt to various movements. Their portability allows for seamless transitions between home, gym, or outdoor settings. This adaptability makes them ideal for both beginners and advanced users, ensuring a comprehensive workout routine that can be modified to suit individual fitness goals and preferences.
2.4 Efficiency in Muscle Engagement
Resistance bands excel at engaging multiple muscle groups simultaneously, enhancing workout efficiency; Their unique tension system ensures continuous resistance throughout exercises, targeting muscles effectively. Whether focusing on upper body, lower body, or core, bands promote balanced engagement, reducing the need for multiple equipment. This efficiency makes them ideal for full-body workouts or specific muscle targeting, providing a time-effective solution for strength training. Their ability to engage stabilizer muscles also improves overall muscle activation, ensuring a more comprehensive workout with each exercise.

Types of Exercises with Resistance Bands
Resistance bands offer a wide variety of exercises targeting upper body, lower body, core, and full-body workouts. They adapt to all fitness levels, ensuring efficient muscle engagement.
3.1 Upper Body Exercises
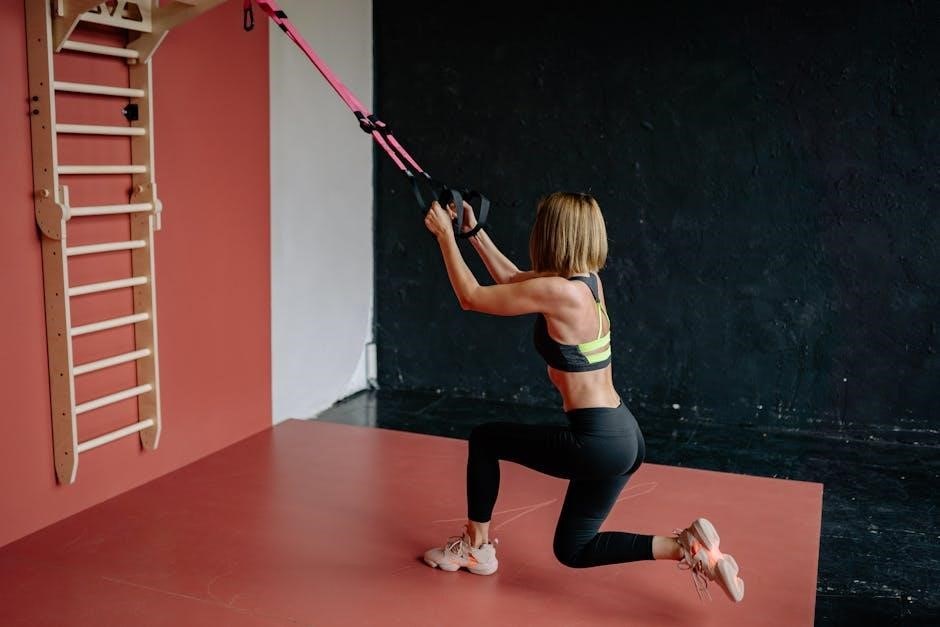
Resistance bands are excellent for targeting the upper body, including chest, shoulders, and back. Exercises like chest presses, shoulder presses, and rows engage muscles effectively. They offer portability and scalability, making them ideal for home workouts or travel. Bands provide continuous tension, enhancing muscle activation. For beginners, they reduce injury risk compared to free weights. Advanced users can increase resistance by doubling up bands. Proper form is crucial to maximize results and prevent strain. Incorporating upper body exercises with bands diversifies routines and promotes balanced strength development.
3.2 Lower Body Exercises
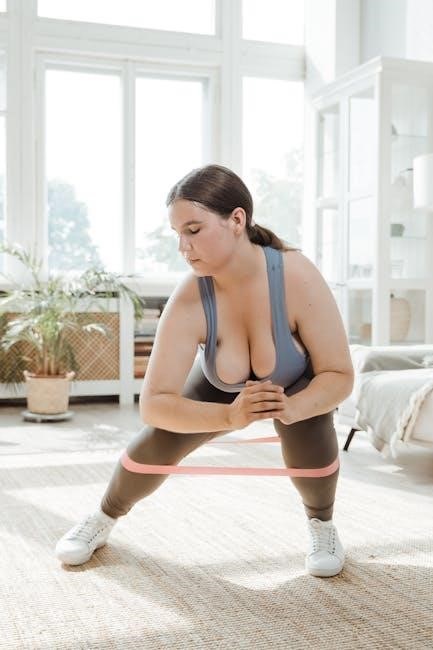
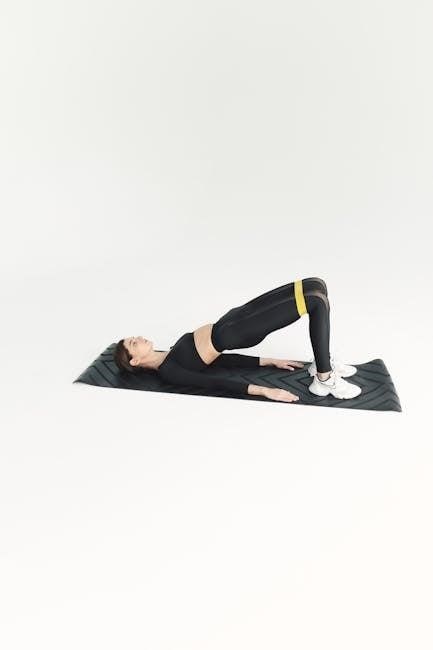
Resistance bands are ideal for lower body workouts, targeting muscles like quads, hamstrings, and glutes. Squats with bands enhance balance and strength, while lateral band walks improve hip stability. Lunges with bands challenge coordination and power. Glute bridges using bands isolate the glutes for focused toning. Calf raises with bands strengthen lower legs. These exercises are low-impact, reducing joint stress. Bands allow progressive resistance, making workouts scalable for all fitness levels. Proper form ensures effectiveness and prevents injury, promoting functional fitness for daily activities. Incorporating lower body exercises with bands enhances overall mobility and strength efficiently.
3.3 Core Strengthening Exercises
Resistance bands are excellent for core workouts, targeting abs, obliques, and lower back muscles. Exercises like banded planks enhance stability and endurance, while banded Russian twists improve rotational strength. Leg raises with bands challenge the lower abs, and banded bicycle crunches engage the entire core. These exercises promote functional strength and improve posture. Bands add resistance to dynamic movements, making core workouts more engaging. Incorporating bands into your routine helps build a stronger, more stable core, essential for overall physical performance and injury prevention.
3.4 Full-Body Workouts
Resistance bands offer efficient full-body workouts by engaging multiple muscle groups simultaneously. Compound movements like banded squats, chest presses, and rows target legs, chest, and back. Adding overhead presses, banded lunges, and lateral band walks incorporates shoulders and glutes. These exercises promote balanced strength and improve coordination. Bands allow for dynamic movements, making workouts versatile and engaging. Full-body routines with bands are perfect for those seeking efficiency, as they work several muscles at once, saving time while maximizing results. They’re ideal for anyone aiming to build overall strength and endurance in a single session.
Choosing the Right Resistance Band
Selecting the right resistance band involves considering your fitness level, goals, and exercise type. Start with lower resistance and progress as strength increases. Durable materials ensure longevity.
4.1 Understanding Resistance Levels
Resistance bands come in various levels, from light to heavy. Light bands are ideal for beginners or rehabilitation, while medium and heavy bands suit intermediate to advanced users. Understanding these levels helps tailor workouts to specific goals, ensuring safety and effectiveness. Proper selection prevents injury and optimizes muscle engagement. Start with lighter resistance to build strength progressively. Always choose bands that match your fitness level and exercise objectives for best results and steady progress in training.
4.2 Selecting the Correct Size
Selecting the right size of resistance bands is crucial for effective workouts. Bands come in various lengths and widths, with longer bands offering more range of motion and shorter bands providing greater resistance. For upper body exercises, narrower bands are ideal, while wider bands suit lower body workouts. Choosing the correct size ensures proper tension and prevents snapping. Always test the band’s resistance before use to ensure it matches your fitness level and exercise goals. Proper sizing enhances safety and maximizes the effectiveness of your training routine.
4.3 Materials and Durability
Resistance bands are made from durable materials like latex, synthetic rubber, or fabric. Latex bands are most common, offering excellent stretch and longevity. Synthetic bands are odor-resistant and ideal for sensitive users. Fabric bands provide extra comfort and grip. Durability depends on thickness and quality. High-quality bands withstand repeated use without snapping. Proper care, such as avoiding sharp objects and extreme temperatures, extends lifespan. Investing in durable bands ensures safe and effective workouts over time. Always inspect bands for wear before use to maintain performance and safety;

Safety Tips and Precautions
Start with lower resistance, maintain proper form, and inspect bands for damage. Anchor bands securely and avoid excessive stretching to prevent snapping. Prioritize safety for effective workouts.
5.1 Starting with Lower Resistance
Begin with lighter resistance bands to assess your strength and technique. This approach reduces injury risk and allows gradual progression. Start with bodyweight exercises, then add bands as needed. Proper form is crucial to avoid strain. If you find exercises too easy, increase resistance levels or reps. Inspect bands for damage before use to ensure safety. This method builds a strong foundation and prevents overexertion. Always prioritize controlled movements and listen to your body to progress effectively.
5.2 Maintaining Proper Form
Maintaining proper form is essential when using resistance bands to prevent injuries and target muscles effectively. Engage your core, keep your back straight, and avoid rounding your shoulders. Focus on controlled, slow movements rather than jerky actions. Ensure the band is securely anchored or held to prevent slipping. Keep the band at the correct height for the exercise to maintain tension. Proper alignment of your body during exercises like squats or chest presses ensures optimal muscle engagement and safety. Consistent form helps achieve desired results and minimizes the risk of strain or injury.
5.3 Avoiding Common Injuries
Avoiding common injuries with resistance bands requires attention to proper form and controlled movements. Start with lower resistance and gradually increase as your strength improves. Overstretching or using excessive force can lead to muscle strains or tears. Keep your core engaged and maintain a stable posture during exercises. Avoid snapping or jerking the bands, as this can cause sudden strain. Ensure the band is not twisted or knotted, as this can create uneven tension. Regularly inspect the bands for wear and tear to prevent unexpected breaks during use. By prioritizing safety and technique, you can minimize the risk of injury and enjoy effective, injury-free workouts.

Full-Body Workout Routines
Start with bodyweight squats, then add resistance bands for increased intensity. Incorporate circuits targeting upper, lower, and core muscles for a balanced workout.
6.1 Circuit Training with Bands
Circuit training with resistance bands is a dynamic way to engage multiple muscle groups efficiently. Combine upper body exercises like banded chest presses and shoulder presses with lower body moves such as banded squats and lunges. Add core-strengthening exercises like banded Russian twists for a full-body workout. Rotate through exercises with minimal rest to boost cardiovascular fitness and burn calories. Start with 3-4 sets of 12-15 reps per exercise, gradually increasing resistance as you build strength. This approach saves time while maximizing results, making it ideal for home or gym routines.
6.2 High-Intensity Interval Training (HIIT)
HIIT with resistance bands combines short bursts of intense exercise with brief rest periods, maximizing calorie burn and cardiovascular fitness. For example, perform 30 seconds of banded squats followed by 30 seconds of rest, then repeat for 15-20 minutes. Incorporate exercises like banded chest presses, rows, and lunges to target all muscle groups. This method boosts metabolism and improves endurance while requiring minimal time and equipment. Start with 3-4 rounds and gradually increase intensity as fitness levels improve, ensuring a challenging yet effective workout anywhere, anytime.
Targeting Specific Muscle Groups
Exercise bands allow precise targeting of muscle groups, enhancing strength and definition. They enable focused workouts for chest, shoulders, legs, and back, promoting balanced development and flexibility.
7.1 Chest Exercises (e.g., Chest Press)
Chest exercises with resistance bands are excellent for building pectoral strength. The chest press, for instance, mimics bench presses without heavy weights, making it ideal for home workouts. Bands provide consistent resistance throughout the movement, engaging muscles effectively.
Additionally, exercises like chest flys target the pectoralis major, improving chest expansion and symmetry. Resistance bands are portable and adjustable, allowing users to customize workouts based on fitness levels and goals.
7.2 Shoulder Exercises (e.g., Shoulder Press)
Shoulder exercises with resistance bands are effective for building strength and definition. The shoulder press targets the deltoids, while lateral raises and front raises engage additional muscles. Bands provide smooth, consistent resistance, making them ideal for controlled movements. They are portable and easy to adjust, allowing for versatile workouts at home or on the go. Incorporating these exercises into a routine can improve posture, balance, and overall upper body stability. Resistance bands are a great alternative to traditional weights for shoulder training.
7.3 Leg Exercises (e.g., Squats with Bands)
Leg exercises with resistance bands are excellent for strengthening the lower body. Squats with bands target the quadriceps, hamstrings, and glutes, while providing controlled resistance. Bands can also be used for lunges, leg curls, and calf raises, offering a full leg workout. They are lightweight, portable, and easy to adjust, making them ideal for home or travel. Incorporating band-based leg exercises improves balance, stability, and muscle tone without the need for heavy equipment, making them a cost-effective and versatile option for fitness routines.
7.4 Back Exercises (e.g., Rows)
Resistance bands are excellent for targeting the back muscles, with exercises like rows being particularly effective. Band rows work the latissimus dorsi, rhomboids, and trapezius, promoting a strong, defined back. They offer controlled resistance, which can be adjusted by changing band tension or body positioning. This makes them ideal for both beginners and advanced users. Incorporating band rows into routines enhances posture, improves core stability, and contributes to overall upper body strength without the need for heavy machinery, making them a versatile and practical option for any fitness plan.
Combining Resistance Bands with Other Equipment
Resistance bands can be combined with dumbbells, kettlebells, and barbells to intensify workouts. This combination enhances resistance, allowing for more dynamic and effective exercises.
8.1 Using Bands with Dumbbells
Combining resistance bands with dumbbells adds an extra layer of challenge to workouts. This hybrid approach enhances resistance, engaging multiple muscle groups simultaneously. For example, attaching a band to a dumbbell during chest presses or rows increases tension, amplifying strength gains. This method is particularly effective for targeting stabilizer muscles, improving overall functional strength. Portable and cost-effective, this combination allows for versatile exercises that can be adapted to any fitness level, making it a practical choice for home or gym training sessions.
8.2 Incorporating Kettlebells
Kettlebells add dynamic movement to band exercises, blending weight and resistance for full-body engagement. Attach bands to kettlebells for enhanced tension during swings or presses, intensifying workouts. This combination targets power and endurance, making it ideal for advanced training. The portability of both tools allows for seamless integration into any routine, ensuring versatility and efficiency in building strength and improving coordination, suitable for both home and gym environments.
A 4-Week Exercise Plan
A structured 4-week program using resistance bands to build strength and endurance. Start with basic exercises, progressively increase resistance, and aim for full-body fitness in 28 days.
9.1 Weekly Workout Structure
Begin with foundational exercises on Days 1-2, focusing on upper body and core. Days 3-4 introduce lower body and full-body movements. Day 5 targets core strengthening. Rest on Day 6, with light stretching. Day 7 resumes with a dynamic full-body session. Progressively increase resistance and reps each week. This structured approach ensures balanced muscle development and improved endurance. Adjust intensity based on fitness level, aiming for 3-4 sets per exercise. Track progress weekly to stay motivated and achieve optimal results by the end of the 4-week plan.
9.2 Progressive Resistance Increase
Progressive resistance increase is key to continuous strength gains. Start with lighter bands and gradually move to heavier ones as strength improves. Incorporate variations like double-loop bands or banded exercises with added weight. Increase reps or sets weekly to challenge muscles. For advanced users, combine bands with other equipment for enhanced resistance. Monitor progress and adjust resistance levels to avoid plateaus. This method ensures consistent muscle engagement and avoids overtraining, keeping workouts effective and safe for long-term fitness goals. Always check band integrity before increasing intensity.

Finding Exercise Guides and PDFs
Discover comprehensive exercise guides and PDFs online, offering detailed workout plans and illustrated exercises. Trusted websites provide downloadable resources for effective resistance band training, catering to all fitness levels.
10.1 Recommended PDF Resources
Explore top-rated PDF guides for resistance band exercises, offering step-by-step instructions and visuals. These resources cover muscle-specific workouts, full-body routines, and progressive training plans. Many PDFs include customizable programs, catering to various fitness levels and goals. Trusted websites provide free and premium downloads, ensuring access to expert-designed workouts. These guides often feature tips on proper form, resistance levels, and safety precautions, making them ideal for both beginners and advanced users seeking structured training plans.
10.2 Trusted Websites for Downloads
Reputable websites like ACE Fitness, Nike Training Club, and Bodybuilding.com offer high-quality resistance band exercise PDFs. These platforms provide expert-endorsed guides with detailed routines and visuals. Websites such as MusclePharma and Fitbit Coach also feature downloadable resources tailored to various fitness goals. Many sites allow free downloads, while others offer premium content with advanced workout plans. Ensure to verify the credibility of the source for safe and effective training materials. These trusted sites are ideal for accessing reliable exercise guides.
Troubleshooting Common Mistakes
Common mistakes include improper form, overstretching, and using worn-out bands. Address these by starting with lower resistance, focusing on controlled movements, and ensuring equipment is in good condition.
11.1 Correcting Form Issues
Proper form is crucial when using exercise bands to prevent injuries and maximize results. Common mistakes include overarched backs, misaligned bands, and lack of core engagement. Correct form by ensuring neutral spine alignment, keeping bands at shoulder height, and maintaining controlled movements. Start with lighter resistance to focus on technique before increasing intensity. Watch for signs like uneven tension or wobbling, which indicate improper positioning. Practice in front of a mirror to self-correct and improve overall performance effectively.
11.2 Adjusting Resistance Levels
Adjusting resistance levels with exercise bands is essential for progressive overload and avoiding plateaus. Start with lighter bands to master form, then gradually increase resistance as strength improves. To modify, switch to thicker bands or layer multiple bands for added tension. Avoid over-tightening, as this can lead to discomfort or injury. Monitor progress by tracking reps and sets, and adjust accordingly. Proper resistance adjustment ensures workouts remain challenging yet achievable, promoting consistent muscle engagement and growth over time.